Today’s Best Deals on Amazon Right Now
One of my favorite things about being an Amazon Prime member is how easy it makes finding great daily deals on a variety of products. In the past year or so, I have purchased several items that were discounted for one day only to realize they are top-notch quality and extremely useful. Whether you’re in the market for a new gadget, looking to stock up on household essentials, or in the need of a new book, Amazon has you covered.
Below are a few of my favorite daily deals currently available through Amazon’s Gold Box Deal of the Day and Lightning Deals.
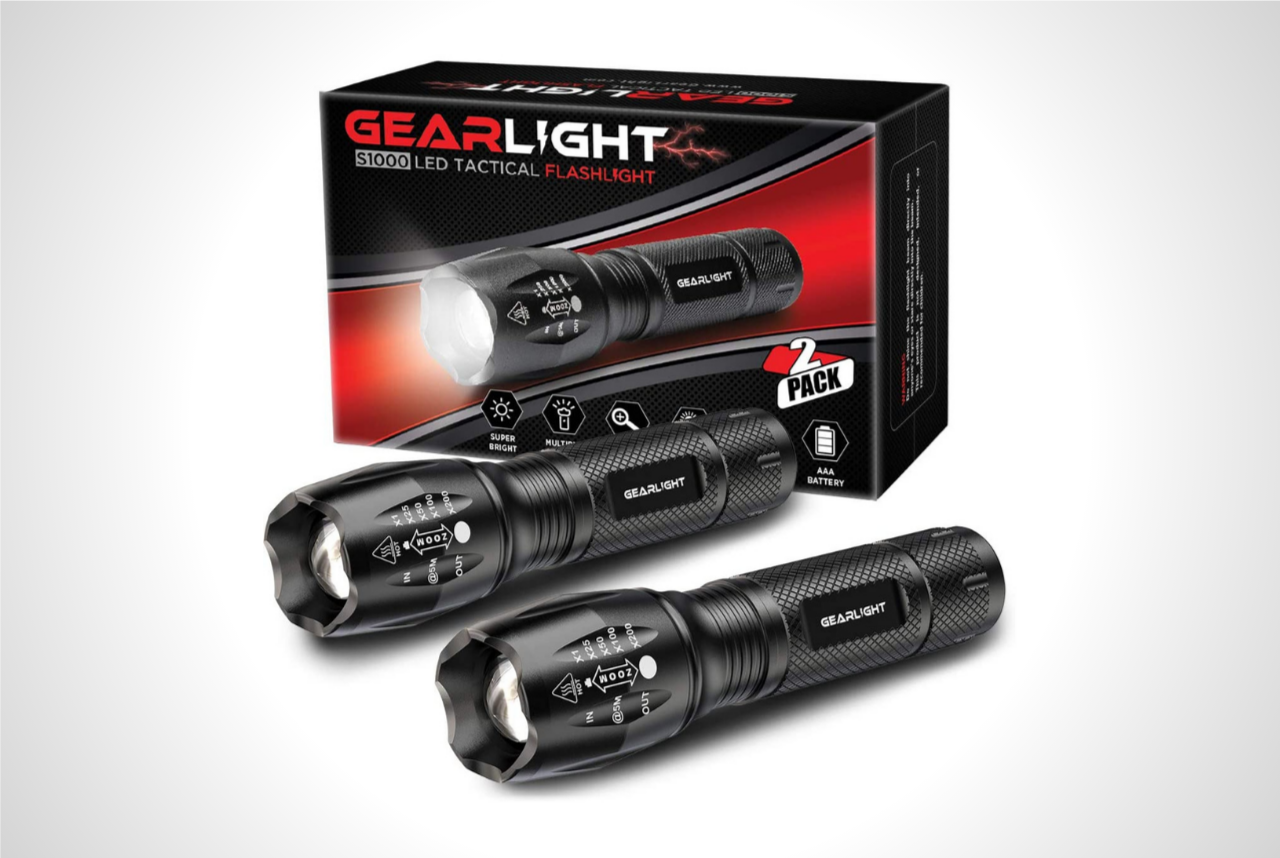
GearLight LED Tactical Flashlight S1000
//34% OFF

These flashlights come with a car charger and an AC wall adapter for rechargeable batteries, which is a nice extra. They each measure 1 inch in diameter by 6.25 inches long, produce 160 lumens of light, and run on 3 AAA batteries (included). I keep one in my backpack at all times because it attaches to my belt loop and can be used to use as a lantern or shine in the face of would-be attackers.
Youdgee Muscle Massage Gun
//45% OFF
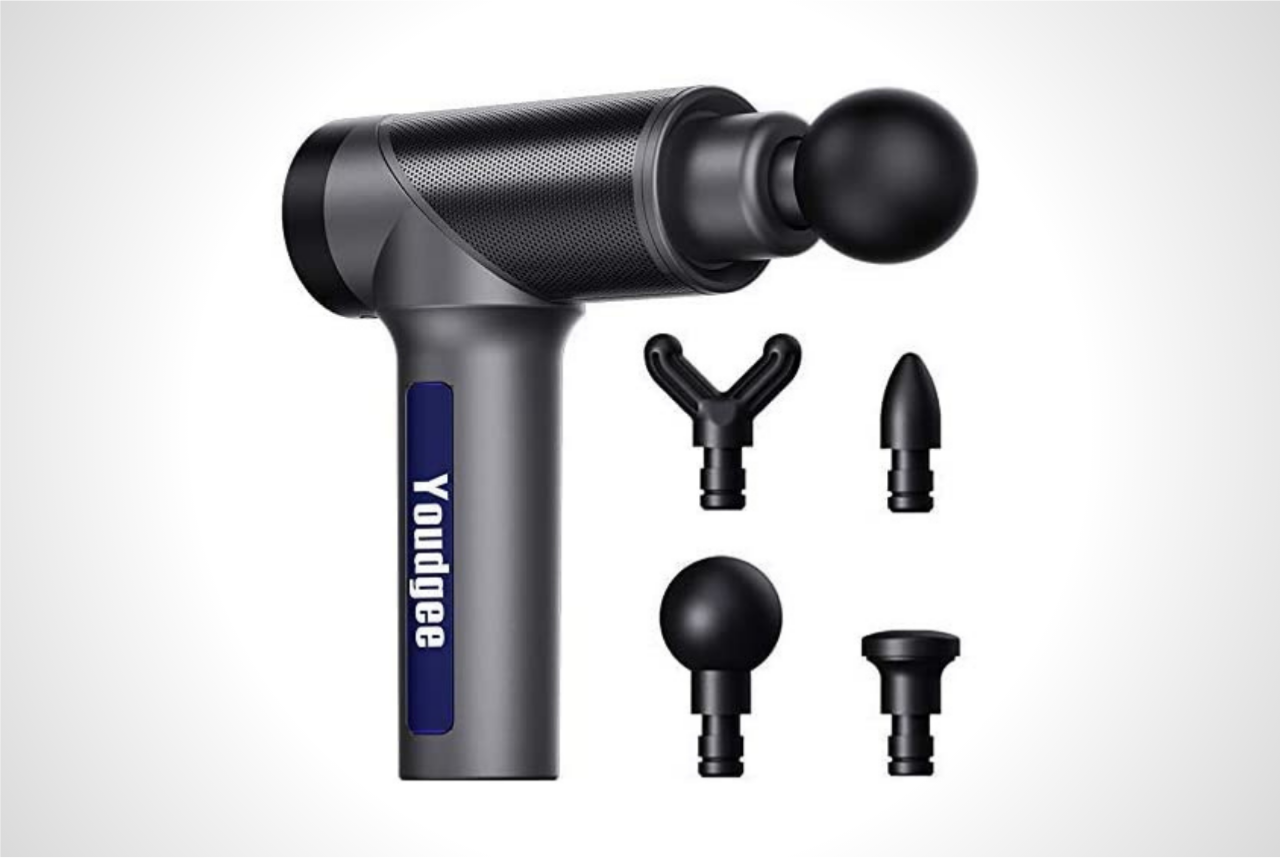
This massager is designed to let you exercise your own muscles and tense them up, as opposed to the masseuse working on them for you. In theory, this means it could strengthen sore muscles over time. However, my personal experience has been that it actually loosens tightness in the muscle instead of strengthening it (it still feels good though). I would recommend this for people who have very tight muscles to begin with, but anyone looking to increase their muscle strength should look elsewhere.
Anker Soundcore Bluetooth Speaker
//27% OFF
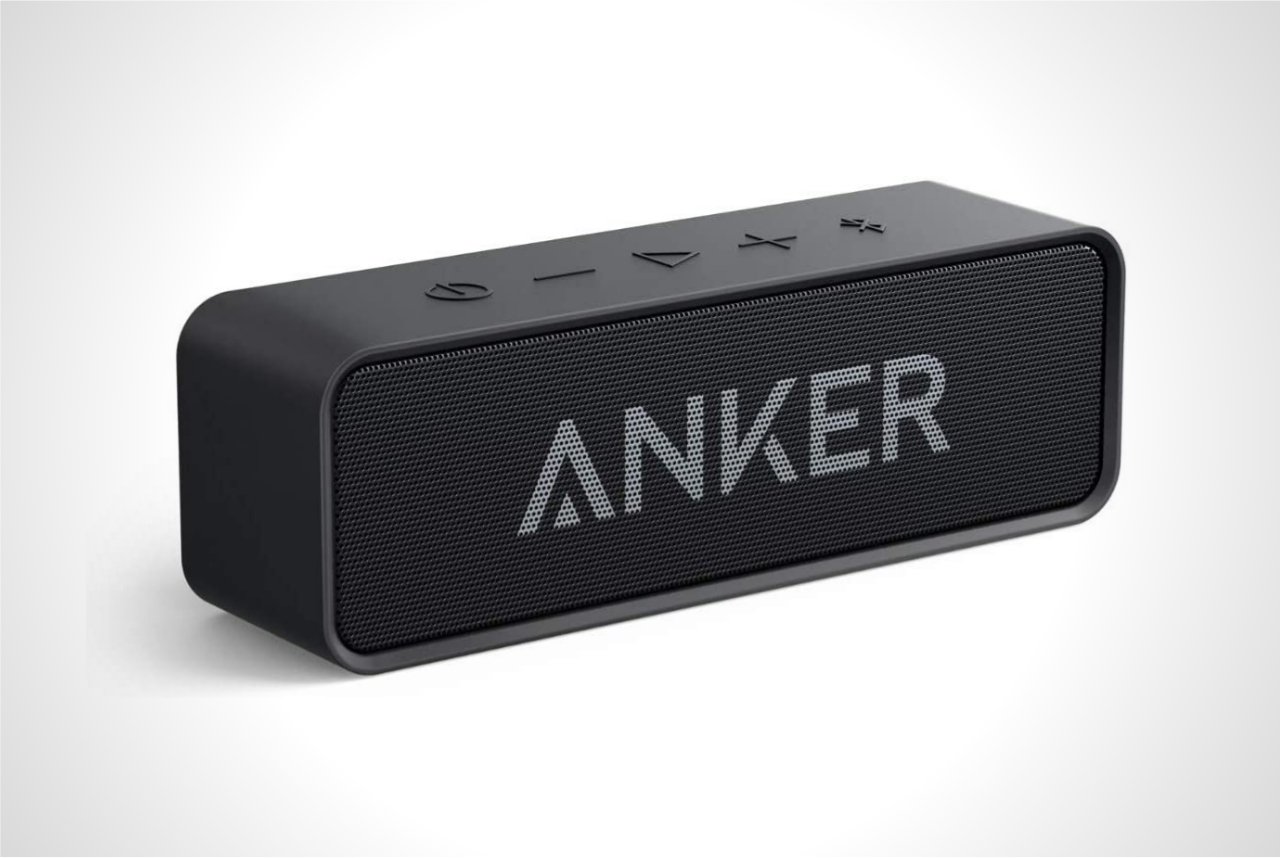
The speakers float, making them perfect for riverside picnics or pool parties. The Soundcore also comes with an auxiliary cord so you can connect it to just about anything.
This is one of my favorite deals because it delivers high-quality sound for a relatively low price and the fact that it’s water-resistant means I can bring it with me on family outings without worrying about rain or spills.
ASTONISHING SOUND: Breathtaking stereo sound with deep bass is delivered with exceptional clarity and zero distortion by two high-sensitivity drivers and a patented bass port
DURABLE AND WATERPROOF: Designed with ruggedness and versatility in mind, the speaker is not only shockproof but also waterproof to withstand heavier splashes of water.
Bekototek Surge Protector
//21% OFF
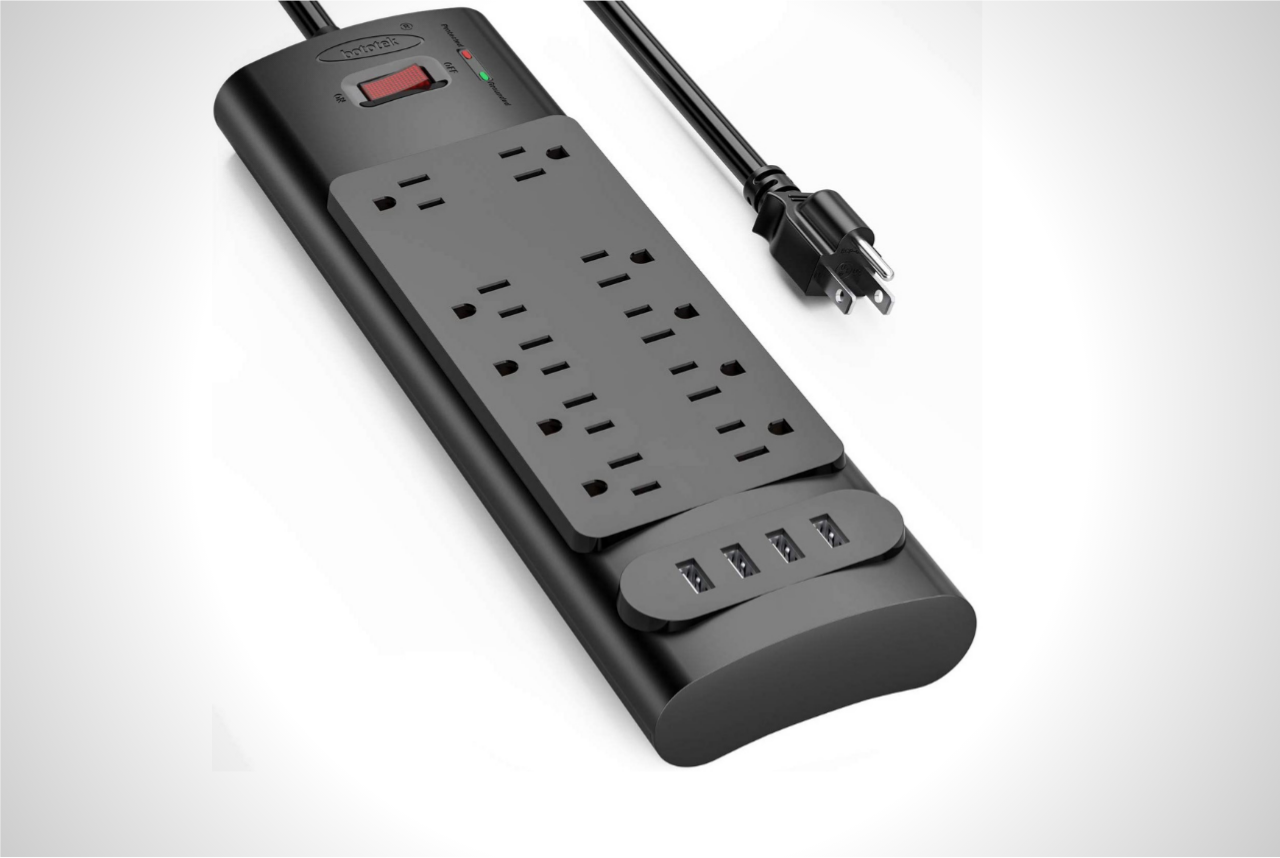
This 15-amp surge protector features a whopping ten outlets plus four USB ports (for smartphones and small electronics) for charging. So whether you’re looking to charge several items at once, or just one device using multiple ports, this is the deal for you.
A great way to save space and charge multiple devices at once. I keep one of these in the kitchen, where my phone and my girlfriend’s tablet charge while we cook dinner.
This surge protector features 10 AC outlets and 4 USB charging ports, so it’s great if you have a lot of electronics to plugin. I like its convenient on/off switch, which helps me save energy when not using it. It has a built-in circuit breaker switch in case you do have an overload and a safety shutter that protects against electrical hazards.
Camping Fan with LED Lantern
//40% OFF
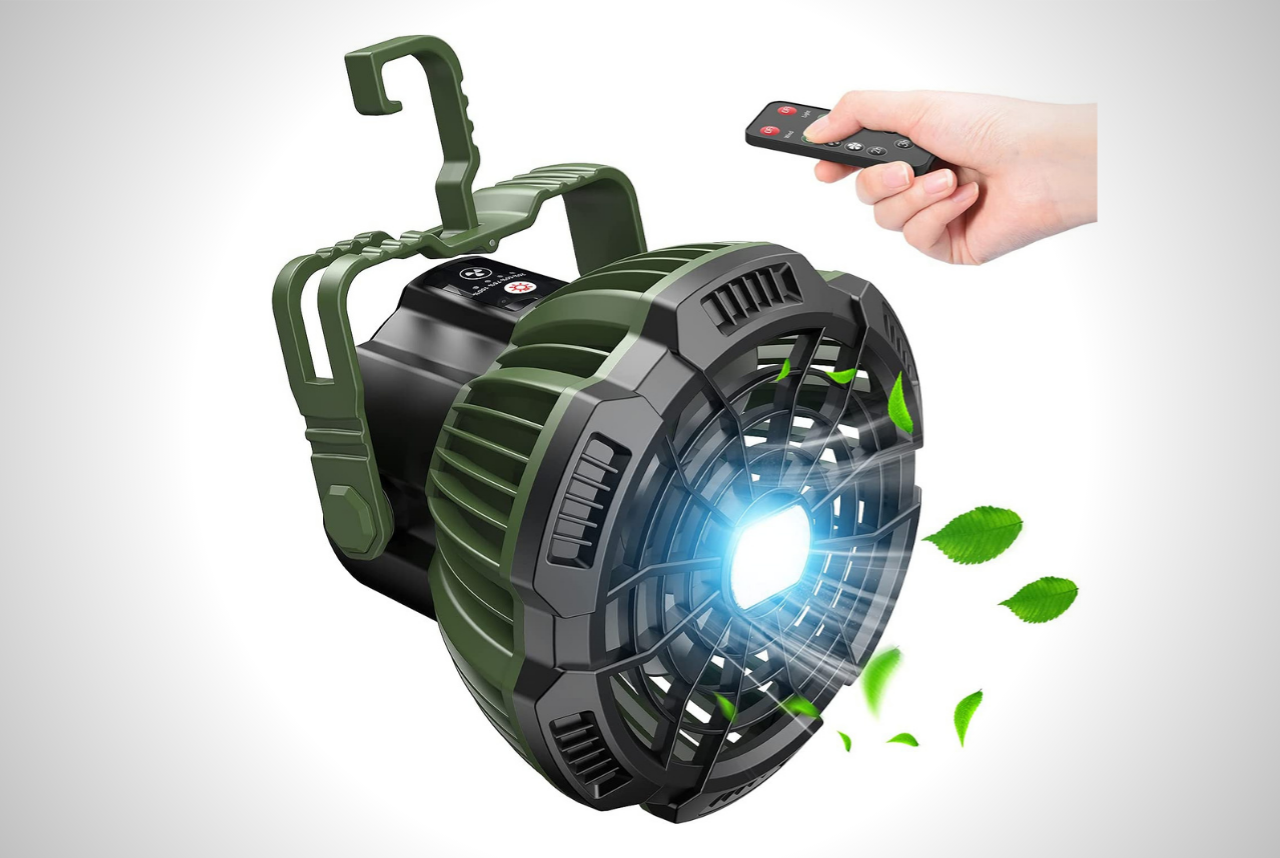
I’ve used this portable fan on camping and hiking trips, as well as in my car. It is great for outdoors because it can be attached to the top of a tent or hung from a branch or railing (with included rope), or simply placed on the ground. It helps push cold air up into the tent at night when most people are sleeping and you want to move the hot air out. The lantern is a nice addition because it provides soft light in a dark environment, which can help relax on an evening when everyone wants to go to sleep early.
This is a great product whether you are camping, fishing, or hunting in the mountains, hiking and walking on a hot summer day, driving your car to far destinations for vacation, going on a picnic with friends and families.
Redragon M602 RGB Wired Gaming Mouse
//41% OFF
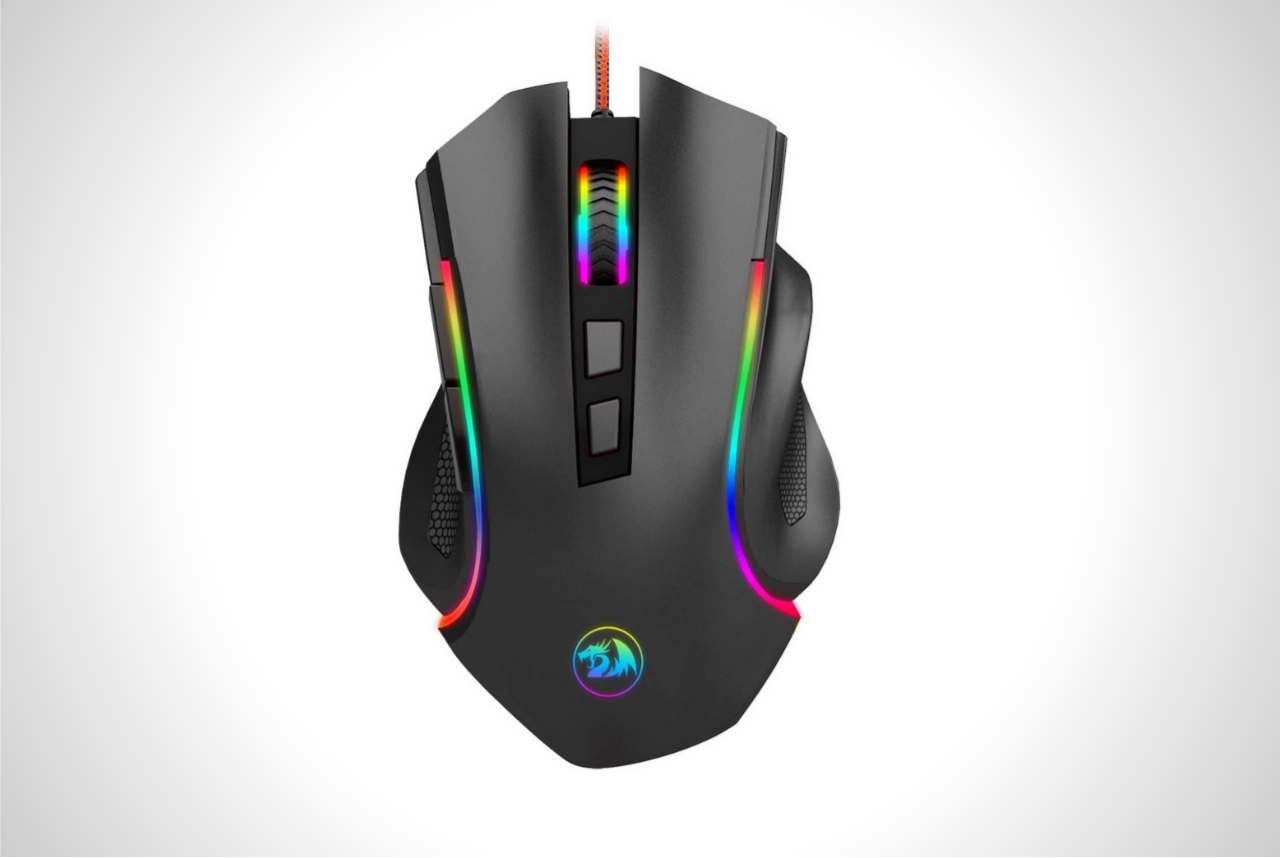
The Redragon M602 RGB gaming mouse has a great design, is comfortable to use for extended periods of time, and has LEDs that change colors depending on which game you are playing. The macro shortcut buttons allow you to pre-program what each key does in your game of choice (for example if a certain key switches weapons).
I was looking for a good gaming mouse and this one has been great. The buttons are very responsive and I appreciate that they can be used for both left-handers and right-handers by changing the button layout. It’s also very comfortable to use for long periods of time, which is important if you want to be able to play games all night!
PS5 Charging Station
//17% OFF
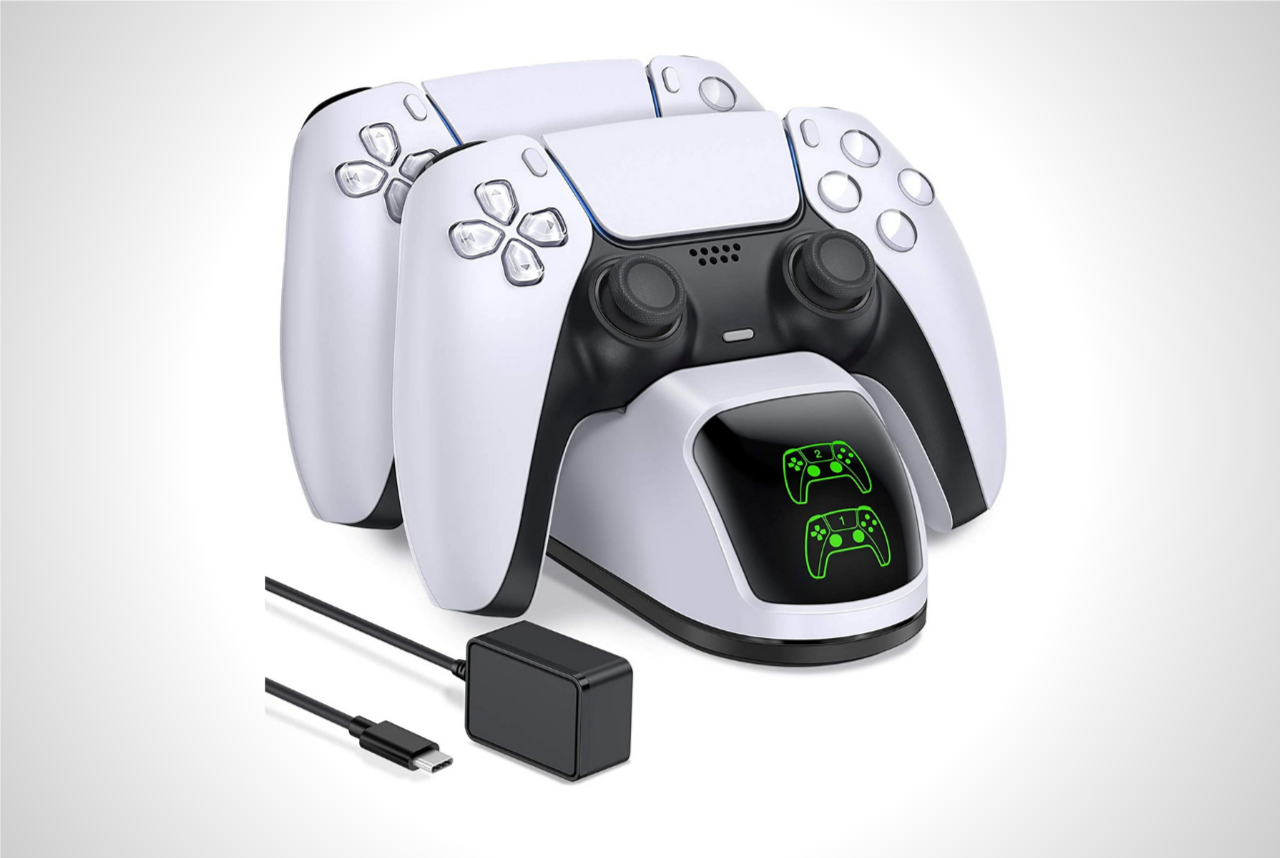
I bought this charging station to organize my PS% controllers. It turns out that it is the best thing I could have done as they tend to get tangled up when set next to each other on a table in the couch room. Having them organized on a stand makes them much easier to find when I need to play.
This charging stand comes with 4 charging ports and 2 wireless controller holders. It charges fast and has a space-saving design that keeps your PS5 controllers organized on a table or shelf, ready for use whenever you are playing. It makes a great gift idea, especially for parents who want to keep the controllers out of the way, away from kids that want to play all day. I’ve been very happy with my PS5 charging station.
The charging station works as advertised and I like that it has a nice sleek design that blends in with my other electronics. It charges both controllers at once (I have two PS5 controllers) and connects to the console via a USB cord. The lights on top indicate when the controllers are charged (they turn red when fully charged) and it also has a USB port for charging your mobile device. The station charges controllers pretty quickly as well, in about 3-4 hours depending on how much charge was already available in the controller when you plug it in.
Here are some other great deals available on Amazon: