All posts in “DSLR cameras”

Top 13 DSLR Shoulder Rigs

P

icture this – you’ve spent the day taking photographs or filming footage, channeling your inner filmmaker. You sit down ready to check the fruits of your labor, excited about the professional results you’re sure to see. Then, disaster! Instead of beautifully shot images and video, all you have is a collection of wobbly images and shaky footage. Sound familiar? The solution is simple, DSLR shoulder rigs.

DSLR cameras are designed to be light, making them great for use over an extended period of time. However, they’re not the easiest to deal with for handheld shots or footage. Without using any of the brilliant DSLR shoulder rigs available, it’s likely your images will be vulnerable to the effects of the day. Making them turn out shaky or unfocused.

In the old days, cameras were much bigger. This actually played a valuable role in stabilizing hand-held shots. However, even those old-school cameras were often shoulder-mounted to stabilize the shots even further. Shoulder mounts are dynamic pieces of equipment which move along with the operator of the camera.

Unlike a tripod, filmmakers can easily move around and make every movement efficient to the shot. The hand-held approach to filmmaking might work for certain types of footage, but it certainly isn’t a one-size-fits-all approach. If you want your work to look like The Blair Witch Project, shaky filming might be the answer.

However, if you aren’t going for that, DSLR shoulder rigs will solve the problem admirably.

As you might imagine, not all shoulder rigs are fantastic. We’ve made it easier to decide on the right one for you so that you can avoid making an expensive mistake. Check out our list of the top 13 shoulder rigs on the market today and find the ideal one to suit your next filmmaking project.

What are the main benefits of DSLR shoulder rigs/ mounts?

DSLR shoulder rigs or mounts aren’t needed by every filmmaker. Not all projects have a need for them, to be honest. However, most of the top people in the business will have one or something similar to do the same job.

A shoulder mounted camera is perfect for a number of things, but it often can help deliver a proper narrative viewpoint. This puts the viewer right in the middle of the action. Think war or action movies, where we’re seeing the fight sometimes from a near point of view appearance.

The viewer goes from spectator to part of the actual scene.

DSLR shoulder rigs can ensure the camera’s proper can movement by helping it capture video or images in a controlled way.  Energy is present in the scene, giving an additional frantic element to major, climatic moments.

Shoulder rigs, as we mentioned slightly above, are perfect for action shots. They offer the stability you need for mobile and speedy shots. Tripods and monopods are unneeded here, and you feel closer to the action.

Thanks to their anti-shock, sturdy design they stabilize even the shakiest hands. This offers smoother-looking videos that are completely flicker-free. As an added benefit, they distribute the camera’s weight evenly over the shoulders for longer shooting sessions.

This is due to the ease of making things less difficult on the cameraman, making them less tired.

Carrying even the lightest DSLR camera around for extended periods can be tiring, and a shoulder mount eliminates that problem for a more pleasant shooting experience.

When you invest in a shoulder rig, you won’t have to worry ever again about shaky and wobbly footage making you look like an amateur. You’ll enjoy wonderfully smooth shots that are precise, well-focused, and professional.

What are the different types of shoulder rigs/mounts?

Not every shoulder mount is designed for the same camera or even the same purpose. The two main types are offset shoulder mounts and straight shoulder mounts. Due to what each can do and why they are both important, we felt it would be best to go over them with you.

DSLR shoulder rigs are incredibly useful, but you often need to know your way around the best.

Even the greatest shoulder mount will cause the user some trouble if it’s the wrong thing. It might also not do well for certain people if the type they use is fine for the camera, but not for them. That said, let’s check these different rigs out.

Offset Shoulder Mount:

Offset shoulder mounts are ideal if you’re using a DSLR with an LCD monitor that opens up sideways. This will allow the viewfinder to remain in front of the eyes of the operator instead of beside them. Overall, the viewfinder often makes a huge difference.

The reason this is so important to keep in mind is due to how you’re seeing the action.

Trying to record something you cannot see can really be troubling. Offsets allow you to see everything like you normally would through a camera. Offsets also are known for being used in a handheld fashion, like on the ground with a camera operator running or walking with them.

These are what you may call the “mobile mount.” Though both are mobile, the offset’s viewfinder ability makes it less complicated to use in this format.

Straight Shoulder Mount:

If you use a straight shoulder rig for the same type of camera you’ll find the viewfinder is offset to the side. This can make it harder on the camera operator, as they’ll have trouble viewing. On the other hand, if you really like this set-up than you can easily use an off-camera monitor for your DSLR.

You’ll also be able to place your monitor into the hot shoe mount of the camera as well. However, the most common way to use one is on a rail support system. This will allow you to get the shot, but you’ll be immobile as you’ll need the rails to push a dolly support-type of thing with you on it.

This can be great for shots, however.

These types of things are cheaper than an entire dolly set-up, so it can be a cheaper option to get the same results for independent filmmakers. However, if you’re using a huge studio, the huge dolly set-up won’t even be a discussion. It’ll be there.

How Their Design Plays A Role:

Shoulder mounts come in several designs. Some have flat metal surfaces that allow the camera to be attached to the top. As we referred to above, some have a rail system. While the right one for you will depend on your own preferences and filming style, the rail system is often considered to be better since it can be adapted to more shooting scenarios.

Also, a rail system can be added to over time. Adding on attachments is much simpler with a rail system and if you’re likely to need accessories like lens support or follow focus, a rail system will suit your needs perfectly.

Not every type of shoulder mount can carry the same amount of weight either. Even a small and apparently light DSLR camera will become heavy over time. Especially once you attach a telephoto lens or other accessories to it. The longer your shooting session, the heavier your camera will start to feel.

If you want to avoid the strain of carrying a rig, camera, lenses, and attachments, you might want to consider a type of mount with chest support or arm. The arm will rest against the chest of the operator, and this helps the camera’s front to be supported.

Many DSLR shoulder rigs are also supplied with a choice of counterweight options. When you add batteries, monitors, lenses, and microphones to your shoulder rig, it will start to be front heavy. You can combat the imbalance in weight by attaching weights onto the rear of the rig to rebalance it.

What are the major mistakes people make when buying shoulder rigs/mounts?

DSLR shoulder rigs won’t just make you look like a professional, it’ll also help to improve your stability during shooting. This is a simple fact of film-life for directors and camera operators alike. You’ll be able to film effortlessly for long periods of time without experiencing any aches or pains in your arms and/r hands.

However, if you buy the wrong shoulder rig, you’ll end up causing more problems than you solve. Let’s take a look at some of the mistakes that filmmakers commonly make when choosing a shoulder mount.

Material:

DSLR shoulder rigs are versatile devices, but if you’re going to get the most out of your purchase you need to consider the material it’s made with. Some are made from steel, which is very durable and long-lasting. On the other hand, it’ll be heavy to handle for extended periods.

An aluminum rig is going to be just as durable but will be much lighter and easier to carry all day on a longer type of shoot. This makes it a much better choice. It’s also worth looking out for a powder coated rig since it will be corrosion and rust-resistant. This makes it ideal for outdoor shoots.

Rail System:

We keep talking about the rail system, but that is simply due to the importance it has. The primary concern it’s for is the stabilization of your DSLR camera. If it has been well designed, it will make your shots stable even if you aren’t as skilled as you thought you were!

Make sure that you select a rig that has a good rail system with a diameter that properly fits your DSLR. You also want it to be made from a durable material like carbon fiber. If you make the mistake of choosing a rig with a poorly designed rail system, you’ll be throwing your money away.

Simply put, the stabilization won’t be good enough to ensure smooth footage. Meaning you need to look out for this big time!

Matte Box:

When buying your rig, look at the placing of the matte box. This is essential for securing your lens filters, something you’ll obviously want to to do. If you’re planning on using these accessories, you need to ensure that your chosen rig’s matte box is in the right spot for you.

The role it plays is pretty crucial to the safety it can provide, of course.

You’ll want to make sure that it can accommodate the type and size of filters you’re planning on using. People often buy stuff like this without considering the stuff they’ll use. Before you do, make sure you have a list of what all you’ll need that should fit into one of these.

Follow Focus:

Follow Focus is a relatively big deal thing to consider, but what is it?

This first needs to be described going over what type of focus people like. Some camera operators like when their camera auto-focuses. Basically, it focuses on the type of shot it will need to do in order to get the complete focused image without blur anywhere.

If it does, it typically gets everything in front of it with blur only happening at distance images.

Meanwhile, other operators like to manual focus. Meaning they do not want an auto-feature affecting the type of image or video they’re working on. They want complete control. They want some blur at times or some far off look. Perhaps they want to focus on closer objects than an entire image or a further one while they’ll unfocus the front objects.

It’s truly up to them. Mounts will be big to consider here because they can be in the way of trying to focus your camera. If you cannot reach in easily to focus the camera during shoots on the fly, it can really be annoying for these types of people.

Auto-focus types won’t care either way.

User-Friendliness:

One of the primary reasons to buy a DSLR shoulder mount is to make shooting videos easier. If you buy a rig that isn’t easy to use, you’ll be wasting money. Choose a lightweight rig is simple to use in whatever environment you’re going to be filming.

Make sure the design is well-balanced and has all the essential features you need to get the most out of your filmmaking. You’ll be golden when you do. If you struggle when attempting to use any DSLR shoulder rigs, then this could be an issue. You want a user-friendly approach.

You’ll be using these things a lot, of course. That means you need the best for you that YOU can operate easily and won’t cause you any grief.

Balance:

What kind of camera will you be using for your filmmaking? If you’re planning on using a larger model you’ll require a shoulder mount that’s able to effectively balance that extra weight. Otherwise, you’ll find it difficult and awkward to handle your equipment, especially on a longer shoot.

Balance can be a huge asset to consider for a ton of reasons on top of this. Think of the word itself, as well as what it means. You’re balancing. Imagine having one side with too much weight on the right or left. It can really do a number on your body but it’ll also look bad when you look back at the footage. It’ll be tilted!

You want even distributed weight for sure.

Add-Ons And Extras:

Planning on adding accessories like battery packs, microphones, and monitors to your set-up? You’ll need to make sure that your chosen rig can accommodate them. Most DSLR shoulder rigs can hold up just fine to a lot of add-ons. However, some can only handle so many.

If you can take away or add on features while you’re out on a shoot, your shooting experience will be better. Overall, you’ll want to have things close by. This makes things easier in every way, so you’ll want a rig that can handle this. However, again, the biggest thing to consider is simply the amount of the extras and even what these add-ons might weigh.

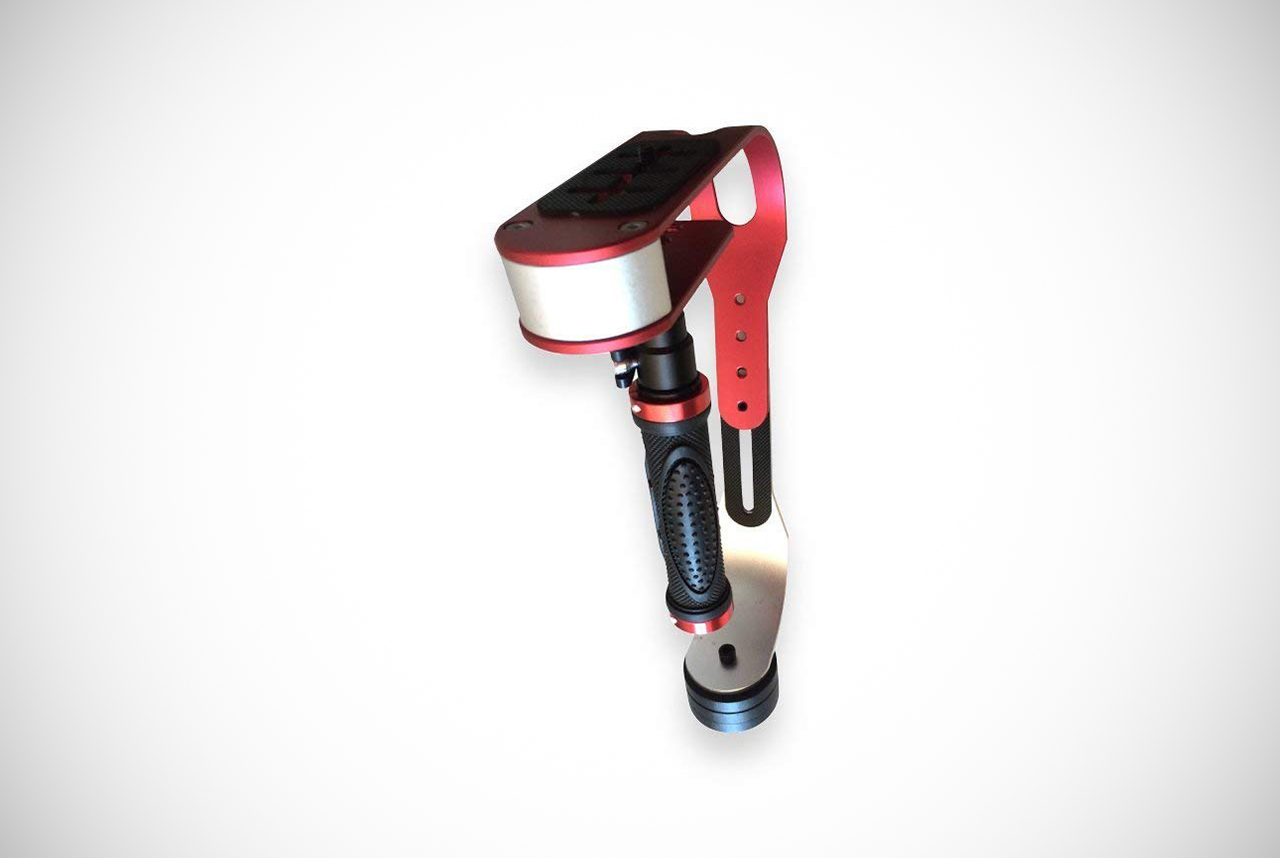
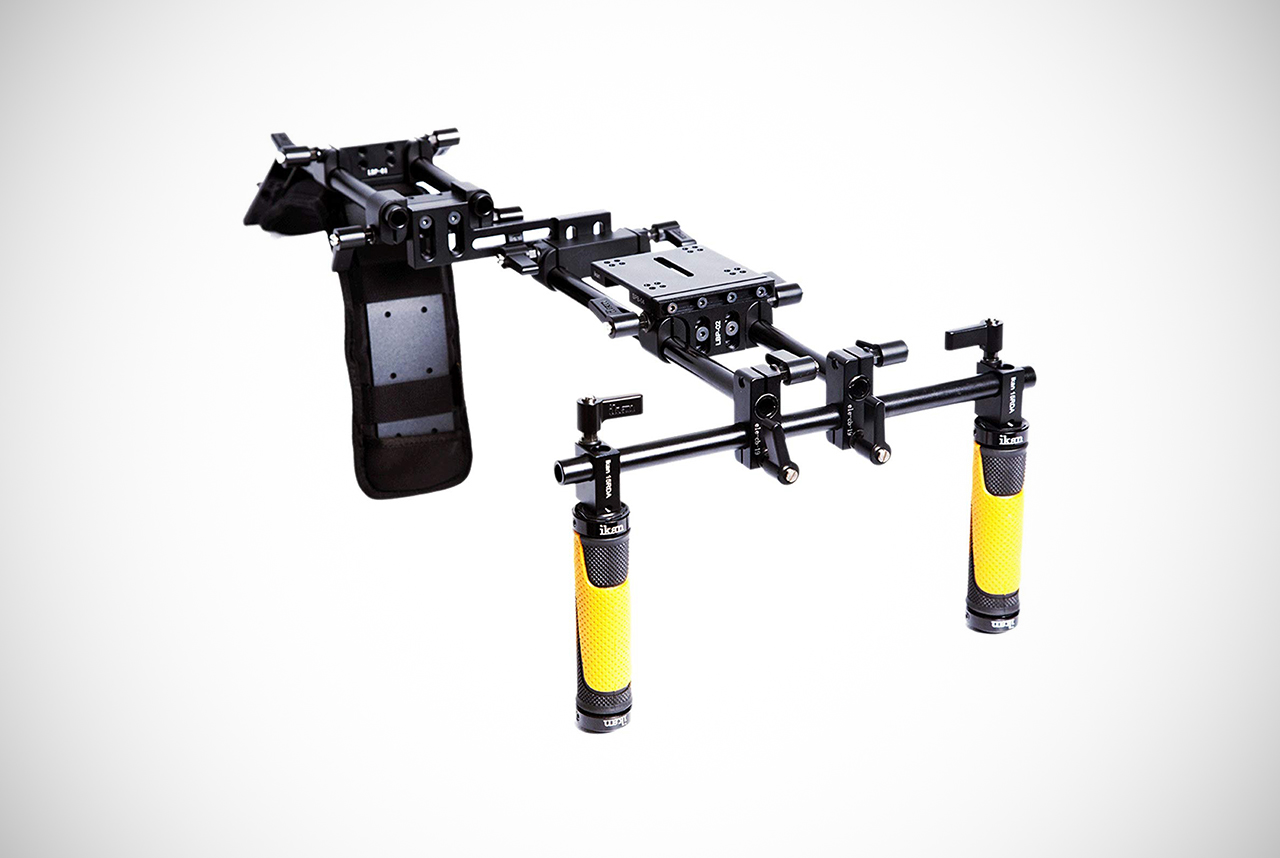
1) Ikan ELE-OFLY Flyweight Offset Shoulder Mount

The Ikan ELE-OFLY is a great choice for both professionals and amateurs on any project they might be working on. Its soft padded shoulder support is comfortable to wear. It’s surprisingly light on your shoulder even for extended periods of filming.

Meanwhile, the rubber handles are comfortable to hold and ensure the best possible grip during use.

Designed for use with DSLRs, this mount fits perfectly in its frame, offering top quality, reliable performance. These DSLR shoulder rigs truly come with all the features of a professional rig. Best suited to small and mid-sized cameras, it can be adjusted easily to obtain optimal comfort even when shooting from unusual angles and heights.

If you’re a beginner, there’s no need to worry about getting to grips with the ELE-OFLY. It is very intuitive and user-friendly, making it an easy rig to operate. On top of this, it only requires minimal assembly, so you can put it together without much of a challenge.

The 15mm rods also allow for vertical adjustments to keep the camera at the perfect height for you every time.

Solidly constructed from anodized aluminum, this rig is durable and strong while also being light enough for extended use. Overall, this makes it quite useful for all kinds of projects you might need it for.

Check Product Price // Read More Reviews

CHECK PRICE  READ REVIEWS

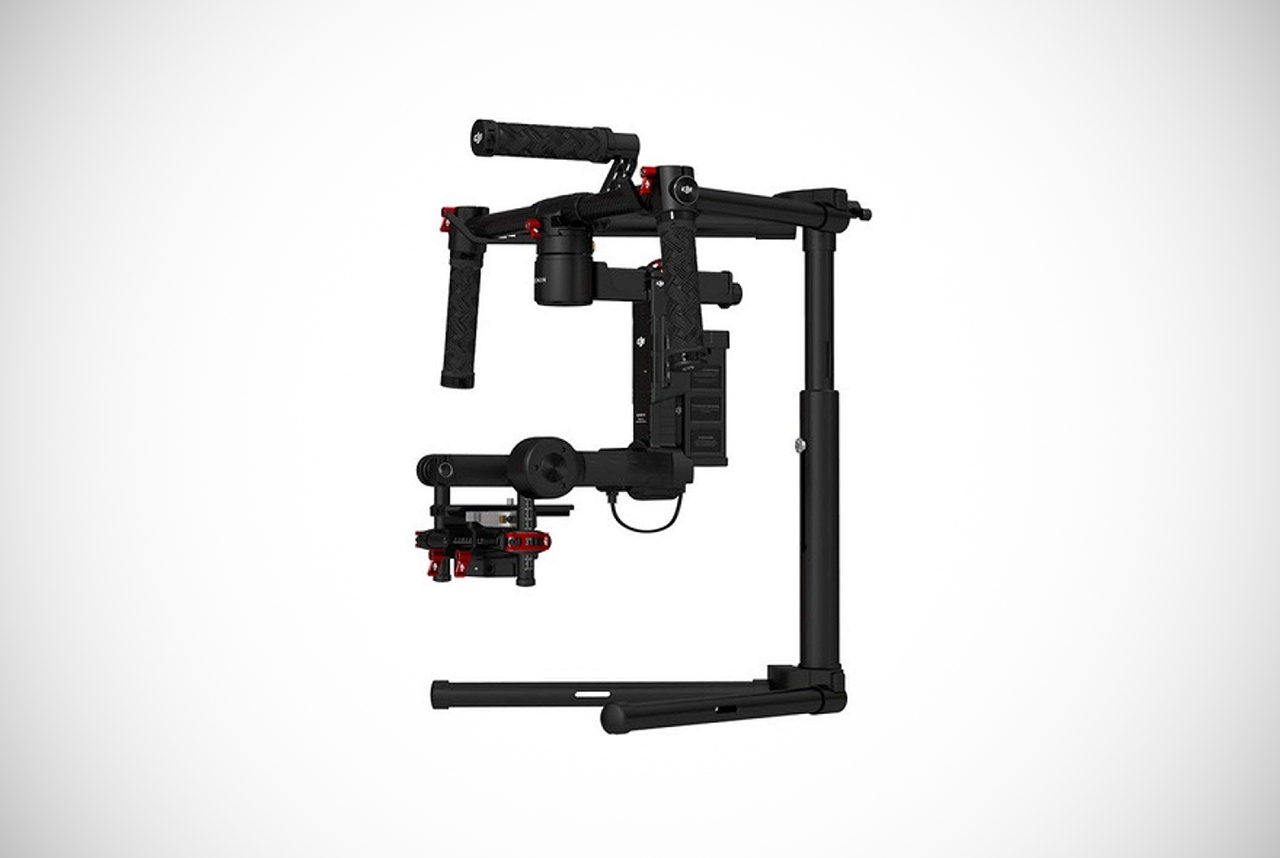
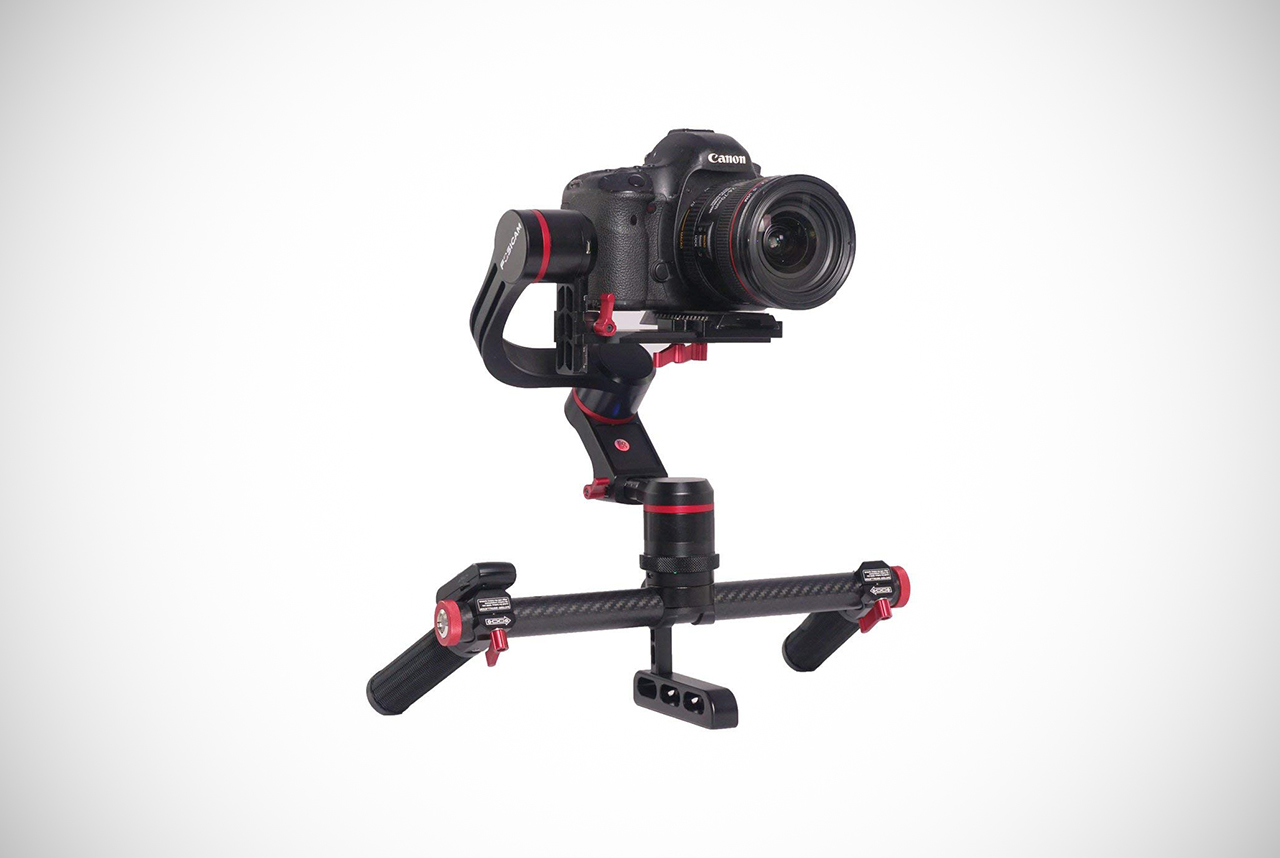
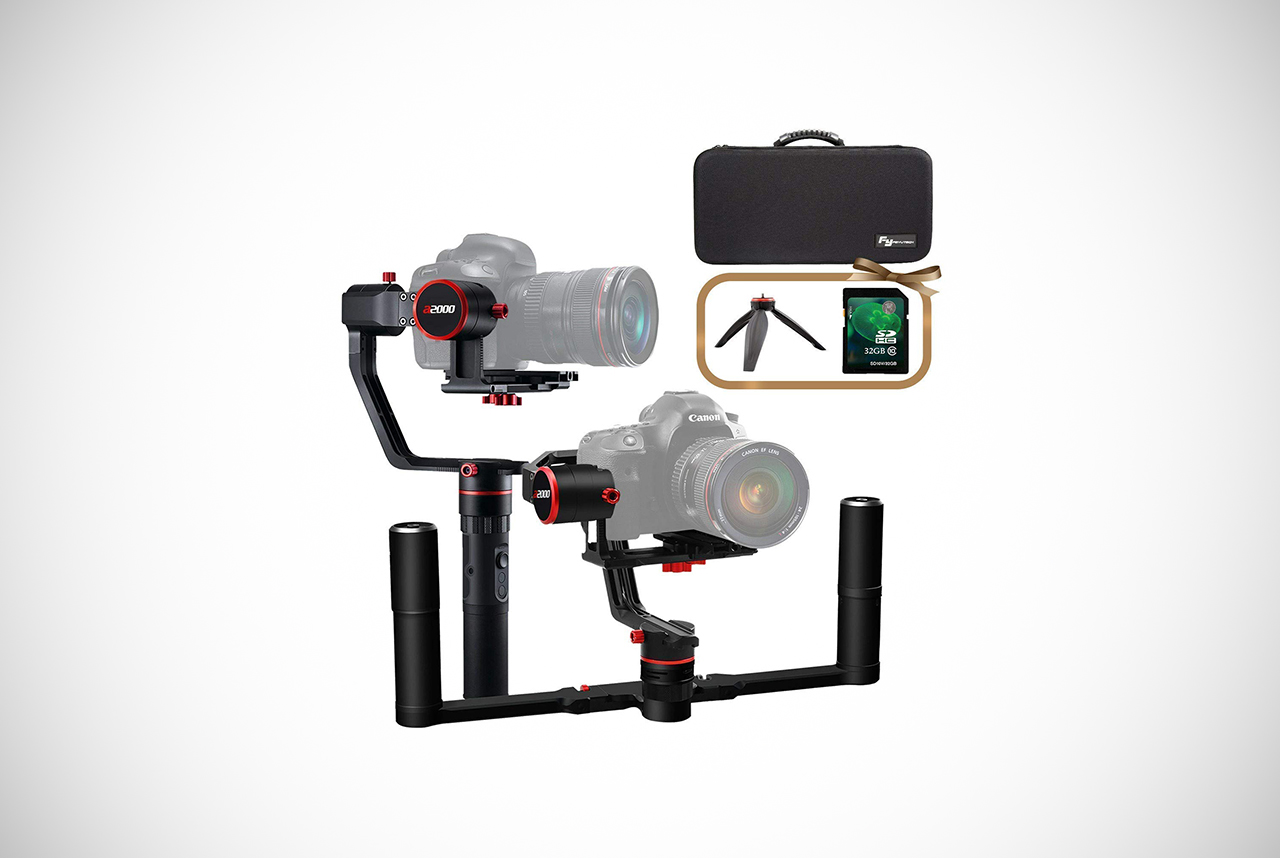
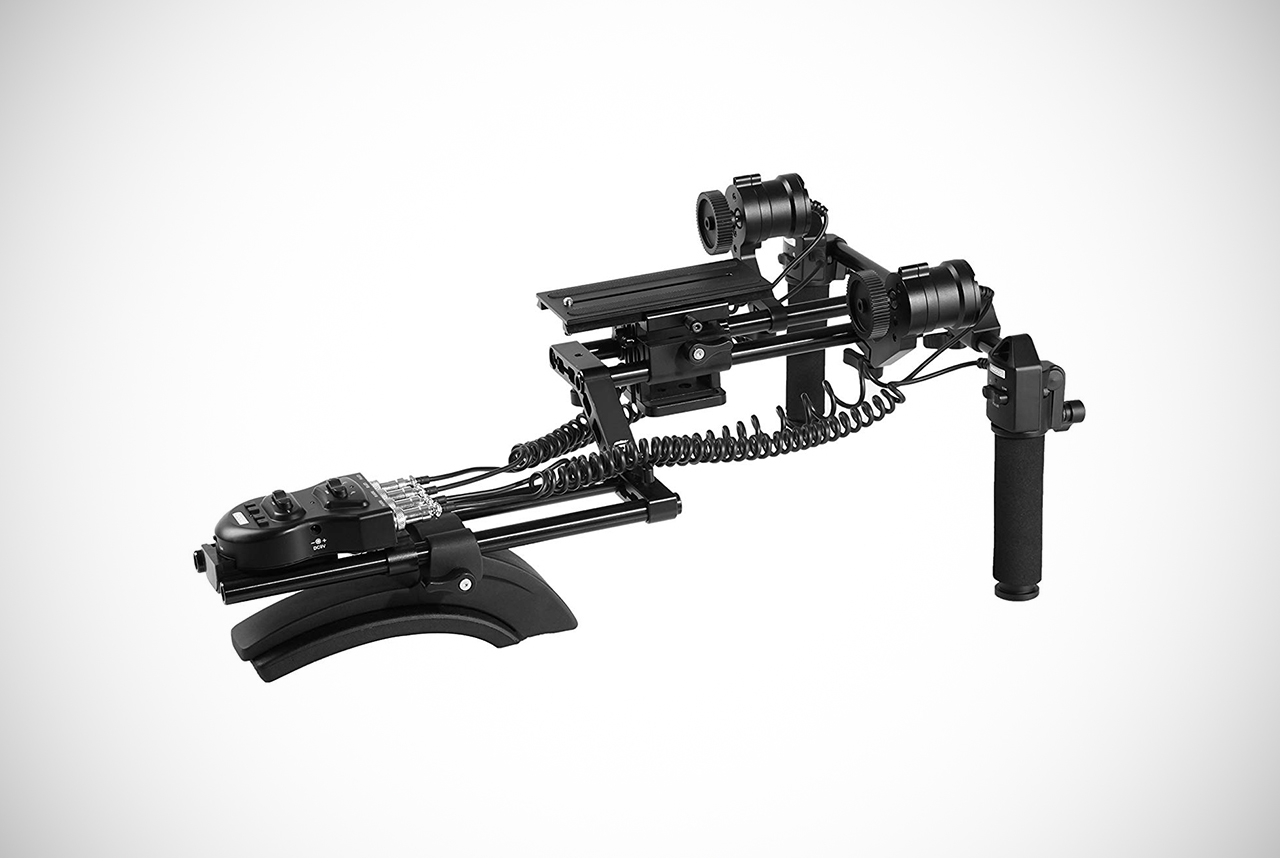
2) Movo MFF400 Premium Motorized Shoulder Mount

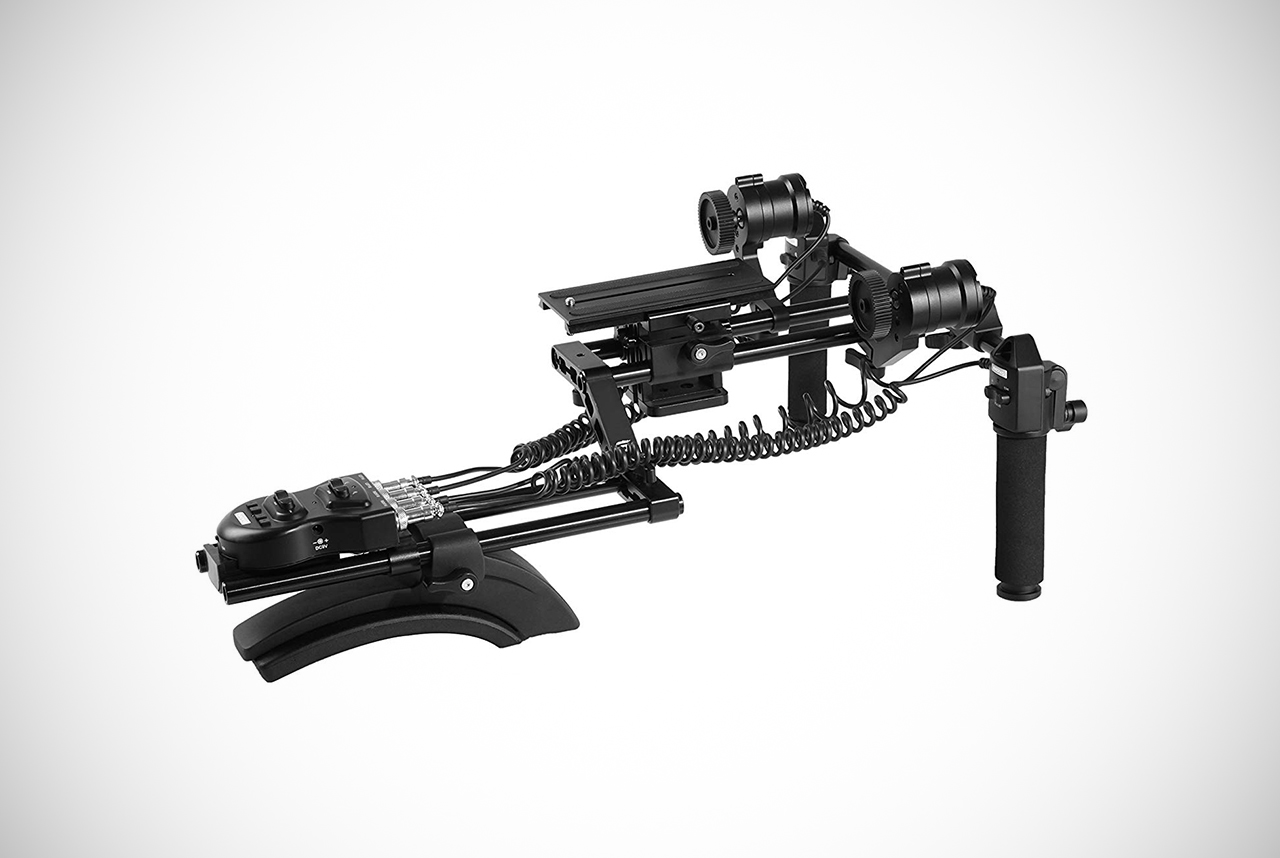
The Premium motorized Movo MFF400 shoulder mount is compatible with virtually all DSLR cameras. It’s ideal for either professionals or amateurs to use, making them a universal product to have for either. Strong enough in construction to last for the long haul, this well-designed model contains highly durable, premium motors.

Together with zoom memory, it allows for smooth photography and a more precise and accurate focus. You’ll be able to use these DSLR shoulder rigs all day long and still enjoy smoothly operating motors.

Boasting silent operation, this mount gives you full control over every shot. It truly could not be easier to use. This is thanks to the speed settings on the control switches that are placed in a highly accessible location. It comes protected by a one year manufacturer’s warranty and has a very affordable price tag for peace of mind.

Check Product Price // Read More Reviews

CHECK PRICE  READ REVIEWS

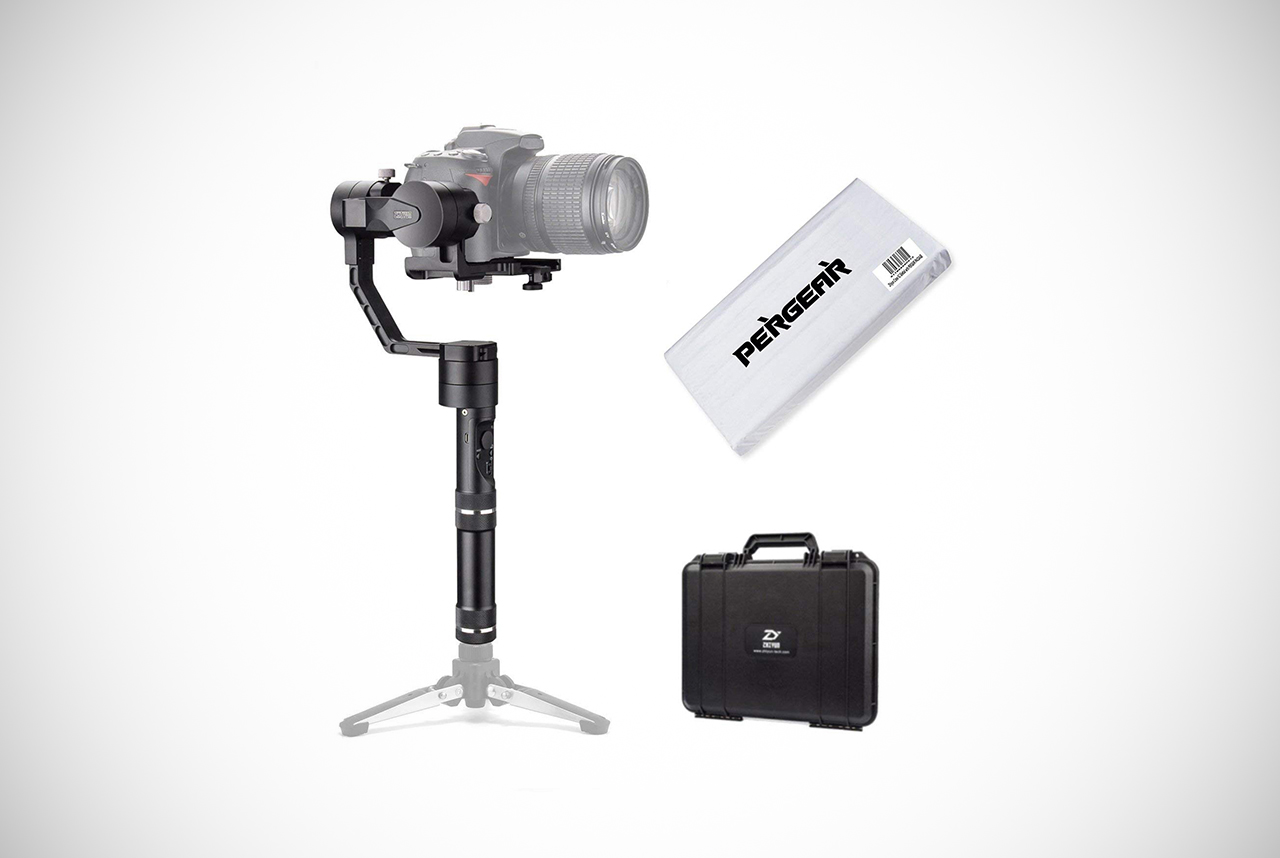
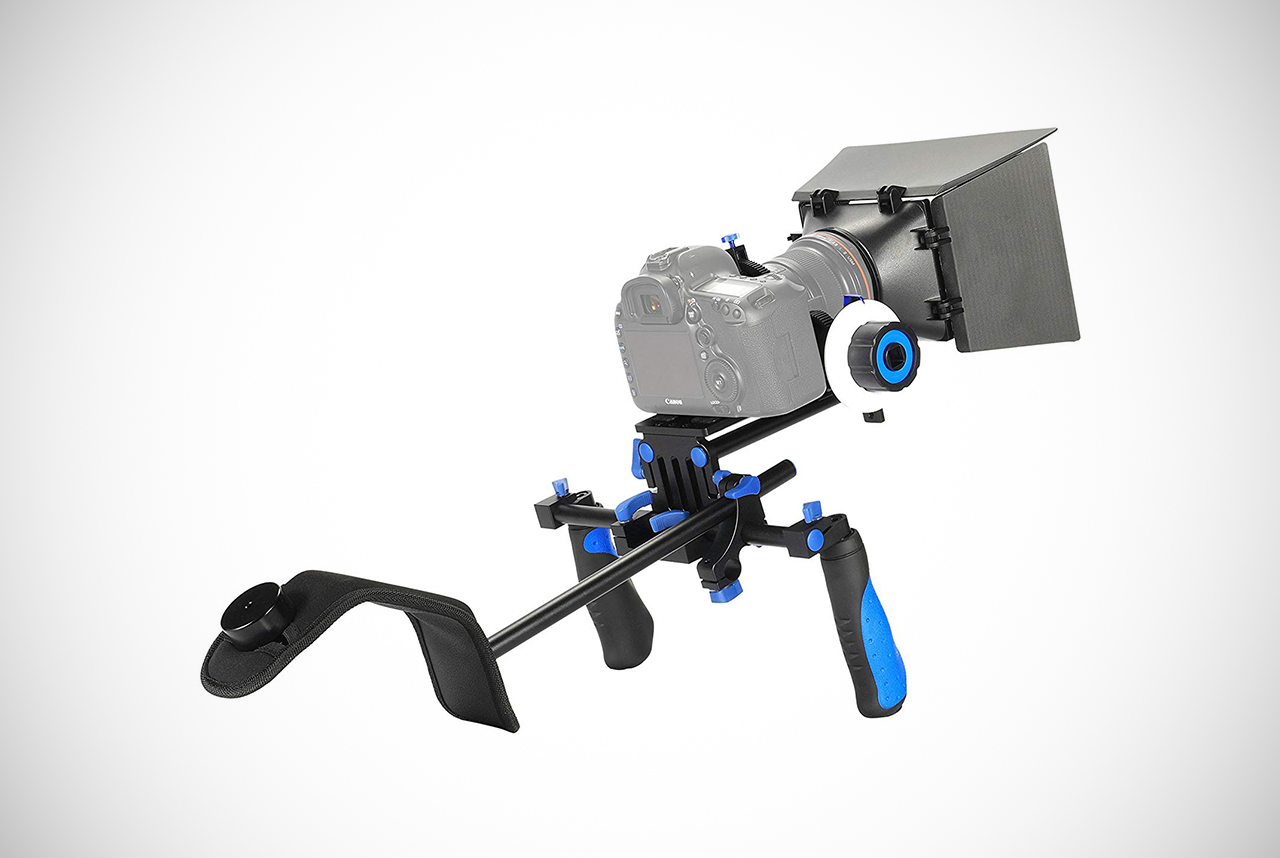
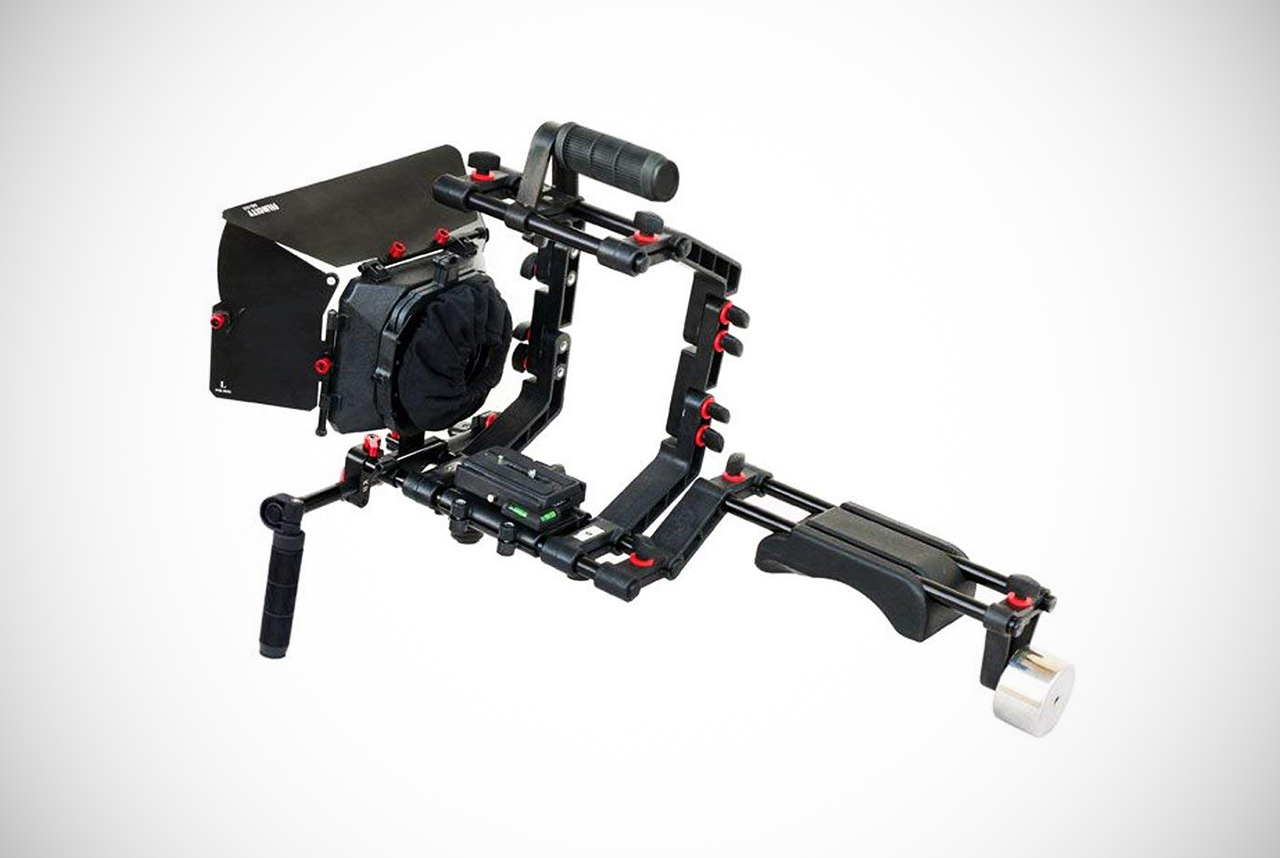
3) Neewer Film Making Kit

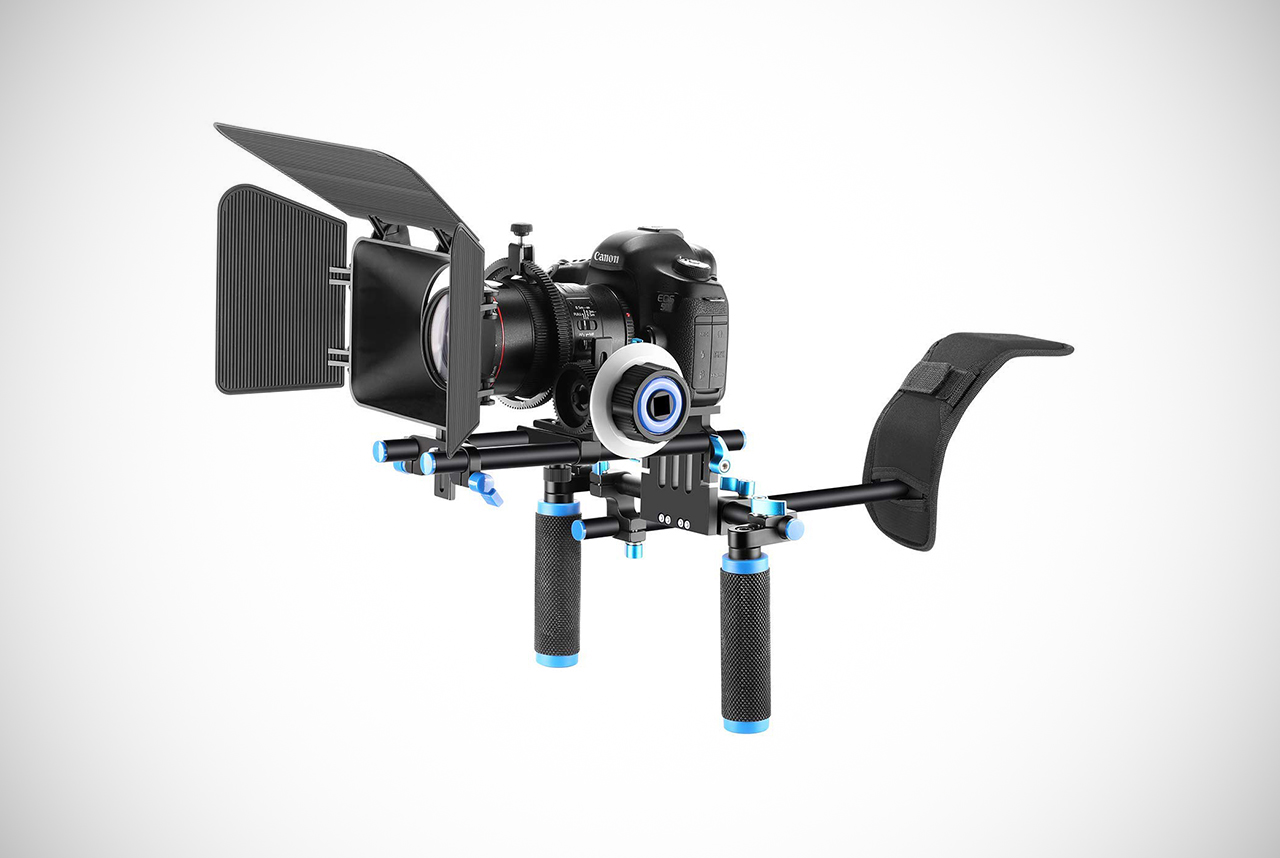
From the terrific and high-quality Neewer brand, these DSLR shoulder rigs are the perfect thing to have for any filmmaker. It comes standard with a follow focus, matte box, and shoulder mount itself. Overall, this gives you complete flexibility to shoot indoors or outdoors while maintaining ultimate portability.

Designed to be entirely gear driven, it ensures accurate, slip-free movement. Meanwhile, its adjustable locking system ensures the perfect comfort and functionality every time you pick up your camera. Thanks to its flexible design, it couldn’t be simpler to adjust this rig to different shooting modes.

On top of this, the handgrips and shoulder mount are well padded for comfortable shooting even over long periods of time.

Capable of supporting a maximum lens of up to 77mm, these DSLR shoulder rigs are made from ABS and anodized durable metal for lightweight support. All of this makes it designed to stand the test of time. You can even mount the gear drive on either side to suit your needs whether you are left or right handed.

Check Product Price // Read More Reviews

CHECK PRICE  READ REVIEWS

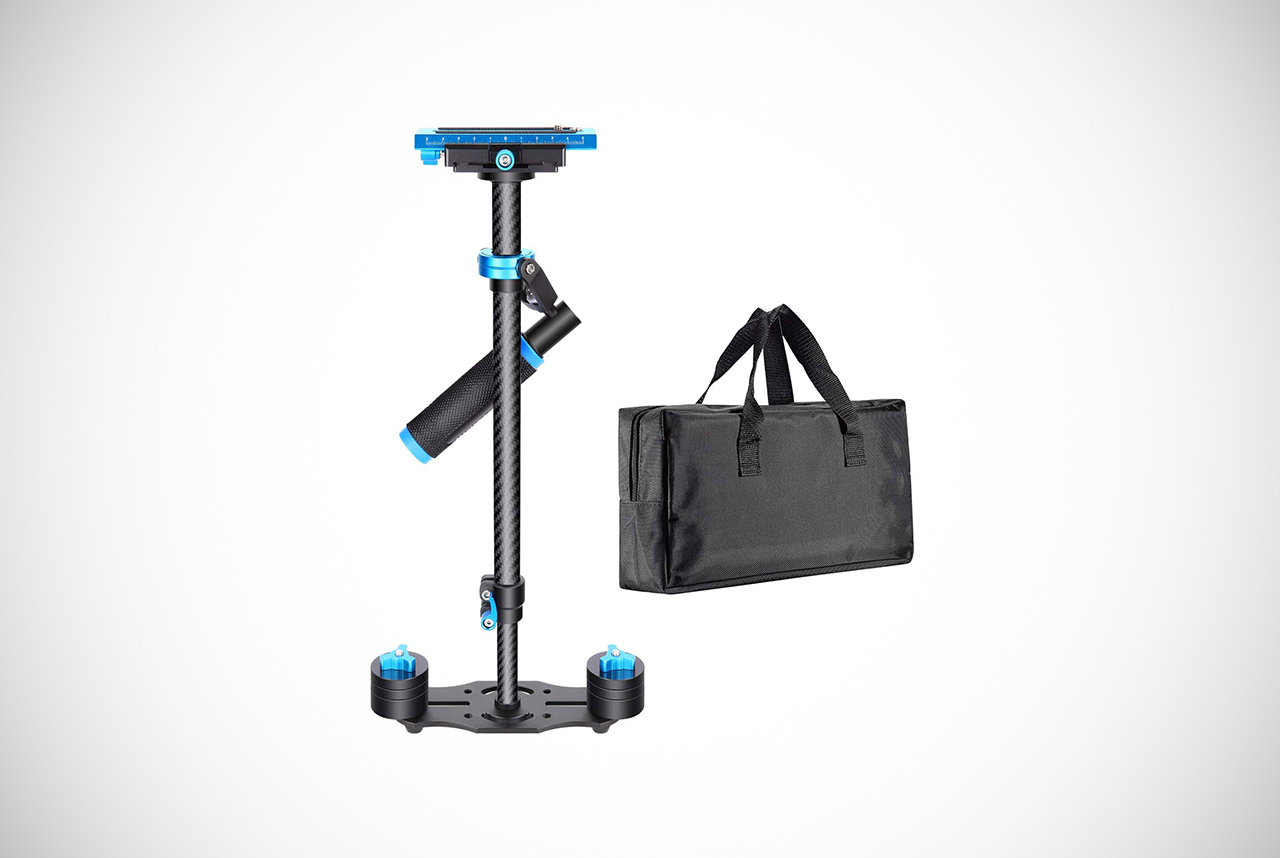
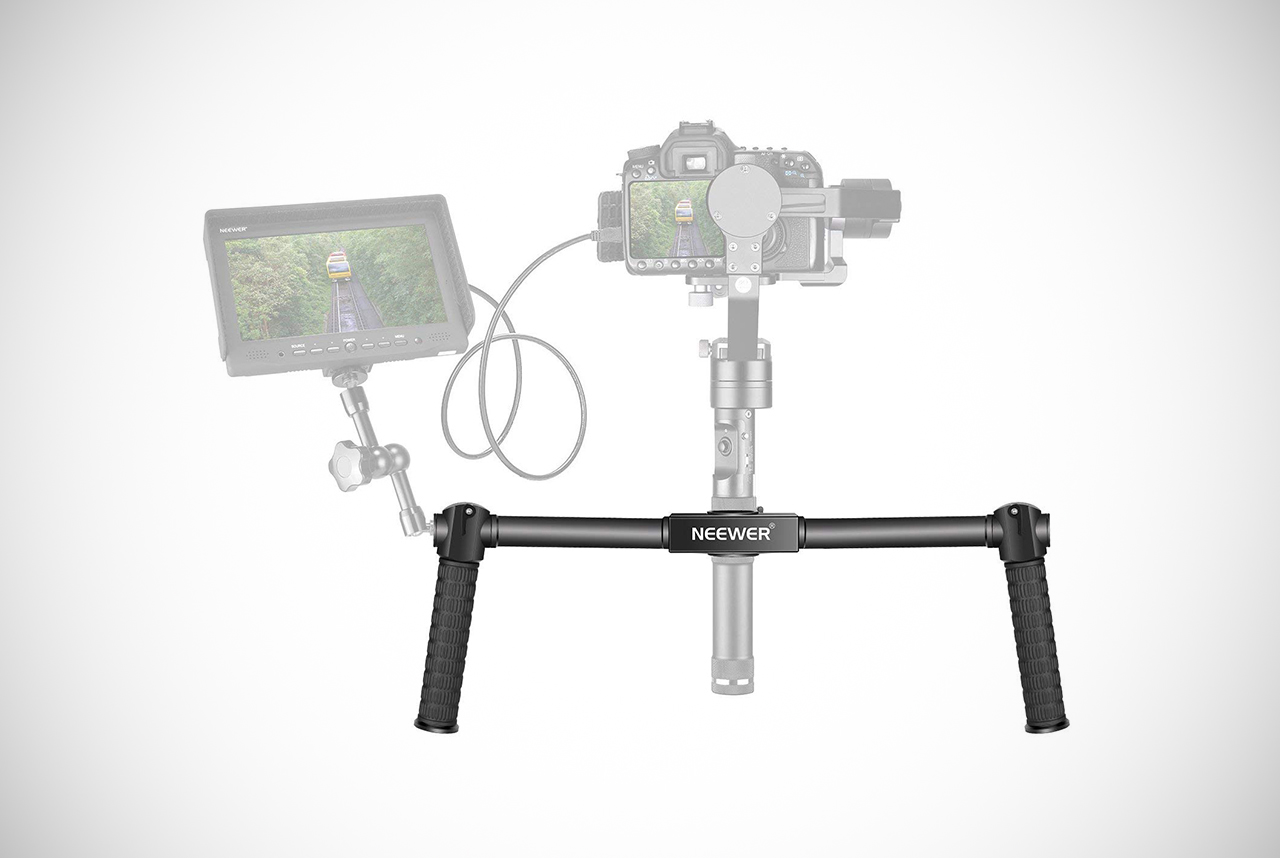
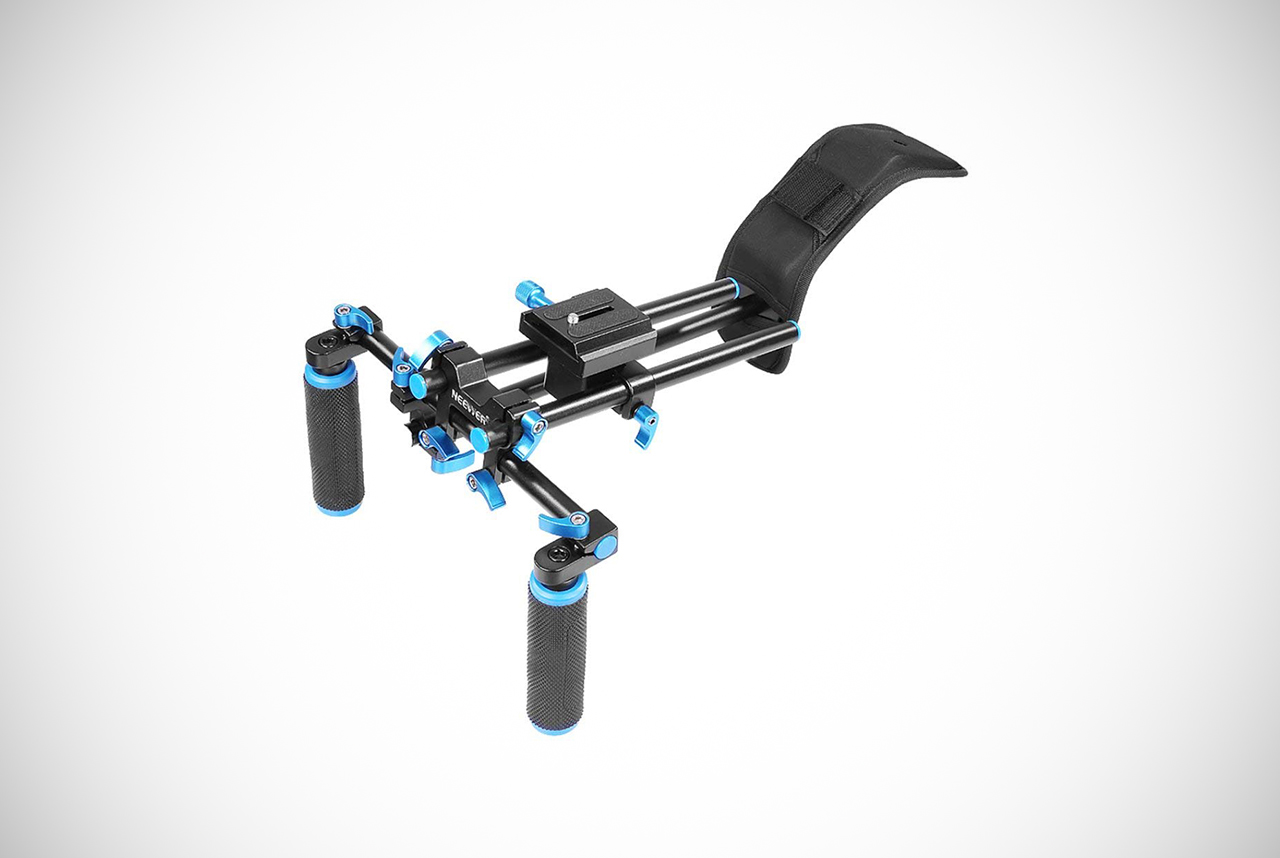
4) Neewer FilmMaker Portable System

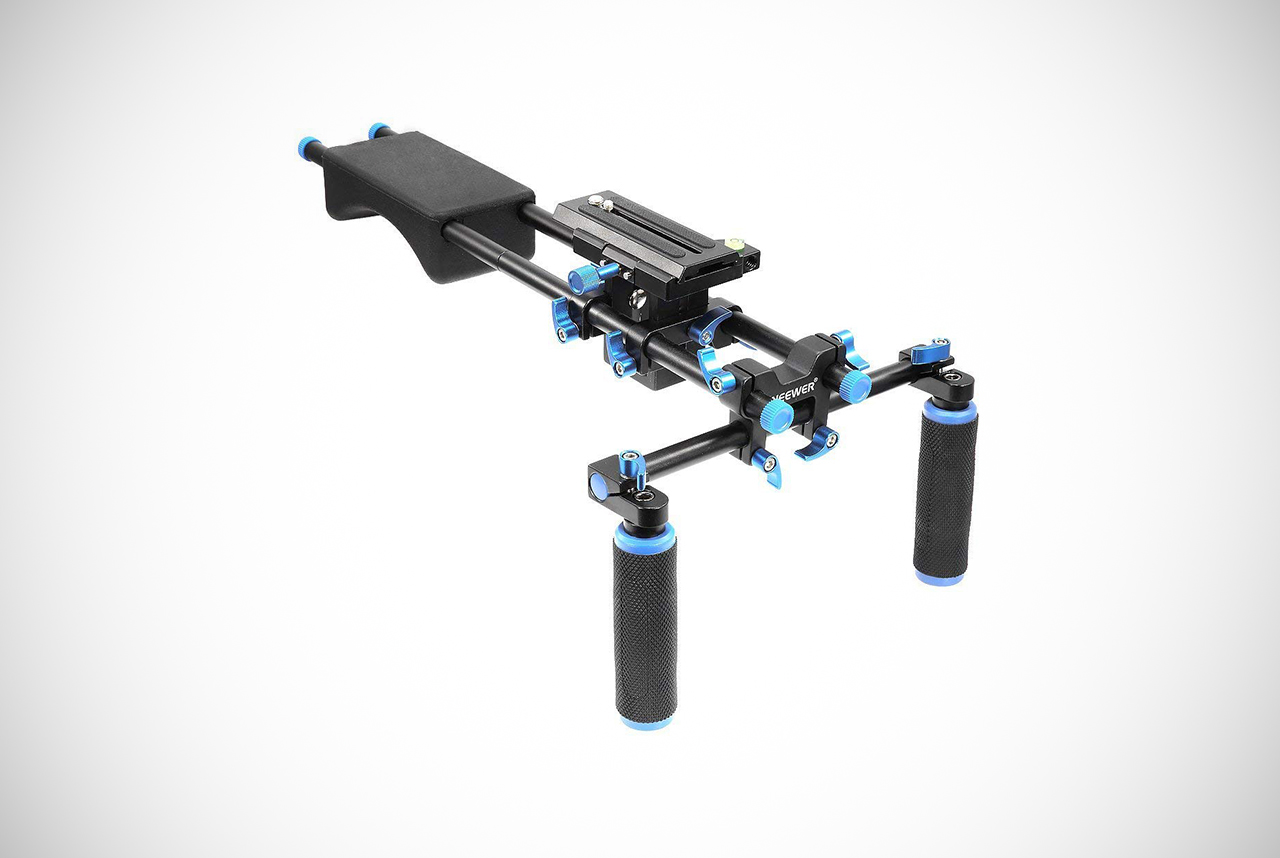
Back yet again with the Neewer brand, we know they can kill it when it comes to DSLR shoulder rigs by now. They do it again with this product, which came to the shock of no one.

These highly portable DSLR shoulder rigs make filming outdoors a breeze. Its lightweight frame makes it easy to transport wherever you need to go and its maneuverability is outstanding. It can secure the majority of DSLR brands while its sturdy construction stabilizes even the shakiest hands.

Its handles are well padded with foam for extra comfort during long shoots. Meanwhile, the comfortable and broad shoulder pads ensure that you won’t suffer from any pain while filming. There’s also plenty of room on this rig to add on any accessories you need.

Its ¼” universal screw holes are ideal for supporting virtually every camera with plenty of space for add-on lenses and accessories. Made from highly durable and strong aluminum, this is a lightweight product that is still built incredibly.

Check Product Price // Read More Reviews

CHECK PRICE  READ REVIEWS

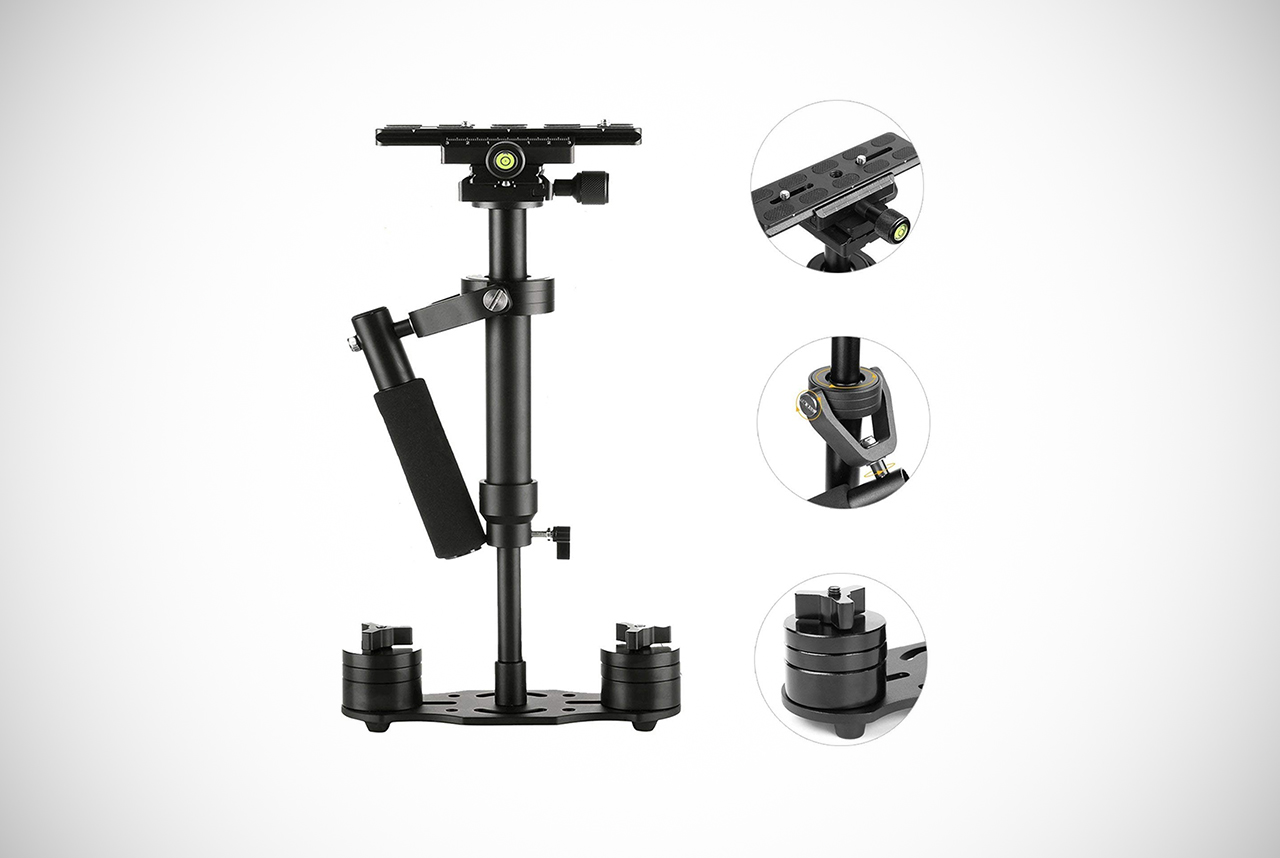
5) SunSmart DSLR Rig Set

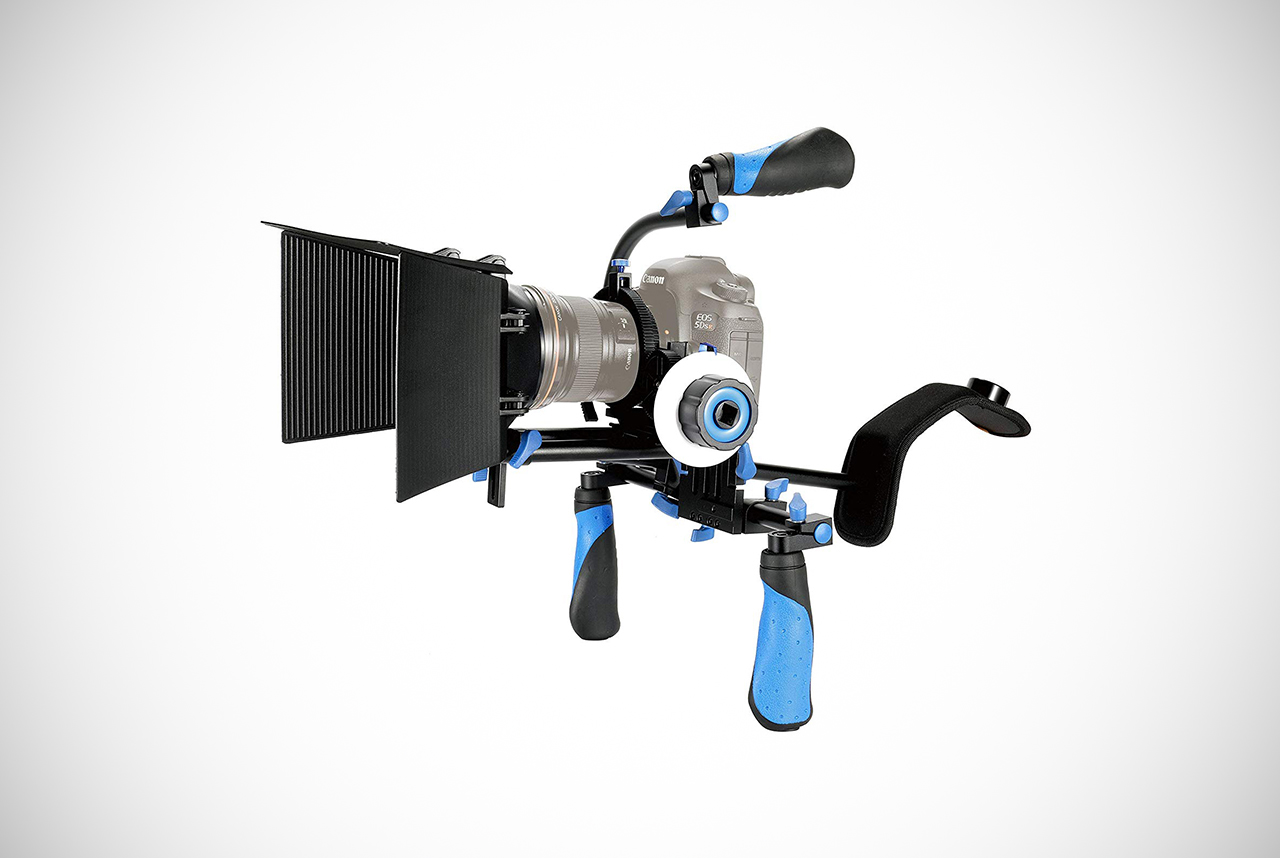
SunSmart comes into the batter’s box with this stabilizing shoulder mount that ensures you can film completely shake-free. It can be easily adjusted to accommodate your height and can even be mounted with a follow focus to allow for even more accurate focus control.

Constructed to withstand heavy-duty applications, these DSLR shoulder rigs are made from stainless steel and aluminum. Its ¼” universal thread means that it can easily be mounted onto a standard tripod for even greater flexibility.

With its gear-driven design, this shoulder rig ensures accurate, repeatable, and slip-free focus movement. Its adjustable slide-mount mechanism can be adjusted to fit a wide variety of lens in different diameters as well. The gear drive can either be mounted on the right or left to suit your needs whether you’re left or right-handed.

All the while, the padding improves the comfort of use and the swing-away mechanism ensures speedy lens changes.

Check Product Price // Read More Reviews

CHECK PRICE  READ REVIEWS

6) Morros DSLR Rig Movie Kit

If you have very shaky hands, the Morros DSLR rig movie kit is the ideal solution. With its low price tag, it’s perfect for amateurs who want to take their filmmaking up a notch. Meanwhile, pros on a budget will love it too.

With its versatile and durable design, it even has a focus flow knob for precise control focus and optimal results.

Despite its relatively low price tag, the Morros rig is built to last with an aluminum heavy-duty frame which is robust but lightweight. It is also designed to be corrosion and rust-resistant for outdoor use. Its gear-driven, innovative design means impressive accuracy.

You’ll enjoy repeatable focus movements that improve your footage quality.

The non-slip grip on its three handles and adjustable slide-mounting design makes it even more effective. The ¼” thread also means that these DSLR shoulder rigs can be attached with ease to any tripod for even greater flexibility.

Check Product Price // Read More Reviews

CHECK PRICE  READ REVIEWS

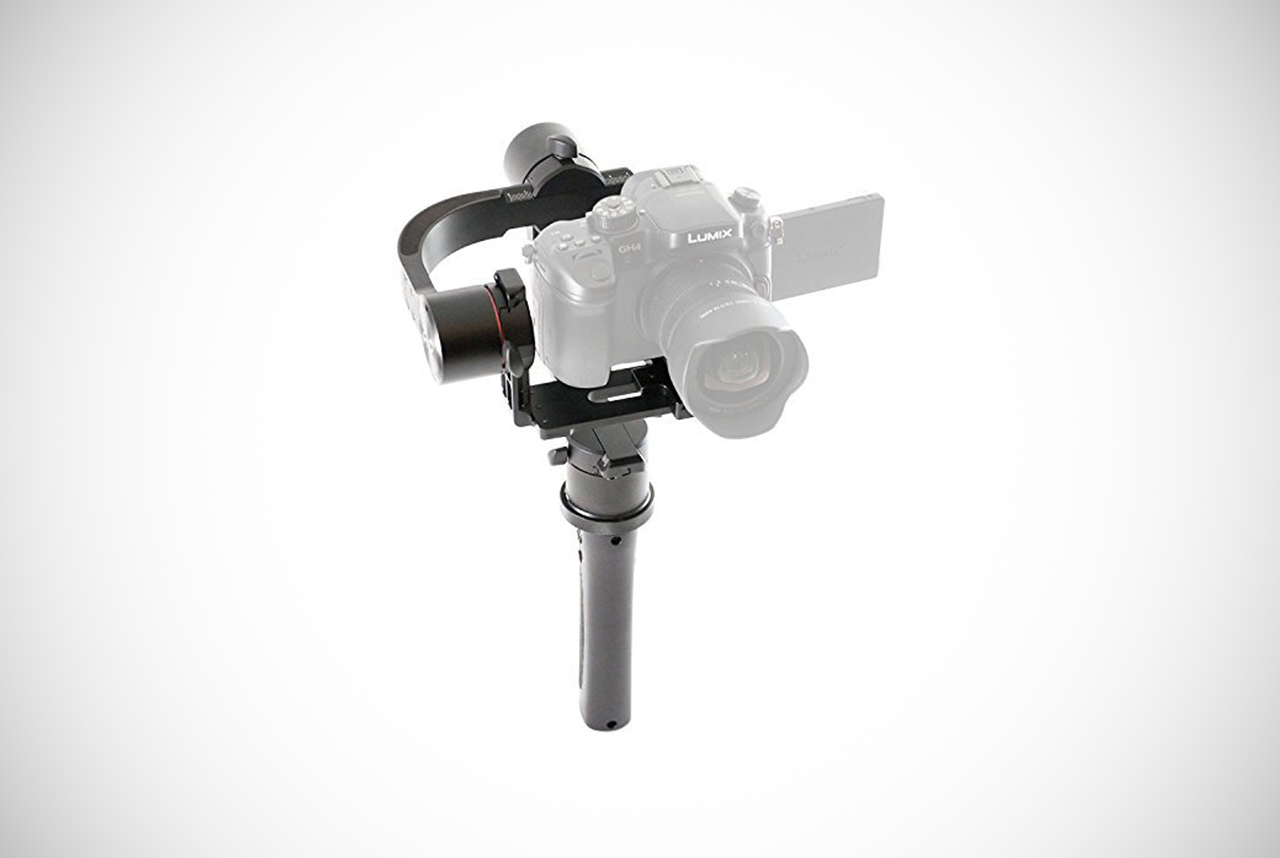
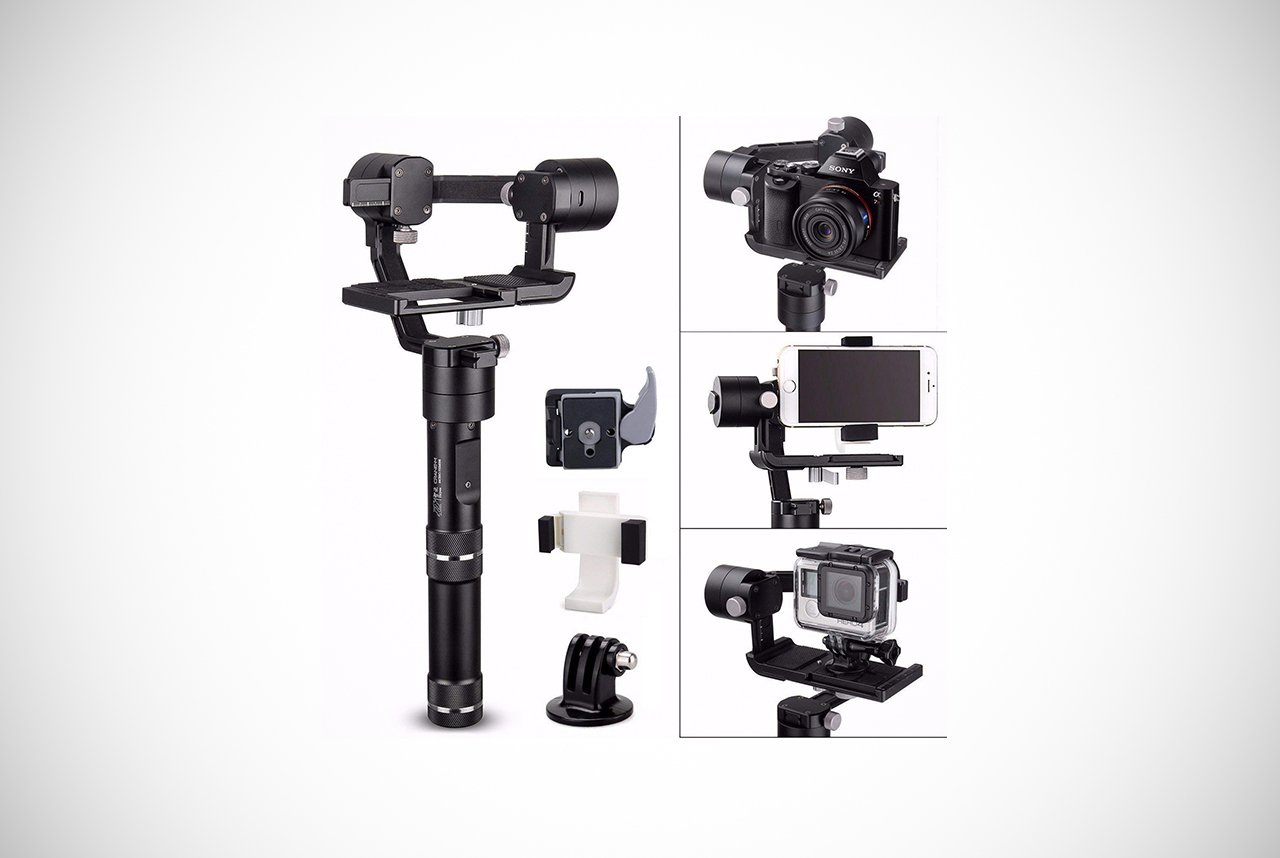
7) Movo SG100 Shoulder Rig

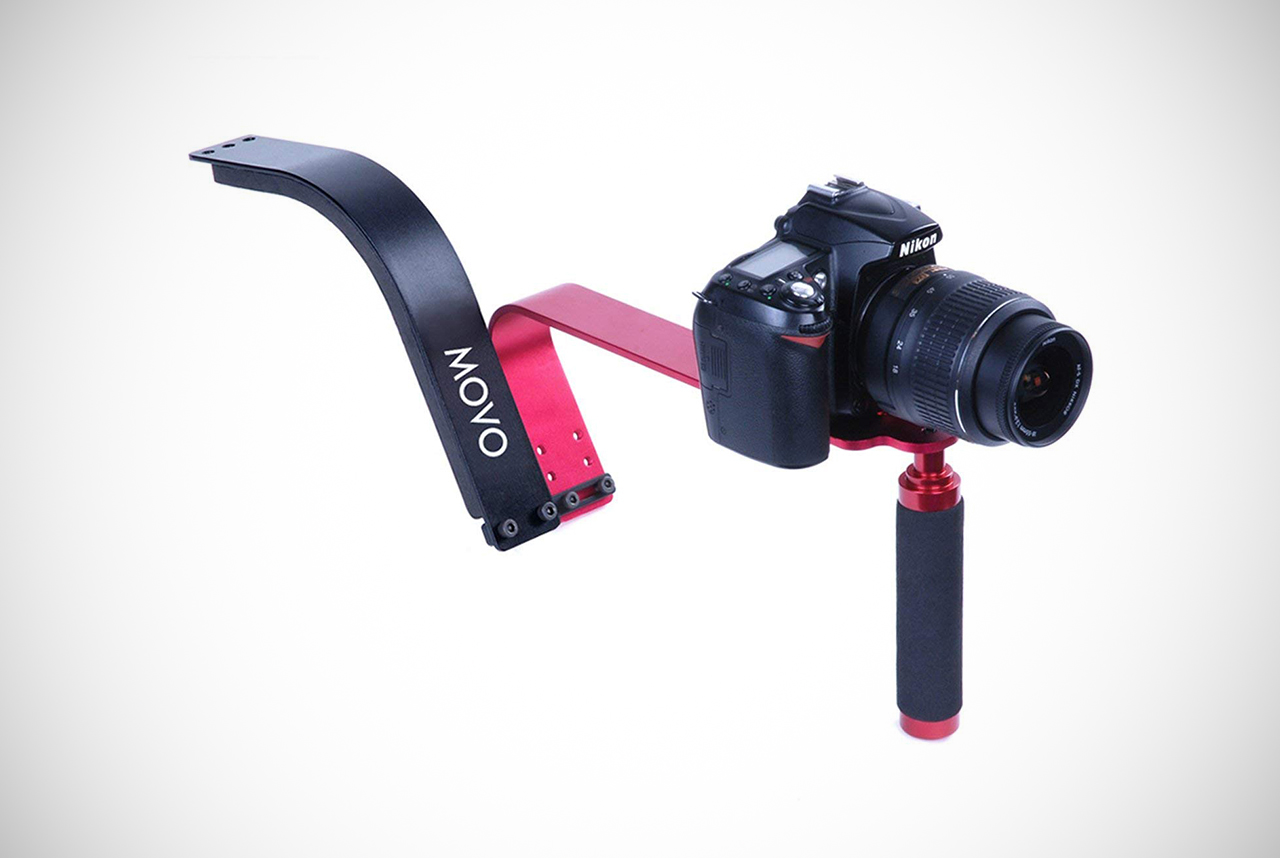
There’s no need for any of the DSLR shoulder rigs to be heavy or bulky in order to offer optimal stabilization camera. The Movo SG100 mount is easy to maneuver and helps you to save energy during a long day of shooting.

With its well-balanced and lightweight design, these are some incredibly sturdy DSLR shoulder rigs that are suitable for use with virtually every DSLR. Eliminating hand-shake admirably, it boasts a cushioned handle and shoulder pad for even greater comfort during long periods of use.

Thanks to its heavy-duty aluminum construction, this advanced support rig is very durable and capable of supporting weights of up to 5lbs. Making sure there are no worries about breaking or bending. This model also comes complete with an SGW-5 counterweight to add more stability.

Check Product Price // Read More Reviews

CHECK PRICE  READ REVIEWS

8) Jag35 KSRV2 Full Shoulder Rig

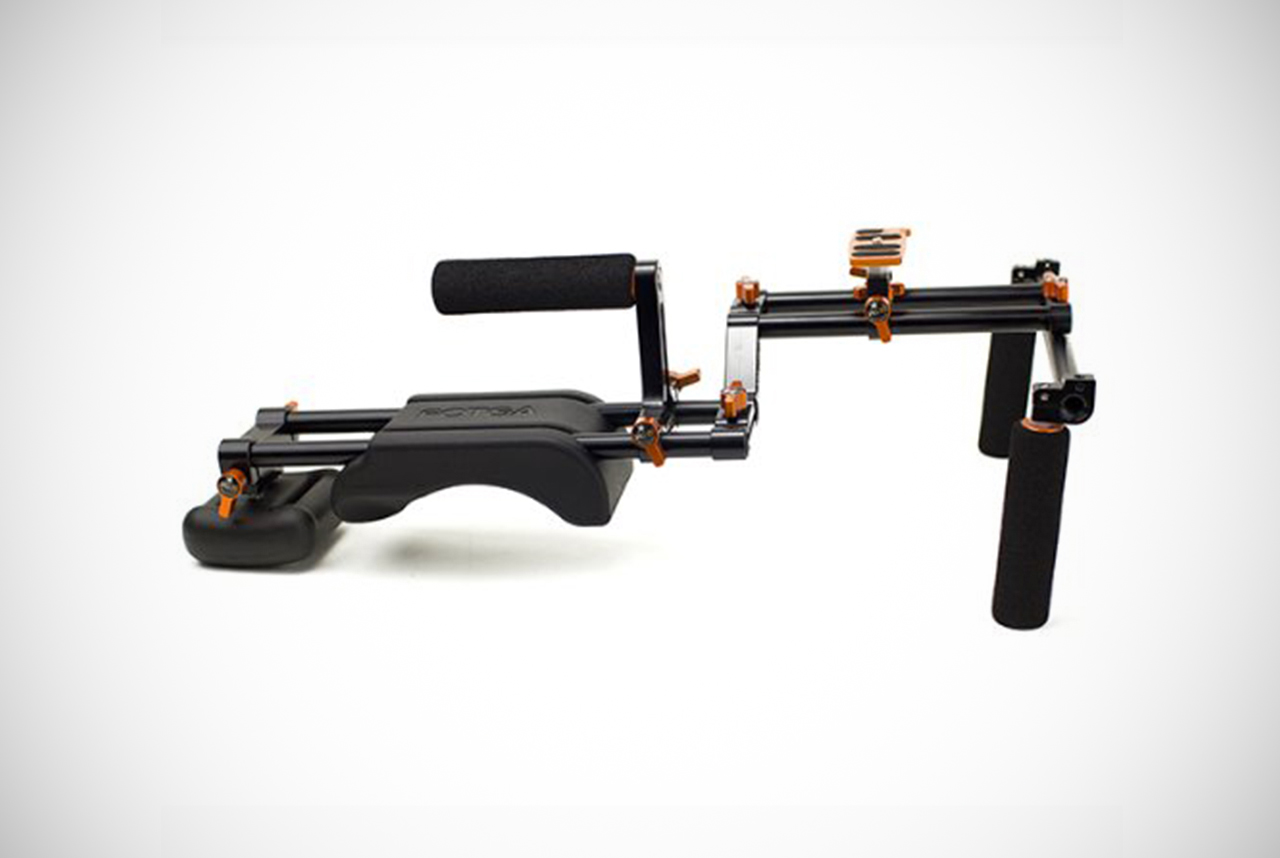
The Jag35 KSRV2 camera rig boasts active stability control for even better results. Paired with a full 2-rod counterweight system, it offers two sturdy yet wide handles. Overall, this combines for the perfect footage!

Thanks to its intuitive design, these DSLR shoulder rigs allow the operator to get to grips with the equipment quickly and easily. Despite its ease of use, it boasts plenty of impressive features. The two-rod back section ensures there’s plenty of space for attaching all kinds of accessories without affecting the balance of the rig.

The front of the rig stays uncluttered so you’ll be able to easily focus on the target of your filming. It also allows for quick lens changes and easier camera operation. With its tall and well-balanced top handle, it’s possible to easily capture low angle shots.

Thanks to its versatile design, it can be easily customized, rearranged, or upgraded to suit your individual filming needs for every project.

It’s easy to smoothly tighten to rails or to remove and add handles as necessary thanks to the array of configurations that this rig makes possible. The surface is incredibly smooth and capable of us with any brand of rods. Since the knobs are also machined for a stronger, tighter grip, you can ensure the most durable and rigid rig.

To top it off, since it is a single knob system, disassembling and assembling your equipment is speedy and efficient.

Check Product Price // Read More Reviews

CHECK PRICE  READ REVIEWS

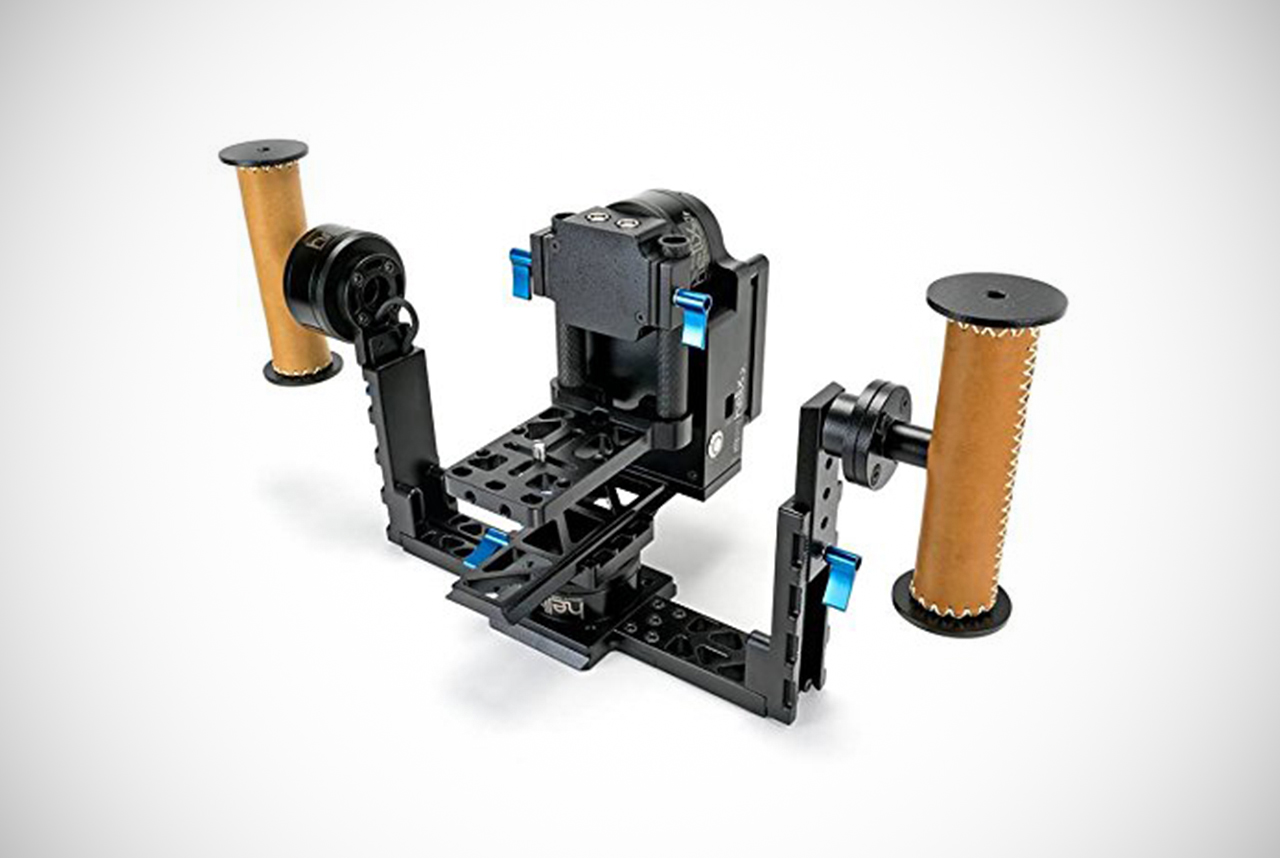
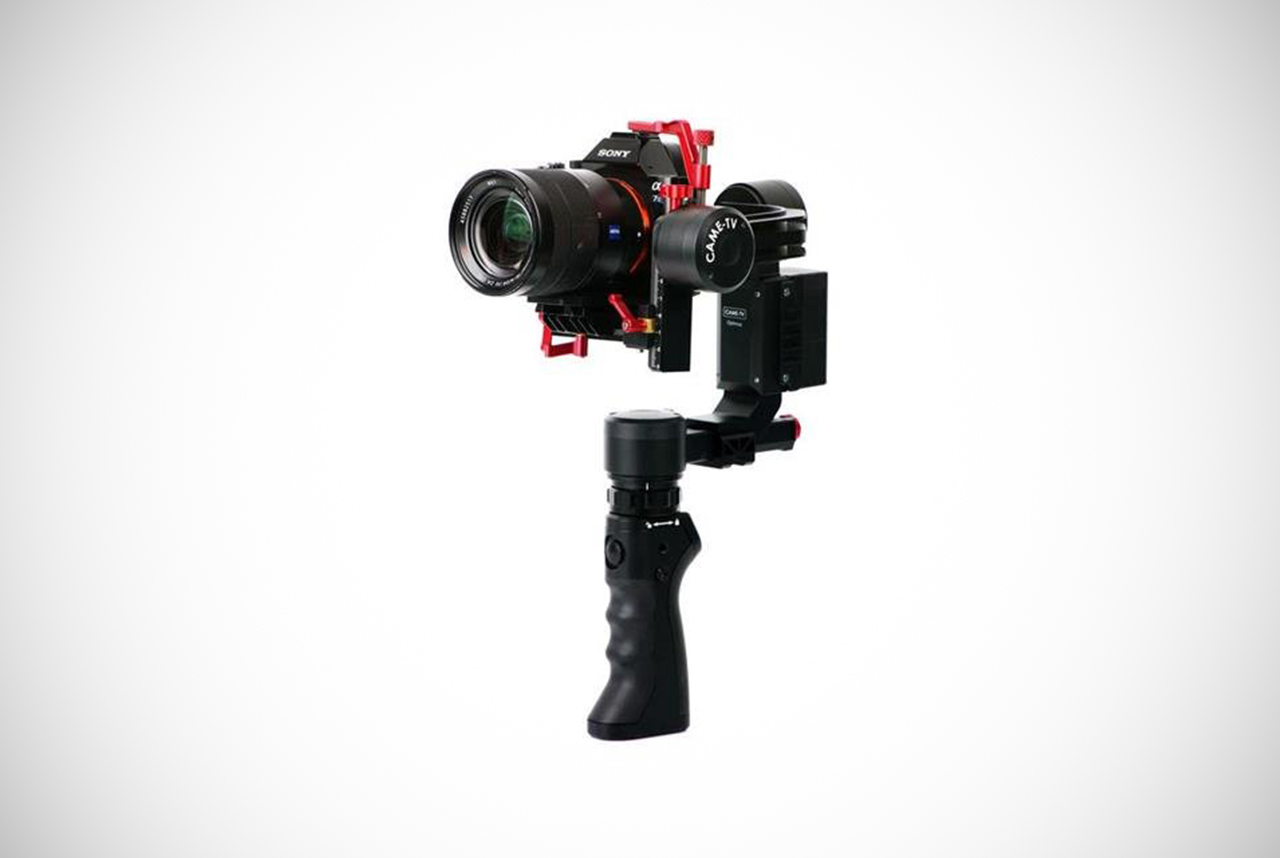
9) Ikan ELE-CINEFLY DSLR Shoulder Mount

If you’re looking for convenient DSLR shoulder rigs capable of being customized to meet your individual shooting requirements, the Ikan Cinefly is ideal for you. Its non-slipping metal rosette system ensures that the handles are very simple and quick to adjust.

This allows you to bring your arms closer into your body so you can guard against fatigue during long periods of use.

This rig comes complete with the Ikan BlackMagic cinema camera baseplate that features well-placed exhaust holes to ensure optimal airflow. This can guard against potential overheating that could cause damage to your equipment. It can also be used with the Ikan DSLR baseplate for even greater versatility and convenience.

It’s surprisingly lightweight, despite the sturdy construction. It’s designed with cinematographers and filmmakers in mind, as they need quality products yet affordable pricing. This rig guarantees a solid construction together with impressive reliability for outstanding performance.

Designed for speed and ease of assembly and disassembly, this rig works perfectly with any brand of DSLR or any other small cameras. Its small baseplate features tension knobs which are fully adjustable for high-quality, stable shots every time.

Its heavy-duty grips paired with the 18” rod system means that adding all the accessories you need will be simple.

Check Product Price // Read More Reviews

CHECK PRICE  READ REVIEWS

10) FilmCity DSLR Shoulder Support

Durable with outstanding build quality, the FilmCity DSLR shoulder rigs will give you all the professionalism you need at a price that even an amateur can afford. With its stylish and sleek appearance, it boasts a number of handy features that will take your filmmaking to the next level.

Its quick release plate is a convenient addition, taking it a mere few minutes to set up and disassemble your equipment. Its shoulder support pad is very comfortable, allowing you to film for extended periods without suffering from any strain or pain.

Meanwhile, the inbuilt counterweight ensures that you’ll be well balanced and stable.

This is the perfect piece of equipment for a run and gun shoot and offers outstanding value for money. Even though it is very lightweight to carry, it is surprisingly durable. Its adjustable brackets can be moved from 6” up to 9” to suit your requirements.

The inclusive matte box is also capable of accommodating lenses of several sizes, up to a maximum of 95mm to suit a range of needs. It also has adjustable top and side doors as well as 4×4 filter holders and a front-located height adjuster for even greater convenience.

Check Product Price // Read More Reviews

CHECK PRICE  READ REVIEWS

11) Neewer DSLR Shoulder Mount

Stop us before if we’ve mentioned the impressive Neewer DSLR shoulder rigs. Chances are, you won’t be disappointed by this product. With its durable and versatile design, this mount improves the quality of your video for even more professional filmmaking.

Designed for use both indoors and outside, this DSLR shoulder support rig has a sturdy construction that retains its shape perfectly. This is regardless of which brand of camera you use. Suitable for both camcorders and DSLRs, it’s very versatile and flexible.

Lightweight enough to take anywhere, this maneuverable rig is comfortable and won’t strain your wrists or hands while you shoot video footage. Both hands have been equipped with a rubberized non-slip grip for extra comfort and support.

Meanwhile, the angles and position of the rig can easily be adjusted to improve your video quality.

Very customizable, these DSLR shoulder rigs feature a C-shape holder that supports the vast majority of add-ons and accessories like lenses. That means you’ll get even more use from your rig. Its aluminum construction is robust and long-lasting yet surprisingly light, and it won’t break or bed over time.

Check Product Price // Read More Reviews

CHECK PRICE  READ REVIEWS

12) Ikan TT-03-TL Shoulder Mount

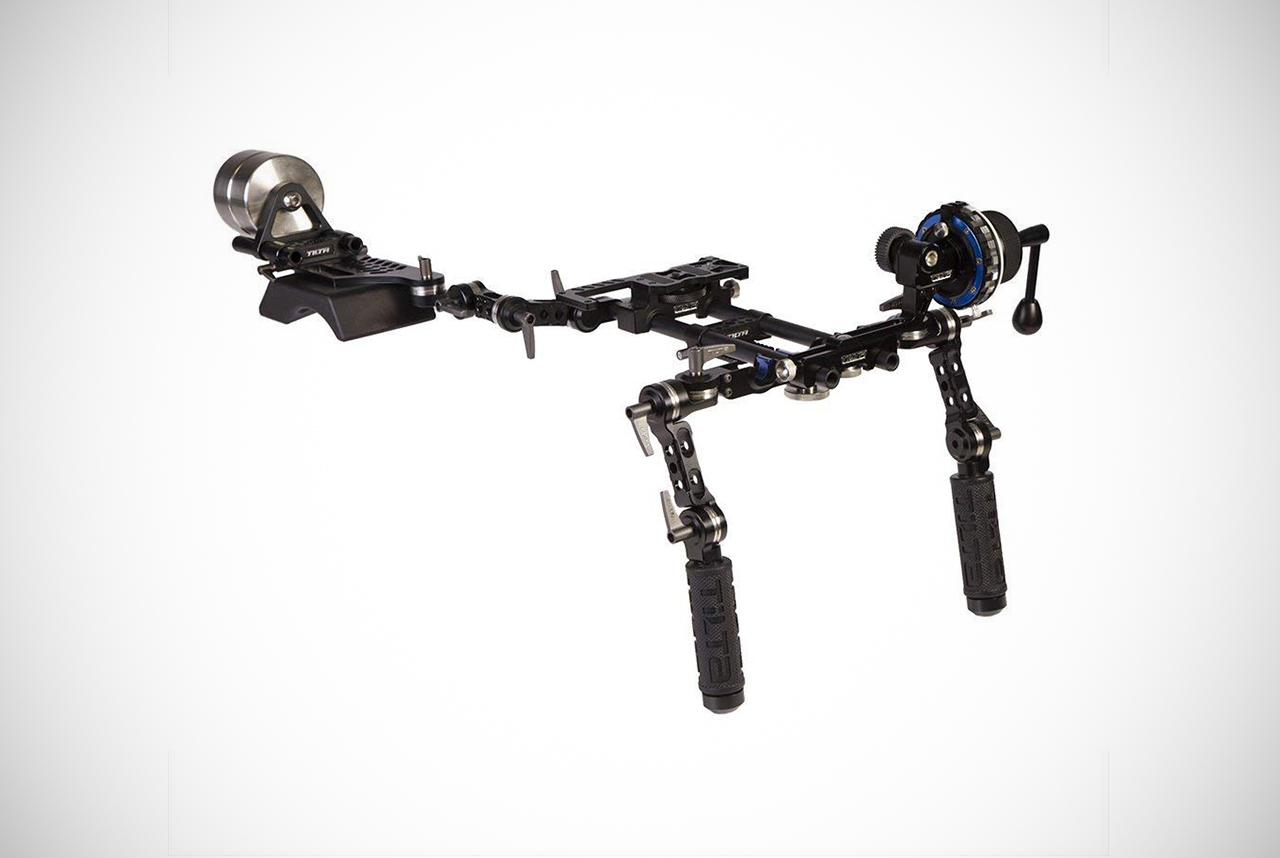
The Tilta TT-03-TL DSLR shoulder rigs come complete with a follow focus and counterweights making it a great option if you’re looking for value for money. Built with the needs of professional cinematographers and videographers in mind, this rig offers quality at a surprisingly low price.

Extremely reliable, it has been designed to be solidly constructed and it boasts every essential feature to guarantee a professional level of performance. It comes with a baseplate designed for use with DSLR cameras as well as a follow focus that has adjustable hard stops.

Compatible with virtually every DSLR camera, this rig’s baseplate can snap quickly onto its 15mm support rods for a removable registration pin. This keeps the camera firmly in place and stable during filming.

The inclusive follow focus simply snaps onto the rig, while its adjustable tension controls and adjustable hard stops ensure completer precision focusing that works perfectly with a photo-type lens. It also features two counterweights with a 15mm rod adapter to mount onto the rear of the rig allowing the weight to be evenly distributed.

This ensures perfect comfort even during a long day of filming. To guarantee this further, the rods have mounted handgrips that can be adjusted through three different points and feature texture for a sturdy and solid grip.

You’ll also benefit from a carrying case that comes free of charge with this rig. This makes it a breeze to transport or store between uses.

Check Product Price // Read More Reviews

CHECK PRICE  READ REVIEWS

13) Neewer Film Movie Video Making Kit

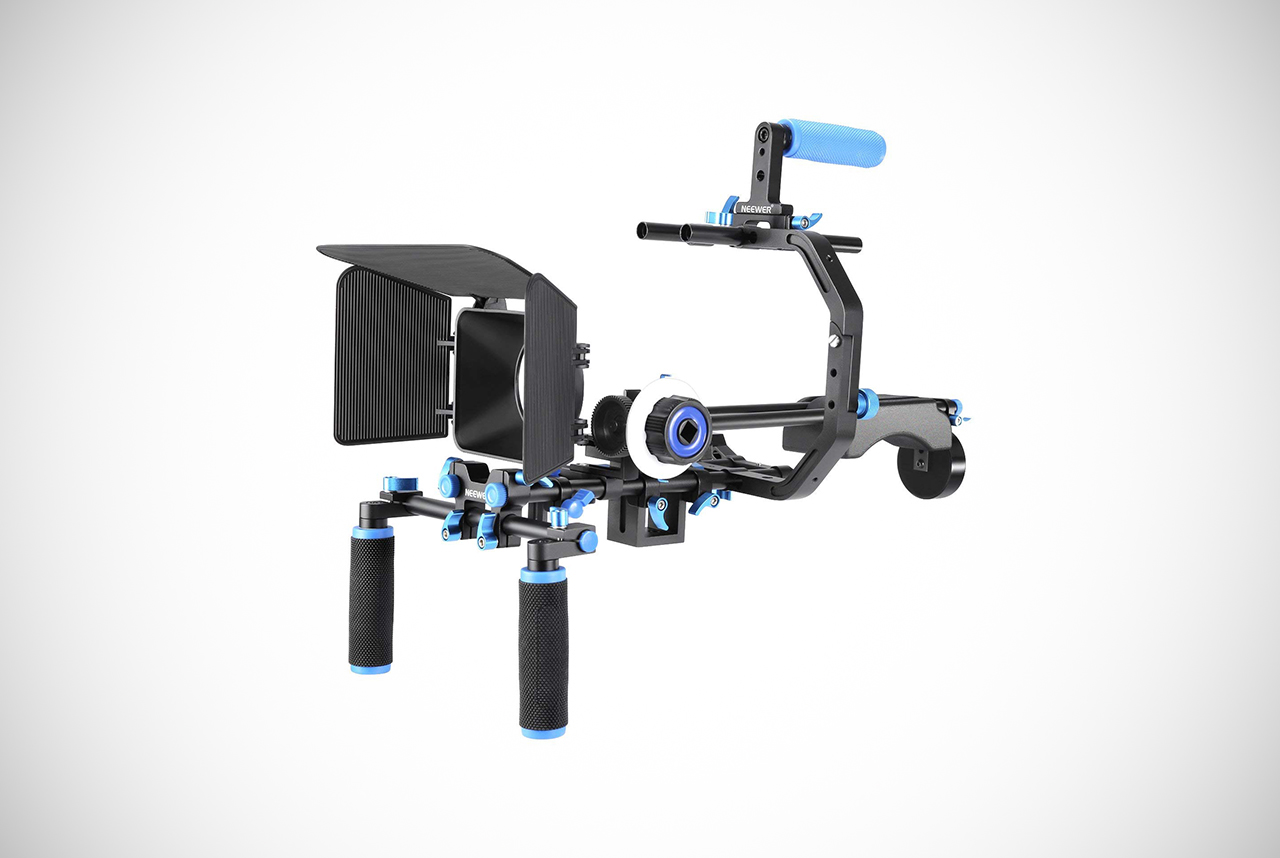
Coming from the Neewer brand, these robust DSLR shoulder rigs come with everything you need to get started with filmmaking. It comes complete with the shoulder mount, matte box, follow focus, top handle, and C-shape bracket.

Designed for use with mid-sized and small cameras, they’re perfectly compatible with your DSLR.  Plus, this model boasts with features that can help lead to high-quality shots. The extremely affordable price tag makes this a great cost-effective option for beginners who are making their first jump to filmmaking.

The inclusive C-shaped bracket features a top handle grip that can transform the rig into a hand-held, which allows for filmmaking on the go. It comes with an inclusive counterweight, which distributes the rig’s weight to better the stabilization and balance.

You can adjust the height of the matte box by up to 45mm to suit your camera’s lens size and it can also work with a standard 15mm rail for extra flexibility. The inclusive follow focus allows for more precise shooting and focusing as well, making shot options endless.

The soft shoulder pad ensures complete comfort of use, even for extended periods. Meanwhile, the dual-hand handgrip is comfortable to use all day long. Quick to assemble and disassemble, this user-friendly rig is ideal for people at any stage.

Check Product Price // Read More Reviews

CHECK PRICE  READ REVIEWS

Focusing On Shoulder Rigs

If you’ve decided you need a shoulder rig, congratulations! To us, it’s the perfect way to get the best footage and shots possible. We feel one of these DSLR shoulder rigs we highlighted above will do the trick.

Designed to take all of the hard work out of shooting, a shoulder mount will take the weight for you and eliminate all the problems associated with hand-shake.

Never again will you need to worry about the jitters after that super-strong espresso before filming!

Whether you’re a filmmaking pro or you’re just an amateur starting out on your shooting adventure, it doesn’t matter. One of these high-quality DSLR shoulder rigs may turn you into the next Steven Spielberg! You’ll love the convenience these rigs provide, especially due to their ability to work both indoors and outdoors.

On a low budget or capable of spending a little more on your filming equipment, you’re sure to find a shoulder mount among our top 13 selection to suit your individual needs. We’ve done the hard work for you. We’ve brought you all the key information you need to make a well-informed purchasing decision and avoid making an expensive mistake.

Whatever suggestion we threw out that best suits your needs, you can be convinced that you’ll be benefiting from great quality and excellent value for money. It’s time to make a snap decision!

15 Best Gimbal, Stabilizer, And Steadycam Accessories For The DSLR Camera

A

re you sick of looking at your videos and images and feeling embarrassed by their poor quality? It’s no fun being the worst photographer or videographer among your friends, but now you can cheat the system with a DSLR gimbal, stabilizer, or even a steadycam. These accessories for the DSLR camera are simple to mount.

They’re the perfect way to get rock-steady, smooth footage and shots for absolutely zero hand-shake.

It’s insanely hard to take high-quality photographs or film while also keeping the camera completely steady while you move. If you’re going for a professional look, this lack of steady nature is something that’s best avoided. You run the risk of looking like an amateur if everything looks blurry or shaky.

Tools like stabilizers and gimbals are popular choices for improving video and image production quality.

Adding one of the top DSLR camera gimbals or stabilizers to your raft of camera equipment is an affordable solution. Of course, that’s as long as you make the right choice of product. As you might imagine, there’s no shortage of different options on the market today.

As always, some are better than others. Make the wrong choice and you could end up making a very expensive mistake.

Our helpful reviews are designed for making it easier than ever for you to pick the best accessories for the DSLR camera available.

If you’re ready to take shots that would put the paparazzi to shame, read on and discover our best 15. We’re sure that whatever you’re looking for, you’ll find something in our selection of top performers on the market. Whether you’re an amateur or an aspiring professional, you’ll love our selections.

What is the difference between gimbals, stabilizers, and steadycams?

Knowing the difference between all of these accessories for the DSLR camera can be very difficult. We understand, so we felt the best way to help you out was to go over them one by one. While this won’t be massively in-depth, it will give you a small understanding of what each product does.

Meanwhile, you will learn specific information about the products below.

That way, you’ll sort of understand as we go until the very end. We’ll call this portion your “DSLR Accessory Crash Course.” Look, we never said we were good at naming things. In any case, check this out.

Gimbals:

When you need floating and smooth quality footage, you need a camera gimbal. Making quality cinematography is accessible to anybody with the right kind of one, and there are two different types to choose from. One is a simple weighted design while others are electronic.

The latter uses brushless motors and software for a more precise balance. Since 2015, camera gimbals have become cheaper and more commonly used by people wanting to keep still while taking photographs, or shooting video.

The majority feature three motors (or axis) so the camera stays steady even when rotating in any direction. These accessories for the DSLR camera are lightweight and so don’t weigh you down even when shooting for extended periods.

Stabilizers:

For those unaware, stabilizers are far different than gimbals, as they don’t have any motors and must be balanced carefully for optimal results. Stabilizers are very affordable when compared to gimbals too. However, the largest versions are also the heaviest. This can be difficult to use or hold for extended periods.

Stabilizers are designed to cancel out the effect of walking or moving on your shot’s quality. Accessories for the DSLR camera such as these are perfect for taking action shots any time. They are also ideal for using outdoors either for professional or amateur use.

Steadycams:

Steadycams have been around for a long time. Invented back in 1975 by Garret Brown, the Steadycam was innovative when it was first introduced, Even today it is invaluable in helping to keep DSLR cameras still during shooting.

There are three primary types of steadycam: the stabilizing wheel (or handles mount), the vertical steadycam that is ideal for heavier DSLR cameras, and Merlin steadycams which are ideal for use with lighter and smaller DSLRs. Though they are often like the stabilizer and gimbal, thus forgotten about more often, they are still excellent.

The wheel version is the cheapest but the footage is often not as smooth as one would want it to be. However, the other versions are just as useful. They simply will work for what you need most, but this also means that these accessories for the DSLR camera mostly come down to user interest.

What are the main things to consider when buying a gimbal or stabilizer?

If you’re ready to buy your first gimbal or stabilizer, there are lots of things to keep in mind. When making a buying decision for any accessories for the DSLR camera, you need to consider these things because of the value you’re wanting. Imagine paying hundreds to get something that doesn’t work or breaks with ease.

It would be terrible, right? Due to this, we felt it might be best to make you aware of those little things and why they are so important.

At the end of the day, if you consider them before you buy…you’ll be grateful later. Have we ever steered you wrong before? Except for that one time in Belgium, of course. We told you that wasn’t our fault. Anyway, check this stuff out below and remember it going forward.

Weight:

The majority of gimbals today are three-axis, allowing them to rotate smoothly in every direction for better stability. However, the motors add extra weight and cost while reducing battery life. This means that weight is something you have to consider when buying one.

You need to choose a gimbal that suits your camera’s own weight. Every gimbal on the market has both a maximum and minimum payload, making it vital to not exceed these limits each can handle. If you overdo it on the max side, you could risk not only breaking the gimbal but possibly that expensive DSLR camera.

Don’t forget to add the weight of your batteries, microphones, and lenses to the weight of your camera when calculating the maximum payload. Accessories for the DSLR camera such as these can be heavier or lighter depending on the make.

However, several can hold a lot of weight too.

Length Of Use:

Will you be holding your gimbal or stabilizer for an extended amount of time? You need to consider this when it comes to your stabilizer or gimbal before you buy. While it sort of goes with our last point, the length of use truly can be determined on the weight of it.

While your own cardio or strength is something to consider here too, the weight of something can be an issue on its own.

Remember that it could be very tiring for your arms if you carry a heavy model around all day. This is why you have to consider your own limitations. Meanwhile, the weight itself is a factor only because you’re literally having to carry something.

Regardless of size, that is still something you have to do.

For some things like this, there are holders that you can use to hold them up. This could be useful for professionals who would use these accessories for the DSLR camera more often.

Camera Attachments:

Some models are only designed for smartphones or GoPros, so you need to ensure that the one you choose is suitable for use with your DSLR. Usually, choosing a model with a ¼” thread allows you to attach it easily to any standard DSLR camera.

The bigger note is that people often overlook what their needs are and simply just click and buy.

If something works for the DSLR, it’ll be labeled as such. That said, you should be able to find this right away when it comes to your needs.

Build Quality:

Cheap models are usually made from cheap plastic and that isn’t ideal if you’re planning to use yours on the go or very frequently. Due to more frequent use, damage could easily occur. Eventually, you’re going to use it for something that it eventually won’t hold up against.

On the go, you’re risking the same issues. If you’re using one of these accessories for the DSLR camera for storm-chasing…chances are they shouldn’t be made with cheap materials.

It’s best to look out for a model which is manufactured from either aircraft-grade aluminum or nylon-reinforced plastic. Both will be more durable and remain strong through anything you might need it to do. Chase a storm, record a football game from the sidelines, you name it. This material will hold up.

Battery Life:

If you’ll be using your gimbal for extended periods while out and about, you’ll need to pay close attention to its battery life. Some models have a life of more than 20 hours, which is ideal for full days of filming. Obviously, when it comes to anything you’re using on a shoot, the battery power is essential.

Clearly, 20 hours is great, but we also advise you get more than one battery for anything needing one. Preparation is useful. Some gimbals have removable batteries, making it ideal to have those back-ups around.

Carry Case:

Not every gimbal or stabilizer comes with a carrying case, however, it might be something that’s worth considering. A dedicated carry case will make sure your equipment doesn’t get broken by being carried in a bag that isn’t designed for the purpose.

This is useful for a number of reasons, and we just addressed one regarding the fact that it keeps the equipment safer.

How do these accessories for the DSLR camera protect your camera? Ease of the carry is one way, just as an example. When in a bag, it won’t be moving or awkwardly carried. Meanwhile, any removal parts won’t disappear on you and become lost.

This allows you to keep everything in one area, allowing the smallest of parts to never leave your bag. Well, until you want them too, of course.

Reliability:

Being reliable is essentially an easy thing to understand. When you think about it, the term in itself is not hard to comprehend. You want something you can rely on, therefore something that won’t let you down. In the world of accessories for the DSLR camera, that means you get what you pay for.

Sure, you could go the cheaper route. However, you get what you pay for in the essence that cheaper material creates a cheaper product. If you want it to last, the model you need to be concerned with is the one that best fits your needs and ONLY your needs.

You’ll then want proper material not made of hard plastic to be present. If there is no metal of any kind near this item, it likely isn’t made well enough to last.

Waterproofing:

Some of these accessories for the DSLR camera we’ll go over today, as well as ones we may not, are designed to be waterproof or water-resistant. Of course, those two terms are very different. Waterproof being that it be underwater for extended periods of time without any major risk of it damaging the product.

Meanwhile, water resistance means it can be for certain periods of time and often only up to a certain foot level.

The waterproof kind would be the type you see people use in underwater shoots. Documentary types may use it to film something that is going to be shown on Discovery Channel next year. Water resistant material would be used for things like storm-chasing or anything involving rain.

Possibly, it could even do light underwater work too.

Set Up Time:

Who wants to spend a ton of time setting up a stabilizer or gimbal? No one, that’s who. That means it’s important to pay close attention to set up times. You won’t want to waste valuable time if you’re under time pressure in setting up your equipment.

This can be a make or break thing for some items in this field, as it rightly should be.

Setting anything up for an extended period of time takes valuable time off the clock. That said, you may struggle when you first buy and begin using a product. Getting used to using it will make it easier for you to set it up each time. The average you need to have something ready to go is somewhere under 2 minutes.

If that isn’t possible, it isn’t worth buying.

Compact Design:

The compactness of a design can be extremely crucial. If you’re planning on traveling with your equipment you need to think about its size and how easy it will be to transport with you. The compact nature is not exactly 100% needed for these things, as many great models can be larger.

However, if you’re going to travel a lot on planes….this is a big thing to consider.

The reason has to do with what can go on a plane in the carry-on versus what cannot. Airlines are well-known for losing luggage. This means anything like a camera and/or its equipment needs to be carry-on if you can manage it. Most of the time, it’s possible.

We have a lot of accessories for the DSLR camera on our list that is small enough to take anywhere.

That said, most should be compact enough to fit what you need. Those that are not exactly compact are present on our list of great accessories for the DSLR camera for being just that, great.

Budget:

Although quality is obviously the most important factor to consider, you also need to pay attention to your budget. Obviously, you want to avoid buying the cheapest model on the market. However, you need to always try to buy the best you can afford.

If you feel that the only types you can buy are made very cheap…then save your money.

It’s okay to wait, as you’ll have the end result of a great product that’ll more than pay for itself after the many uses you’ll have. It’s like buying a $500 Windows laptop every year for 5 years instead of a MacBook once. Sure, the MacBook may be $2,000.

However, if you’re buying 5 laptops at $500 then you’ve paid as much or more than you would have for the ONE MacBook.

The same premise is here too. Wait to buy if you must. If you need something right away, just keep in mind that the cheaper models are made to be like disposable cameras. They were never meant for long-term professional use.

How do I properly use a gimbal or stabilizer?

Gimbals and stabilizers are pretty simple to use and they’ll make a big difference to your shooting. Well, as long as you know to use them of course. They can give your shots more creativity, exploration, and life overall.

However, it’s important to recognize that there are lots of nuances that you need to think about when you shoot with a gimbal or stabilizer.

These products are specially used for certain reasons. That means the jobs they do are obviously useful. However, it also means that you need to keep a lot in mind before buying and using them. We thought we’d go over a few.

Balance:

Whenever you use a stabilizer or gimbal, a top priority to consider is the balance. Most small models don’t need you to do a ton to balance them properly. Usually, they can be set-up relatively quick and you’ll balance everything up without much issue.

However, larger models need you to work a bit more to produce the best results. What we mean is this.

Larger models typically are going to be so large that they need to be balanced up special, with real dedication put into it. Imagine it like the game you played as kids involving coins. You’d try to balance a quarter, but for the life of you, there were some quarters much harder to balance.

It was not the quarter itself sometimes, but the surface it was on.

Meanwhile, the penny was much easier to balance as was the nickel. One due to their size and the other due to the thickness of the coin. The bigger the coin, and the thinner it was, the harder it would be to balance. This is the same situation.

Smaller is easier and takes less time while larger takes more time. The more you do this, however, the easier it gets.

Carrying Style:

There are several ways to carry a gimbal or stabilizer. If you hold the handle at your chest height you can either keep the camera upright and below the handles or inverted and above the handles. The third possibility is grabbing its center handle, then going lower towards the ground.

Some models even allow you to grab the side handle, turning it upright to briefcase mode. Inverting the camera lets you get higher perspectives or overhead shots. All of this while using the center handle. This is ideal for those interesting shots where you have to follow someone as they walk, filming their feet.

The briefcase mode is perfect for low-angle shots.

Controlling Your Camera:

This is vital when using a gimbal or stabilizer. If you tilt or pan, your gimbal will tilt or pan the camera. Some models feature thumb controls, however. This is extremely useful, trust us on that. With them, you can control your camera no matter where you’re facing.

Some models also allow you to refine and adjust the smoothness using an application. Today we have truly graduated to the “there’s an app for that” line. Welcome to the future!!

Camera Movement:

You can use your gimbal or stabilizer to experiment with a wide range of movements and shots. A dolly shot can easily be obtained by walking, running, or biking while holding the camera. A jib shot is much more conveniently since you can get a lowering or rising shot by simply squatting or bending.

A pass-through shot is also possible by fitting through smaller spaces thanks to the compact size of a gimbal for DSLR cameras. The lack of shake allows for these shots to come in smoothly, regardless of how you choose to use them. Truly, you can do whatever you want and the shot will come back looking great.

Just don’t jump off any roofs, alright?

1) The Roxant Pro Video Camera Stabilizer

The Roxant Pro stabilizer weighs under 2lbs, making it very easy to handle even for longer shoots. As an added advantage, it has a comfort grip handle that makes it easier to hold for extended periods. Promising outstanding balance, the Roxant Pro is a top choice for performance.

It’s also very affordable, with an offering of a great lifetime warranty by the manufacturer to give you extra peace of mind. Not all accessories for the DSLR camera are going to get this type of warranty, so Roxant truly went above and beyond.

Its pro-style stabilization ensures less shake and motion for a shot, all while the customized lower arm material ensures that sway won’t be a problem. An interesting note is that this was designed for DSLR. However, it can also work with a wide range of other cameras from smartphones to GoPros.

Overall, this stabilizer can support a payload up to a maximum of 2.1 lbs. It also offers three separate counterweights so you can get a price adjustment.

Whether you’re shooting in a tight space or while moving, this stabilizer will do the job admirably. You can even benefit from a free video training tutorial to get you started. With its superior solid construction and design, this is a model built to last. True quality comes from this item, that’s for sure.

Check Product Price // Read More Reviews

CHECK PRICE  READ REVIEWS

2) DJI Ronin-M Gimbal Stabilizer

The DJI Ronin-M 3-Axis Handheld Gimbal Stabilizer allows you to capture impressive shots you may have otherwise been unable to do. Able to effortlessly switch between three different operation modes with no need to adjust settings, this stabilizer weighs just 5lbs.

This means it won’t weigh you down during a long day of shooting.

This model is surprisingly sturdy, despite its design of being easy to transport. It’s capable of supporting a camera setup as heavy as 8lbs. As an added bonus, it couldn’t be quicker or easier to set this stabilizer up.

In fact, you can likely begin shooting professional-quality footage in under five minutes. All you need to do is mount your DSLR, balance it quickly, then press a button.

Featuring upgraded Auto-Tune Stability, this stabilizer boasts precise technology for balancing and turning without any need for tools. Allowing you to get tight shots that look amazing. It has also been designed with a top handle, capable of being twisted off to make it smaller. This makes it easy to unpack or pack up in seconds.

These accessories for the DSLR camera are durable enough to be used in rough environments, with a strong frame made from a quality single piece of fine-tool magnesium.

The magnesium construction ensures an exact shooting experience without compromising on maneuverability. The U-shaped arm that holds the camera plate eliminates any common imperfections. All for greater reliability and stability with no potential of any pieces moving apart or coming loose.

Check Product Price // Read More Reviews

CHECK PRICE  READ REVIEWS

3) Zhiyun Crane V2

The Zhiyun Crane V2 has been designed for use with DSLR cameras, coming in at a weight between 0.77lbs and 3.96lbs. This gives you quite a range of devices to choose from. It’s actually the first gimbal to ever be handheld, as well as feature CCI (camera control interface).

These accessories for the DSLR camera allow the focus and shutter of the camera to be controlled using buttons located on the handle of the gimbal.

There are three different operational modes to select from while the simple and quick mounting system requires no tools. Meaning reduced set up and pack away time. With its three-axis 360-degree rotation, it’s possible to enjoy impressive and smooth filming in any direction without any shake or wobble.

Every motor of this gimbal has automotive grade magnetic encoders, ensuring it can sense the smallest change intervals of as low as 0.02 degrees. This model was the first to achieve three 32-bit MCUs, which run parallel at 4K HZ. All of this allows it to film low to high angle shots with ease.

Paired with an efficient proprietary control algorithm, the powerful microcontroller is paired with an advanced servo-control algorithm. Allowing it to compute or control the camera with an accuracy of 0.001 degrees, in just 0.25 of a millisecond.

You can also connect the inbuilt wireless control model with the smartphone app or Zhiyun’s proprietary gimbal remote control. Supporting two 25400mAh batteries that come included with the package, it provides up to 12 hours of operating time.

Check Product Price // Read More Reviews

CHECK PRICE  READ REVIEWS

4) Neewer Carbon Fiber Handheld Stabilizer

Surprisingly lightweight yet capable of a 6.6lb payload, the Neewer Stabilizer is terrific. Designed to be handheld, it’s also made specifically for the DLSR and happens to be one of the best accessories for the DSLR camera today

This compact system means a dolly or tripod are a thing of the past for creating a smooth video on the move.

Featuring a camera platform that boasts y and x adjustments, the Neewer stabilizer also has several mount holes. These allow you to position your camera in many different ways. Its weight plate has four separate weight discs, making it easy to balance the camera more effectively.

You can either remove or add to these depending on your needs due to screw threads for easy fitting and removal. Suitable for use for low and high angle shooting, this stabilizer has low friction joints and high precision bearings. Its stretch adjustment also improves the weight ratio, reducing the clump weights massively.

There is also a quick release plate, useful for any camera that has a ¼” or 3/8” thread. As the bidirectional base plate also has a fine adjustment system it’s possible to freely adjust it in any direction.

Made from strong carbon fiber, this stabilizer is durable and solidly built for a long lifespan. Meanwhile, the grip has a comfortable sponge covering for an easier handling experience. You’ll also benefit from a free carrying back for easier transportation and storage.

Check Product Price // Read More Reviews

CHECK PRICE  READ REVIEWS

5) Glide Gear Geranos VII Stabilizer

This DSLR three axis gimbal stabilizer has been designed to allow for impressive cinematic style videography while on the move. All in one conveniently small and light package. With its advanced encoders, the Geranos stabilizer offers a limitless range of camera movements.

Meanwhile, it only weighs 2.8lbs without its batteries.

Designed to be small enough to stow away in your backpack, this lightweight model won’t be hard to deal with for long periods. It’s also simple enough to carry around anywhere you need to go.

It couldn’t be easier to operate with its single button as well. These great accessories for the DSLR camera feature full 360-degree rotation for smooth action shots in all directions.

It offers a number of other excellent benefits you will love. Those include three programmed controls, the possibility of toolless balancing to save on time, and arm and vest mounting for ease of use on the go. It comes complete with a set of batteries that can provide up to eight hours of continuous filming on a single change too.

If that’s not enough, it also comes with a hard case for convenient carrying between locations.

Check Product Price // Read More Reviews

CHECK PRICE  READ REVIEWS

6) Ikan Beholder 3 Axis Gimbal Stabilizer

The Ikan EC1 Beholder Mirrorless 3-Axis Handheld Gimbal Stabilizer has been specifically designed to meet the needs of professional filmmakers. It offers them an amazing single hand-held stabilizer to suit small and medium-sized DSLRs with a weight of up to 4.5lbs.

Yet these accessories for the DSLR camera can be used by regular, amateur filmmakers too.

Lightweight and simple to use, the Beholder EC1 can easily be carried around. It comes complete with a free carrying case to make that even easier. Made from strong and durable aluminum, this rugged stabilizer is ideal for use outdoors.

Meanwhile, its 360-degree rotational ability ensures smooth filming at all angles.

Featuring an OLED display screen, it’s possible to see which operating mode is being used. All while its eco-friendly battery indicator shows when a recharge is required. This model is also equipped with a 12-bit encoder and 32-bit controller for excellent performance and professional-style filming.

Check Product Price // Read More Reviews

CHECK PRICE  READ REVIEWS

7) Moza Lite II Motorized Handheld Gimbal

The MOZA Lite II: offers an outstanding stabilization system for professional quality film production. With its lightweight yet very solid frame it weighs just 4.8lbs yet supports an impressive maximum payload of up to 11lbs.

Supplied with its own hard carry case, these accessories for the DSLR camera couldn’t be easier to take wherever you need to go. It also comes with a battery charge and camera mounting plate so you can get up and running quickly.

The Moza Lite II is compatible with the Moza Assistant app for easier control, which has become quite popular among gimbal accessories as of late. It is also protected by a 12-month manufacturer’s guarantee for your peace of mind. Its battery life is reasonably long, lasting for around 6 hours before requiring a recharge.

Quick and easy to set up and take apart, this impressive piece of equipment will ensure smooth shooting and high-quality footage.

Check Product Price // Read More Reviews

CHECK PRICE  READ REVIEWS

8) Neewer Aerospace Handheld Grip

This specially designed dual handheld grip is perfect for use with the Neewer Crane/Crane M 3-Axis, Zhiyun Crane, or Zhiyun Crane M 3 Axis Stabilizers. Allowing you to quickly shift between two-handed and one-handed operation during shooting, this camera grip has a non-slip design to allow for easier holding and operation.

Durable and lightweight, these accessories for the DSLR camera are made from aerospace grade aluminum alloy for easier portability yet robust construction. Designed to help you save time and energy while filming, this model features two ¼” screw holes.

This makes it easy to attach further accessories onto your camera for even greater shooting convenience.

Check Product Price // Read More Reviews

CHECK PRICE  READ REVIEWS

9) Letus Helix Jr Aluminium Brushless Gimbal

If you’re looking for the most lightweight and compact three-axis gimbal, the Letus Helix Jr is a great choice. Having been fully optimized for use with DSLR cameras, this model features a flat-bottomed design. Allowing you to easily set it down on any surface with no need to use a stand.

Ideal for both professional and amateur use, its small dimensions make it suitable for fitting easily into backpacks even without disassembly. This means you can shoot virtually instantly without waiting for setting up time.

Made from lightweight magnesium alloy, these accessories for the DSLR camera isn’t only durable and easy to hold and use for extended periods. It also has improved vibration dampening properties for even less camera shake during use.

Weighing only 4lbs, the Letus Helix Jr also boasts encoded motors for even higher level performance.

Check Product Price // Read More Reviews

CHECK PRICE  READ REVIEWS

10) Pilotfly H2 Handheld Gimbal

Introducing a new and more flexible way to shoot video, the Pilotfly H2 gimbal is powerful, efficient, and effective. It’s designed to be the best single-handed gimbal for use with DSLR cameras. It features an ergonomically designed lightweight handle, which basically means everything involved in it is efficient with no random issues.

It’s equipped with a user-friendly four-way joystick, battery/power status, LED light, and mode button. These accessories for the DSLR camera also have brushless motors with fully integrated MCUs.

Using this gimbal, you can turn both of the axes a full 360 degrees without worry of possible damage to the cables. The three-axis is made from CNC aluminum alloy for extra robustness without adding additional weight. Surprisingly, the gimbal can still support a maximum payload of 4.8lbs.

Meanwhile, its battery lasts up to an impressive 26 hours of continuous operation.

Check Product Price // Read More Reviews

CHECK PRICE  READ REVIEWS

11) Beholder DS1 Handheld Stabilizer

The Beholder DS1 Handheld Stabilizer is one of the best accessories for the DSLR camera on the market today. This model allows you to rotate a full 360 degrees without dead augmentation. The design of the stabilizer was to support the GH series scroll and external remote control.

On top of this, the Beholder DS1 is capable of supporting a maximum DSLR camera weight of 3.8lbs. This makes it light to carry, however, the max weight would be low for bigger cameras. Possibly even for bigger projects too. However, stabilizers like this are effective with smaller cameras.

Usually. DSLR cams are light anyway.

Promising a fast response, the DS1’s system has dual sensors together with improved accuracy and stability. It is the first dual-level sensor 5D handheld 3 axis gyro stabilizer in existence. Suitable for all kinds of angles and shooting styles, this model comes with its own carry case for easy transportation and storage.

It is also very lightweight at only 2.2lbs even when the battery is installed. The quick release plate makes it easy to set up. This allows you to not waste time on setting up the thing or packing it away after you’re done.

Check Product Price // Read More Reviews

CHECK PRICE  READ REVIEWS

12) FeiyuTech a2000 DSLR Camera Gimbal

Ideal for professional use, the FeiyuTech a2000 has integrated anti-shake technology for even easier stabilization.  This model can support a maximum payload of 2.5kg (5.5lbs). Thanks to the downloadable firmware, you can keep your purchase up to date and functioning at an optimal level.

Thanks to the easy-to-use damping sliding arm, it couldn’t be simpler or more convenient to adjust the balance. Regardless of the weight of your attached DSLR, this will work perfectly. Meanwhile, the built-in shutter cable allows the gimbal and camera to be connected.

This allows you to control the zoom and shutter buttons remotely.

As an added bonus, the downloadable app allows you to do time-lapse photography as well as automatic shooting to be set up remotely. Truly great accessories for the DSLR camera, this model also features a detachable handle. This allows you to add other accessories in the future.

It also makes it simple to switch between single and dual handle options.

Check Product Price // Read More Reviews

CHECK PRICE  READ REVIEWS

13) Zhiyun Crane M3 Gimbal

With a battery life that lasts for a full 12 hours, this gimbal will remain functioning without needing a recharge for nearly a full day of filming. These accessories for the DSLR camera allow for a handled and inversion style shoot, with a 360-degree rotation offered when it’s in locking mode.

Thanks to the large and flat area of its 4-way rocker, it couldn’t be easier to control speed and direction precisely. It also offers a more convenient and comfortable operation than the standard 5-way joystick. Due to tools not being required to mount the camera, adjusting the balance is quick and simple to achieve within s minute.

The downloadable compatible app allows for convenient remote zooming out and in as well. Thanks to the ¼” screw at its base, this model can be used with extension rods and tripods to suit different needs. Though only capable of supporting a maximum weight of 1.4lbs, this is truly a professional quality model that produces shake-free results.

However, we’d advise you only use it with the smaller DSLRs. For, well, obvious reasons.

Check Product Price // Read More Reviews

CHECK PRICE  READ REVIEWS

14) Sutefoto S40 Handheld Stabilizer

The Sutefoto S40 Handheld Stabilizer is a quick balancing model with the capability of shooting 360 degrees completely stable. Offering a quick release plate, your camera can be set up with it and packed away in under 30 seconds. It’s also capable of supporting any DSLR camera, with most never exceeding 3.3lbs.

With its lightweight and compact design, this model can easily be carried anywhere you need to go. Meanwhile, its aluminum construction is black powder coated to protect against rust or water damage. It is equipped with six removable weights that you can adjust to suit your filming needs.

These accessories for the DSLR camera are perfect for both low and high shooting, offering low friction joints and high precision barrings. Meanwhile, its anti-skid handle is a non-slip version, giving a comfortable hold for extended periods of time.

It even comes with its own carrying bag for proper storage and easy transportation.

Check Product Price // Read More Reviews

CHECK PRICE  READ REVIEWS

15) Came TV Optimus 3 Axis Gimbal

The CAME-OPTIMUS gimbal features encoders for professional level performance and even allows for single-handed operation. With its new frame design, it can be operated in an underslung or inverted option, while its motor can rotate through a limitless 360 degrees.

Of course, this offers even more flexibility and range during operation.

With a battery life that lasts up to ten hours on one charge, these accessories for the DSLR camera come complete with a wireless joystick remote. This allows you to access the gimbal and control it without a need for being near. It also offers a quick release plate that ensures little to no adjustments.

This allows a faster and simpler camera balancing operation. There is also one free additional battery supplied with each model for an even longer battery life. Thanks to the 12-month manufacturer’s warranty, you can have complete peace of mind in your purchase as well.

Check Product Price // Read More Reviews

CHECK PRICE  READ REVIEWS

A Snap Decision

If you’ve decided that a gimbal or stabilizer is the perfect tool to get impressive footage, you need to know how to make the right choice for sure. We felt we offered the most useful advice you’ll need to make the perfect decision to suit your needs.

You might be an amateur who’s excited to start a YouTube channel of your very own, or if you might have professional ambitions. You need a seriously impressive piece of hardware, and we understand that around here. That said, you’ll find something on our list to accommodate your requirements.

We make it easier than ever for you to make an informed choice so you won’t end up making an expensive mistake. Buying any accessories for the DSLR camera can be very difficult to accomplish, regardless of what they are. We feel your pain.

We did the research for you and that means you’re going to really love the choices we went with.

Channel your inner filmmaker with one of these cutting-edge stabilizers for your DSLR camera today. Then enjoy outstanding footage each and every time you set up a shot. Maybe we’ll see your stuff making millions of views on YouTube or making billions at the box office one day.

Good luck, Mr. Director!

Top 14 Shotgun Microphones For The DSLR Camera

A

re you ready to become the next hot thing on YouTube? Finding a way to improve the sound on your video must be pretty high on your agenda. Whether you’re vlogging or making your own home videos, you’ll run into times when your best sequence can be ruined. All due to audio that is filled with background noises, static, or strange distortions. DLSR Cameras are popular in this community. However, most need shotgun microphones for the DSLR camera to help them.

Unfortunately, your bad audio is likely to be the result if reliance on your camera’s inbuilt mic to record your sound.

If you’re shooting video on your DSLR camera, an external microphone is the only way to go. An external mic will filter out all those unwanted noises, focusing only the sounds you need to capture for your high-quality video. Shotgun microphones for DSLR cameras are the perfect solution.

They are designed to be lightweight, simple to use, and sturdy. These microphones are an ideal option for any would be Vlogger, effectively capturing dialogue, interviews, and voice-overs effortlessly.

How do you go about going through the many shotgun microphones for the DSLR camera to find one for your next project? There are lots of different options out there. As you might expect, not all of them are going to make your audio sound like the Hollywood blockbuster that you had in mind, however.

To save you making an expensive mistake, we’ve done all the hard work of finding the best camera microphone options on the market so you can make an informed decision. Are you ready to channel your inner Steven Spielberg? Then read on and discover the top 14 shotgun microphones for the DSLR camera.

What are the different types of mics for a camera?

There are a number of different microphones for various types of camera. However, each one is best suited to a particular filming environment. This is also something crucial to the camera you are using. There are several shotgun microphones for the DSLR camera out there.

However, if you pick one made for the Sony Handycam, it simply won’t work for the DSLR.

This is something a lot of nieve or less tech-savvy people assume when they jump into stuff like this. They buy products that do not work together. We did not want to do that to you, so every shotgun microphone we highlighted will go with the DSLR camera specifically.

However, it’s more than just what type of camera you have. It’s also about the mic itself.

See, there are several different microphones available. All do different things. Some of them are heavily needed to get the kind of audio you want and need from it. Others are unneeded or simply overkill. That said, we wanted to make you aware of a few of them.

Shotgun Microphones:

First up revolves around what this list is all about, the Shotgun microphone. These are by far the top choice for anyone using their DSLR camera to capture sound. Perfect for use in all kinds of environments, they’re great for outdoor or indoor interviews, shooting vlogs, or making YouTube footage.

If you’re keen to capture video and audio on the fly, a shotgun mic is perfect thanks to their ability to either be attached to a boom pole or the camera itself. As a directional mic, it can capture audio in any direction you point the lens, and the audio capture is impressively high quality.

There are little things you’ll need to be aware of when using them, some of which we’ll go over more in-depth later.

These mics are capable of picking up a ton of audio, and often ignore things around them. However, it will pick up things like the wind as well unless it has a “condom” on. We know it sounds funny, but exactly as the rubbery stuff does for Mr. Johnson, they too need protection.

By having one on, a coverage if you will, it keeps “ambient sound” out. Thus offering you better audio in the direction you have chosen.

Handheld Microphones:

Handheld microphones are a great option for interviewing or presenting/hosting. They’re often used in churches, at political events, and more. These mics are great for reducing ambient and background noise and are ideal for use in crowded spaces.

There are a few additional accessories required to use a handheld microphone if you want to use it to record sounds to your camera. While handheld mics are a great cue when interviewing someone to tell them when it’s time to talk, it’s important to hold the mic to their face.

However, you do not need it to be at the lips. Many pick up sound from a respectable distance.

Like shotgun mics, they also need protection. This is mostly due to the “pops” you might hear. Especially on the “P” sounding words. Even “S”-words (not that kind, Fred) can interfere with quality. Putting coverage on the mic allows you to pick up the audio without any random pops that could ruin an otherwise incredible interview.

Lavalier Microphones:

Often referred to in the business as “lav mics,” the lavalier microphones are a great choice if you’re recording in a controlled environment. Designed to clip onto clothing and worn close to the mouth, they are regularly seen on vlogs and talk shows.

Less sensitive than other types of mic, they aren’t ideal for outdoor use, but they’re very discreet and are therefore great for interviews. If you’re recording indoors, these are a great choice. However, remember that you need every person that you’re interviewing to have their own mic connected and set up for them.

Lav Mics are usually very good at picking up any sound they need to in a “direct” placement. They can have a distance of your chest to your mouth where handheld needs to be a little closer. However, unlike handheld mics, they are unable to capture anything other than direct sound.

Yet this can also come with added issues of rustling cloth sounds or finger touching. Be warned when in use. If you know how to use them, they may be your new best friends for direct vlog videos.

Headset Microphones:

Primarily used for presentations in noisy environments, a headset mic is perfect for interviews in crowds. They allow voices to be isolated in post-production. They aren’t great for a standard YouTube-style video, however, since they can produce a breathy sound quality.

They’re also bulky and quite unappealing to wear, especially if you want to look your best in front of the camera! These are more common in the world of radio. You may also be well-versed with them if you’re a person who likes to play video games online.

While these are a cheaper version normally, they essentially are what we’re referring to here.

Why is a shotgun microphone a good option for a DSLR camera?

Shotgun microphones for the DLSR camera are a top choice for recording sound since they boast a precise pick-up pattern. They are ideal if you won’t be moving around a lot or if you’re being assisted by a boom mic operator.

However, since they can be used on top of cameras so easily, they can be mobile relatively fast. Allowing you to take them with you on remote shoots.

They have a hyper-cardioid or super-cardioid pattern for optimal sound quality. They do need to be placed close to the source of a sound, but most are small enough to be kept out of the frame of the shot. This means you won’t need to worry about bits of your microphone being visible in the final version.

Unlike with boom microphones, often used for talk shows.

One further advantage of using shotgun microphones for the DSLR camera is that there’s no need to wire everybody up. This would only be necessary if you were using lavalier mics. This makes shotgun mics a brilliant option if you’re interviewing several people.

Also, if you’re shooting outside shotgun mics offer many options for wind control thanks to furry or foam condoms we referred to earlier. The world likes to call them “windshields” to be appropriate. However, we dare you to ask a media professional and they’ll back us up.

What are the main things to consider before buying Shotgun microphones for the DSLR camera?

There are a number of useful features that are vital for the quality of sound you can produce. You need to keep these in mind when you’re looking over shotgun microphones for the DSLR camera you want to buy. There are so many things to keep in mind that you may not even realize it. We cannot let you make a mistake knowing we could have helped.

That isn’t the Batman way. Since we at Men’s Gear like to be like Batman, other than the weird and illegal vigilante stuff, we’re here to help. That said, here is a quick overview of some of the key aspects to consider when you’re buying your first shotgun mic:

Range:

A shotgun microphone has several different ranges so you can select the right one to suit your needs when filming. What is a range when it comes to a microphone? We’re glad you asked. The range encompasses everything in a certain area of the microphone.

Basically, if you can stand 2 feet from someone and get relatively perfect audio, great. However, if you cannot get it well after 5 feet, then you have a low range.

Most can do a relatively useful distance of 10 to 20 feet away from where you can hear audio. Obviously, the closer you get the louder things will become. The person at a distance may need to speak louder to be heard at a greater distance too, which is obvious stuff.

Shotgun microphones for DSLR cameras were made for close-range material, keep in mind.

Battery Life:

As with anything technology related that uses batteries, you’ll want to know how long power will last. The battery life can vary significantly between models of shotgun microphones. This means you need to take the time to check out how long the battery will last between charges.

This is especially relevant if you’re planning on using your microphone outdoors. There are limited opportunities for a recharge in most outdoor venues. Nor are there many places to plug in if your microphone can work with both. A lot of professionals tend to have more than one battery for this very reason.

This is present for both the battery and microphones they use.

We recommend getting a few to always be ready, as they are relatively cheap. Plus, you already get one with the microphone upon buying it. Getting more than one will ensure the best results. However, if your battery can last 90 hours on full charge, you may not need to use more than one.

Many we added below certainly fit that department.

Weight And Size:

Most shotgun microphones for the DSLR camera are lightweight and small to suit the needs of all DSLR users. DSLR cameras are designed to be compact and easy to operate on the go. This is useful, as it’s functional for all people regardless of age, gender, or what have you.

That said, you won’t want to make yours any heavier than it is already. You can make sure to choose the lightest and smallest shotgun mic to avoid adding any extra bulk or weight to your camera. While some good microphones can be slightly heavier, this isn’t a bad thing.

You just have to be capable of handling it on your camera consistently.

Build Quality:

A DSLR microphone can be costly, but most are made from high-quality materials for the sturdiest build. This is especially important if you’re going to be shooting outdoors. Obviously, you’re going to want your mic to be durable enough to survive outside.

A higher-end model will often be made from metal for impact and element-resistance. The cheaper models will be made out of plastic or other cheap materials similar to this. Of course, this isn’t necessarily a bad thing, but some are flimsy and brittle and are therefore better suited for indoor use rather than outdoor shooting.

This means you’ll need to know what you’re planning to use your camera for. As it will also allow you to know what needs you’ll have for your microphone too. Once you know, you can decide on the time that would be best for you. Cheaper or more expensive, both are usually fine.

However, no matter what you plan to do…the more expensive versions are better made.

High Pass Filtration & Frequency Response:

Our ears can register sounds between 20 and 20,000 Hz. Your mic’s frequency response is important here. If it can be close both ends of the range, that means the sound it gets will be a lot more realistic. Most rightly prefer very low frequencies not to interfere with their recordings.

In order to do this, you need to have a quality product. Shotgun mics with a high pass filter can muffle those low-frequency sounds that would have otherwise registered. Of course, those covers we referred to before will also be present. As they can grab sound without random issue too.

Thus helping frequency as well.

Super-cardioid or Cardioid Pickup Pattern:

The pickup pattern of your mic is a visual representation showing the area in which sound will be picked up. Some microphones can register equal amounts of sound in every direction, including the back and front. However, this isn’t the case with shotgun mics.

Shotgun microphones for the DSLR camera have a tightly focused pickup pattern. The super-cardioid or cardioid patterns are ideal to pick up sound only from the front of the camera without picking up any sound from the back or side of the mic.

Basically, if the camera is facing you but we need to get sound of what you’re looking at off-screen. super-cardioid won’t help that.

Super-cardioid microphones are slightly more focused. However, they also need to be positioned more precisely if you want to eliminate the possibility of unwanted rear noise. Overall, these types of mics are great at getting audio they are facing as well as cutting out noise from the back that you want to avoid.

Normal cardioid mics won’t do that as efficiently.

Accessories:

Different accessories come with different mics. Simply choosing an expensive mic doesn’t necessarily mean you’ll benefit from extra accessories. Nor does that mean they’re going to be of good quality. Check out which accessories come with your microphone so you can make sure that everything you need is included.

Some of the accessories include mic condoms (windshields) for outdoor filming (either padded to cancel out breathing sounds or furry to disperse the wind). Shock mounts to eliminate vibrations when moving the camera, and cables that allow you to power your mic or connect it to a boom pole.

These either come separate, completely combined or a small combo of the few.

How hard is it to set up shotgun microphones for the DSLR camera?

Although it may seem complicated to set up shotgun microphones for DSLR cameras, it won’t be as hard as you imagine. There are three different options when it comes to setting the mic up. Option one is to capture your audio separately and then sync the audio during the editing process using third-party editing software.

The second option is to connect your mic with an XLR adapter to your camera. The advantages of this setup are that you can benefit from power for microphones and have a small independent power source. On top of the ability to monitor sound and disable the internal audio gain control of your DSLR.

The third option is to directly connect your mic to your camera via the mini-jack input of your DSLR. This produces surprisingly good audio quality especially when you’re filming for YouTube or the internet

Overall, all options are easy to do and take less than 2 to 5 minutes to complete. Once you get used to it, things may take less than 30 seconds even.

1) Rode VideoMic Compact Microphone

If you’re looking for small shotgun microphones for the DSLR camera, the VideoMic Pro is a great choice, plus lightweight. Even with the 9-volt battery is attached, no real extra weight is present. Overall, this allows it to be carried around with ease.

The battery is powerful enough to run for 70 hours of use. The small dimensions of this mic allow it to be used on smaller DSLRs, making it compatible with any DSLR. The intuitive controls can be found on the back of the mic, with 3 different positions for the upper switch – high-pass filter, on, and off.

The filter perfectly handles noise, allowing it to remove low frequencies and wind noise.

There are three different gain settings, +20dB, 0dB, and -10dB. The unusual+20dB setting allows cameras with poor gain circuitry a way to work with the mic.

The custom shock mount is a shoe-style design. The base includes a screw thread to attach the mic to a boom pole. Rubber shock-absorbers fix it into place, with spares added for extra benefit.

This mic features a super-cardioid pickup pattern, which removes excess background noise. There is also a foam windshield provided as standard. Also, if you register for the manufacturer’s warranty, you get a fluffy windshield too. All with an impressive 10-year guarantee, so why not?

There’s also a very similar item on our list at number 14 which includes a fluffy sound attachment.

Check Product Price // Read More Reviews

CHECK PRICE  READ REVIEWS

2) Audio Technica Camera Mount Microphone

Whatever type of environment you’re capturing audio in, this Audio Technica microphone model is a good choice. Suitable for both outdoor and indoor use, it has a line-cardioid selectable mono mode and a mid-side internally matrixed stereo mode.

This means that you’ll have all the flexibility to focus your recording on just one sound source or alternatively to wider the recording field to give extra sonic realism.

These shotgun microphones for the DSLR camera have a 3-position input pad that can be adjusted to 0dB, -10dB, and -20dB. This allows both loud and soft sound passages to be captured with no distortions. It’s also possible to select a low-frequency roll-off so that unwanted ambient noise is not picked up.

An AA battery is required to power this mic; a surprisingly convenient solution, and powerful enough to ensure excellent performance with a high max SPL. The integral camera shoe is suitable for attaching to DSLR cameras, and the mic is supplied with its own mini-jack.

The latter is great for convenient set-up. It also comes with a fuzzy windshield and a standard windshield. There are rubber integral shock mounts that can isolate the mic from any mechanical camera noises or vibrations. This just ensures you don’t pick up any unwanted sounds.

Check Product Price // Read More Reviews

CHECK PRICE  READ REVIEWS

3) Rode VideoMic Go Microphone

One of the greatest benefits of the VideoMic Go from Rode is that no batteries are needed for it to function. There are no external controls that adjust the mic either. It’s literally the simplest model on the market and is the ultimate Plug and Play device.

There’s not even any need to switch the mic on!

Despite its convenient and hassle-free design, the VideoMic GO still offers good quality directional sound pickup. This is thanks to its Rycote Lyre shock mount that ensures no handling or vibration noise comes through on your recording. As an added bonus, the cable is independent of the mic.

Meaning even if breaks accidentally, you can replace it with ease.

The frequency response of this mic covers from 100Hz up to 16kHz, cutting off low frequencies under 100Hz without any problems. This is also one of the most affordable shotgun microphones for the DSLR camera on the market today.

It allows these mics to be the perfect option for anyone who wants an informal sound recording device for their YouTube videos or home movies.

Check Product Price // Read More Reviews

CHECK PRICE  READ REVIEWS

4) Sennheiser MKE440 Shotgun Microphone

Thanks to its strong all-metal construction, the Sennheiser MKE 440 shotgun mic is incredibly durable and robust enough to use outdoors. It also features an integrated shock mount, allowing it to be protected from those unwanted handling sounds and vibrations.

These so often occur when using your DSLR camera to film on the go, so eliminating them is essential. It’s a terrific thing that these shotgun microphones for the DSLR camera by Sennheiser do just that.

Its small size means that it is perfect for use on all kinds of DSLR cameras, from the smallest to the largest model! On top of this, the switchable sensitivity it contains makes it suitable for use at both short and long distances.

Despite its sturdy construction, this is a surprisingly intuitive camera. There is also a seemingly absent learning curve when it comes to using this device, making it incredibly easy to use. It also produces premium-level recording quality while boasting an amazing battery life of more than 300 hours.

The two recording modes mean that customizing your microphone to suit the shooting conditions on any particular day or project is a breeze. There is also a selectable wind noise filter for clearer recordings when recording sound in front of the mic.

Check Product Price // Read More Reviews

CHECK PRICE  READ REVIEWS

5) Rode SVM Stereo Condenser Microphone

This high-quality stereo mic has been designed for use not only with DSLR cameras but also portable audio recorders and camcorders too. It features two ½” high-res condenser capsules that are mounted into a fixed stereo array. The result of this is a natural-sounding stereo recording with plenty of rear rejection to get rid of unwanted ambient sounds.

The built-in shock mounts allow it to handle noise extremely well, essentially eliminating it. Thanks to the standard-sized shoe mount with its 3/8” thread, you can easily mount this mic onto a stand or boom pole. This, of course, offers different recording applications.

Options are useful for shotgun microphones for the DSLR camera, as they allow you to get several sounds for the video you’re putting together.

The high-pass filter can prevent low-frequency sounds from being captured while the -10dB level attenuation allows loud sources of sound to be recorded. The body is made from high-quality cast aluminum for extra ruggedness and durability on the go.

Meanwhile, the 10-year manufacturer’s warranty gives you complete peace of mind in your purchase.

Check Product Price // Read More Reviews

CHECK PRICE  READ REVIEWS

6) Tascam Camera Mountable Microphone

Designed to comfortably sit in any camera hot shoe, the DR-10SG mic is lightweight and compact enough to take anywhere. All without adding extra bulk to your DSLR camera. Great for shooting on the go, this mic captures good quality audio.

It does this while powered by a single AAA battery. It is easy to keep it running when out and about for sure. As an added bonus, the external USB connector means that you have a second option when it comes to powering this mic.

You can choose between two different recording levels for recording dual audio tracks. It also comes with its own windshield cover to protect against unwanted wind noise when recording outside. You can record one of two was. You can opt to record directly to an SD card or directly to your camera.

As a super-cardioid mic, the DR-10SG picks up sound from in front of the mic extremely well. Its integrated shock mount means that no vibrations or handling noises are captured. There are four different EQ modes as well as an onboard audio slate to allow synchronization during your editing process.

Truly it is one of the best shotgun microphones for the DSLR camera today. We could not love it enough.

Check Product Price // Read More Reviews

CHECK PRICE  READ REVIEWS

7) Zoom SSH-6 Stereo Shotgun Microphone Module

The Zoom SSH-6 provides highly focused stereo sound capture that is suitable for use with the Zoom Q8, H5, or H6 recorders. It’s ideal for use in outdoor recording situations especially. Ultimately allowing it to be one of the best shotgun microphones for the DSLR camera for various uses outside.

Things like football or storm chasing will be caught in easy, high definition sound. All without any problem of things being too much when you listen back. This mic comes complete with a furry windshield to guard against unwanted environmental noises too. Allowing it to avoid the unnecessary sounds you want to eliminate.

Thanks to the bidirectional side capsules, you can choose to record right and left ambient noises around you. We should also mention this is a hypercardioid mic, this goes with what we referred to earlier on its ability with ambient noise. Unlike cardioid mics, they have less sensitivity on their sides with the sound.

On top of this, they pick up better directional sound than the cardioid too. Thus, you can be confident of outstanding sound capture.

One of the best shotgun microphones for the DSLR camera available for beginners, the Zoom SSH-6 impressively records interviews in an outdoor environment without any issue. With its small and lightweight construction, it’s easy to take anywhere and won’t weigh your DSLR down.

Check Product Price // Read More Reviews

CHECK PRICE  READ REVIEWS

8) Shure VP83F Camera Mounted Microphone

The Shure VP83F is one of the most impressive shotgun microphones for the DSLR camera on the market. As it’s capable of doing things many others struggle to do, especially for the price it asks for. Thanks to its in-built shock mount, it protects against unwanted handling and vibration noise during your recordings.

It fits easily onto the camera’s shoe, making it the perfect option for use on the go. It also offers the option to either record sound directly to the removable micro SD card or to the camera via the inclusive cable.

Compact yet extremely rugged, the Shure VP83F can capture high-def audio while its single-button recording and intuitive menu make it a user-friendly camera mic. It’s one truly anyone to use, without a struggle.

Its highly directional super-cardioid pickup pattern means that you can use it virtually anywhere without any unwanted off-axis audio capture.

Using the two inclusive AA batteries, this mic supplies a full ten hours of battery life. It comes supplied with a gold-plated 3.5mm audio cable as well as a foam windscreen for outdoor recordings. The mic can easily be mounted onto a boom pole or stand thanks to the ¼” threaded base.

Meanwhile, the fully-adjustable user gain allows you to move in 1dB increments up to 60dB to fine-tune your audio.

Check Product Price // Read More Reviews

CHECK PRICE  READ REVIEWS

9) Nikon-ME-1 Stereo Microphone

The Nikon ME-1 sounds compelling in its name alone, and supplied by a trusted brand, you know it offers quality. Obviously, these shotgun microphones for the DSLR camera are near the top of their field. Supplied with a carry case and windscreen, the mic fixes easily onto the accessory shoe of any DSLR camera.

It tightens firmly into place thanks to a lock ring mechanism. There is a channel in the microphone’s back that keeps the cable out of the way during use. Meanwhile, the in-built rubberized shock mounts ensure there is no excess handling noise or vibrations to ruin your audio.

The integrated rotary dial allows the low-cut filter to be switched easily off and on, cutting off any low-frequency wind noises. It’s lightweight, compact, and simple to attach to your DSLR with the 3.5mm mic jack. The ME-1 manages to capture audio with a rich and full tone from up to 20-feet away outdoors with the windscreen in place.

With its sensitivity from -42dB up to +3dB, you can expect low frequency sounds to be well filtered out.

It’s clearly smaller in size, which means it does not require a battery. Ultimately, that makes it more convenient and much easier to carry around. To be this good at this size is incredible. Wait until you see the price and hear what the audio sounds like!

Check Product Price // Read More Reviews

CHECK PRICE  READ REVIEWS

10) Audio-Technica ATR-3350IS Lavalier Mic

This lavalier mic is an ideal choice for use in an interview situation, but barely scraping onto the list of ‘shotguns’ due to its basic features. However, thanks to its omnidirectional functionality, it is great for picking up voices even in a noisy environment.

As a high-quality condenser, it boasts a low-profile design for excellent discretion. All while its smartphone adapter ensures that it is instantly compatible with the newest smartphones.

The dual-mono 1/8” output plug can connect to your DSLR with ease, recording audio on both the right and left channels. It comes complete with an inclusive foam windscreen, an LR44 battery, and a tie clip. Ultimately, making this a really useful choice for use anywhere you need to go.

The mic has a long cable which can extend to accommodate the needs of different applications, its low price tag makes it a truly affordable choice for even vloggers on a budget.

Check Product Price // Read More Reviews

CHECK PRICE  READ REVIEWS

11) Tascam TM-2X Stereo Microphone

This stereo condenser mic can be mounted with ease onto your DSLR’s hot shoe. It can rotate up to 180 degrees to suit your recording needs and there’s no need for battery power to use it. All of this adds up to one really convenient choice for indoor or outdoor audio capture.

Designed specifically for use with DSLR camera, it has an isolation arm to stabilize noise levels and there is also an integrated low-cut filter to eradicate low-frequency sounds. The floating shock mounts ensure that no vibrations or handling noises are picked up.

With two microphone capsules and an X-Y pattern, this mic captures an authentic representation of your sonic atmosphere. This comes from either the wider area of the mic or from the front of your camera. It’s also capable of handling high sound pressures to a maximum of 120 dB SPL.

Complete with two-stage output levels, it can be adjusted with a single switch to suit a range of DSLR cameras. It also comes with a thread to help you add a tripod to it. Overall, these are clearly impressive shotgun microphones for the DSLR camera.

They’re compact, get the job done, and all at a nice size and price. What’s to not like?

Check Product Price // Read More Reviews

CHECK PRICE  READ REVIEWS

12) Shure VP83 Camera Mounted Microphone

Rugged yet extremely compact, these shotgun microphones for the DSLR camera offer an excellent way to capture high-def detailed audio. With easy to access controls, this mic has a low-cut filter to get rid of unwanted low-frequency sounds. The 3-position gain allows for simple adjustments to suit different environments.

Created with a directional super-cardioid pickup pattern, the VP83 can provide premium-quality rejection of off-axis sounds. This is present for a more natural audio capture. Its custom-designed, integrated Lyre shock mount eliminates vibrations and mechanical noises for better sound quality.

Powered by a single AA battery, this mic can stay running for up to 130 hours – pretty impressive! Also, thanks to its all-metal construction, it’s durable enough to use anywhere. Meanwhile, its RF superior immunity protects against any unwanted audio from RF and cellular devices.

It comes complete with a 3.5mm audio cable to allow for speedy connections to your camera. On top of this, its ¼” threaded shoe mount base makes it simple to mount onto a stand or boom pole. It also comes complete with a foam windshield to eliminate wind noises with no effect on sound quality.

Check Product Price // Read More Reviews

CHECK PRICE  READ REVIEWS

13) Azden SMX-20 Stereo Switchable Microphone

Offering both stereo and mono capabilities, the Azden SMX-30 mic has two different capsules for switchable functionality. These shotgun microphones for the DSLR camera are suitable for use in mono mode to record dialogue or in stereo mode for 120 degrees of audio coverage.

This super-cardioid mic is easy to adjust by simply moving the switch on its back. There is also a level adjustment to switch between -10dB, 0dB and +20dB to suit different recording requirements.

Meanwhile, the low-cut filter eliminates those unwanted low-frequency sounds. Made from hard and sturdy plastic, this well-made camera mic has a ten-year manufacturer’s warranty for your complete peace of mind.

It is perfect for all kinds of users. From YouTubers to corporate presenters, it will work for any need you ask of it. Of course, this isn’t the cheapest model on the market. However, its ability to switch between mono and stereo recordings is a huge selling point.

Check Product Price // Read More Reviews

CHECK PRICE  READ REVIEWS

14) Rode VMPR VideoMic Pro R

With its compact design, the Rode VMPR VideoMic Pro R is perfect for the DSLR camera. Giving you excellent audio capture in one affordable and lightweight package, this mic is easy to install and offers some great additional features.

With its inclusive hot shoe mount on its base, these shotgun microphones for the DSLR camera can also be connected to your boom pole. This is thanks to the 3/8” thread, and it offers even greater versatility. With its compact dimensions and low weight, it won’t be too big to use on even very small cameras.

In fact, even on the smallest DSLR won’t get in the way of your wide-angle shots.

Requiring one 9V battery to power this mic, it can run for up to 70 hours of continuous recording. Obviously, more than enough to finish your daily Vlog. It can connect easily by using the inclusive 3.5mm jack. Meanwhile, the furry windshield isn’t part of the package.

However, you can claim it for free when you take out the extended manufacturer’s warranty.

This will protect against unwanted wind noise when recording outdoors, of course. If you don’t want to claim the warranty, the inclusive foam windshield works pretty well as standard.

The integrated shock mounts prevent the mic from hitting the surrounds and base. Thus guards against vibrations and handling noise for clearer recordings. Spare mounts also come included so you are getting even better value for money.

Check Product Price // Read More Reviews

CHECK PRICE  READ REVIEWS

A Snapshot Overview

Whether you’re Vlogging or making your own home movie, having a great quality mic for your DSLR camera is going to make an enormous difference. It’ll offer great quality to your final recordings, something the pros do all the time. Choosing from all the many options out there is never going to be easy, and we knew this going in.

However, when you following our helpful buying guide, you’ll be in a much better position to make an informed purchasing choice.

Among our selections for the top 14 shotgun microphones for the DSLR camera, you’re certain to find the perfect model to suit your recording needs. Whether you’ll be outdoors or indoors, interviewing or presenting, we feel we highlighted the best microphones to fit your specific needs.

Our list provides only lightweight, durable, and easy to use in the home or on the go products, Most can also connect to boom poles or stands for even greater versatility of use.

Channel your inner Steven Spielberg with any of these shotgun microphones for the DSLR camera right away. Then enjoy making and hearing amazing sound quality on every recording you do.

Top 14 DSLR Camera Tripods

G

etting the perfect shot is never as easy as you think it’s going to be. Grabbing your trusty camera and snapping away sometimes just won’t cut it, especially if you need to keep still for a long exposure. If you’re sick and tired of shaky shots and wobbly images, it’s time to take your photography to new levels. That means looking into DSLR tripods, so you can get that perfect shot.

Who hasn’t tried at one time or another to balance their camera on a wall, fence, or bush to get the ideal exposure? This can be a recipe for disaster. Your camera probably cost an eye-watering amount. Clearly, putting it at risk by propping it up in a tree probably isn’t the best idea!

DSLR camera tripods are the perfect solution to all your photography problems using DSLR cameras.

Designed to hold your DSLR firmly in place while you shoot to your heart’s content, you’ll wonder how you ever got by without one.

Of course, it goes without saying that not every tripod is best for your camera and you, personally. Yes, they may share the same shape, but that’s often where the similarities end. From size and design to materials and durability, there can be a whole lot of variation.

Obviously, you won’t settle for anything but the best camera tripod on the market, so we’ve done all the hard work for you.

We tried out the top-sellers to bring you the perfect blend of DSLR camera tripods that we’ve reviewed, just for you. Shooting your own home movies, honing your photography skills, or just need a convenient place to hang all your heavy gear while you’re out on a shoot. We feel confident you’ll find the best tripod for DSLR cameras here.

What Are The Main Things To Consider When Buying DSLR Camera Tripods?

Let’s leave out of the equation the very first question – do I need a digital camera tripod at all? After all, if you didn’t need one, you wouldn’t be reading this. That said, let’s move on to the other key factors to keep in mind before you buy. DSLR camera tripods are useful, but there are key things you need to know before you buy one.

Speed:

Speed is definitely of the essence when you’re a passionate photographer. Picture the scene. You see a spectacular bird in your backyard, then run to grab your tripod and camera. Then, you struggle and sweat as you wrangle the legs into place. You wrestle your camera into place.

Then, look through the lens just as you see its wings flapping away into the distance! Clearly, this isn’t an ideal scenario.

The telescoping speed of the legs, the speed of adjusting the ball head, and how effective the quick release system is essential to check before you buy. It should be swift and simple to mount your camera and just as easy to fix the legs in place. Making the wrong choice will just make you frustrated.

Weight:

Weight is your next consideration, and for good reason. How much weight can you carry, and how sturdy do you need DSLR camera tripods to be for you are crucial to know. You need to find the perfect balance between sturdiness and portability.

However, also need to make sure that your tripod can support your camera’s weight and bulk. Obviously, you don’t want it to tip over just as you’re about to take an award-winning shot.

This is also something to consider when you have to take it in and out of your vehicle. You’re going to lug this thing all over the place. It might as well be something useful for weight, so long as it fits what your camera’s needs are. If you can get a lighter one that does the same as a heavier option, why wouldn’t you?

Size:

While taking weight into account, size is another issue to consider. While they may sound similar, they aren’t really the same. If you’re planning on traveling with your tripod you might want to consider a small camera tripod that fits in a bag.

Meanwhile, if you’re taller than average, you’ll probably need to select one that can accommodate your extra height. Weight handles the all-important heavy factor while size handles the overall length or ease of transport.

Weight plays a role here too, but size handles far more. Whether that means needing only a small bag type or a large type, it all comes down to you. This is also crucial when selecting tripods, as some collapse into smaller and easier to carry forms. Others, at the same size and ability, may not.

Material:

The material your tripod is made from will also be a factor to keep in mind. Carbon fiber is light but expensive, yet aluminum is affordable but heavier. Meanwhile, stainless steel is probably going to be too heavy to take on vacation with you. Although, this option is ideal if you’re shooting video.

Now we’re getting down to technicalities and nice-to-haves. Although a bubble level isn’t strictly essential, it can be a useful addition to your tripod head and stand. The material is good to keep in mind mostly due to the conditions you’ll face too.

Rust can be a factor with some, which is why you’ll need to keep them out of rainy or wet environments. Others are made of a material that can melt, meaning sunny or hotter environments won’t work. Truly, where you go to shoot most is a huge factor in the tripod you buy.

How do I know if a tripod is compatible with my camera?

You don’t want to spend hours going through DSLR camera tripods only to discover it isn’t compatible with your cutting-edge camera. We don’t want that either, so let’s look at how you can avoid making a costly error.

First, you’ll need to ensure your tripod is sufficiently sturdy to support your camera without it being so heavy that you end up leaving it at home. You’ll also need to check that the head is strong enough to prevent your camera flopping over and getting damaged.

Some tripods aren’t robust enough to accommodate the heaviest camera equipment, so it’s important to check it out before you buy. A mini camera tripod, for example, may not be stable enough to hold your heavy duty camera. Yet it would be great if traveling.

It isn’t all about the tripod itself – the camera mount is key here. You need to check that your model is actually a tripod camera. Modern cameras are almost all tripod-capable these days, but if you have a smaller model there’s a chance it might not have an integrated tripod mount. If it doesn’t have one, you’re onto a losing streak.

However, there are two standard types of thread to fix cameras to tripods. Simply check that your chosen tripod has the right one for your camera. The two common threads are 1/4″-20 and 3/8″-16, so make sure to check which is right for your camera before you buy.

In the worst case scenario, if you end up with the wrong type of thread fitting for your camera, it isn’t the end of the world. You’ll just need to get an adapter so that you can fit it into position.

How do I mount a camera on the tripod?

We all know that a real man never reads the instruction manual when they get a new gadget. We’d never let you either, but you need to know this. That said, here’s your crash course in how to set your camera onto your tripod:

  1. Take the camera plate off the tripod. Usually, there’ll be a quick-release lever or clip to do this. Although it isn’t strictly essential to do this before you fix your camera onto the tripod, it makes life much easier. It can be tricky to fix the camera onto the plate when it’s still on the tripod.
  2. Level your tripod by adjusting its legs. Once it’s stable, raise the legs to the right height for you then secure them in place.
  3. Screw your camera onto the plate. The fixing system will vary. Sometimes your camera will “screw” right onto the plate, other times it’ll need to be clamped in place.
  4. If there’s a screw-head on the plate’s underside tighten it from under the plate rather than twisting the plate onto your camera. Make sure that the connection isn’t too tight – you don’t want to damage your mounting system
  5. If your tripod has a clamp mechanism instead of a screw, put your camera between the clamps gently, then tighten the screws or twist the knobs so your camera is securely held in place.
  6. Remount the camera plate onto the tripod. Usually, this is quick and easy. All you need to do is pull the quick-release lever back, fit the camera and plate onto your tripod head, then release the lever.
  7. Look through your camera’s viewfinder to make sure the lens is properly angled.
  8. Take one last check to ensure your tripod is stable and level, then you’re all ready to take your first shot!

What are the main brands of camera tripods?

When you’re choosing the right camera tripod for you, you’ll find that there’s no shortage of brands available. Of course, not all are best for you. It’s vital to choose the right brand if you’re serious about your investment. A cheap tripod may save you money in the short term.

However, you’ll regret your purchase when you’re struggling to set up your gear and dealing with a wobbly, poor quality tripod.

Usually, it’s true to say that you get what you pay for. While the best brands don’t come cheap, you’re guaranteed great quality and high-level performance. It’s always sensible to choose a reliable, highly tested brand when choosing the right camera tripod for your needs.

Some of the best known and highest quality brands include Vanguard, Benro, and Manfrotto.

Although, there are many other high-quality brands which aren’t so famous. Go with one of these brands and you’ll benefit from strong and sturdy materials, cutting-edge performance and speedy, convenient setup. This is just what you need to hone your photography skills.

You could do all the research yourself on DSLR camera tripods, but we know you’ve got a busy lifestyle. That’s why we’re here to save you the time, effort, and money involved in making a poor choice. Our team has worked hard to review all the best DSLR camera tripods on the market today.

We’ve checked out all the details and outlined all the pros and cons so you’ll be sure to find the perfect tripod in our top 14 list.

1) Vanguard Alta Pro 263AB 100 Aluminum Tripod Kit

Looking for stability, flexibility and a wealth of angle possibilities? The Alta Pro DSLR camera tripods are perfect for you. It has a Multi-Angle central column system. This enables you to adjust the central column up to a 180-degree angle in either a horizontal or vertical position, allowing wide-angle and macro shots are a breeze.

There’s also an ISSL system (Instant Swivel Stop-n-Lock) that allows you to reposition its central column with one speedy movement without compromising the stability of the tripod.

Plus, no more shaky pictures. Aluminum alloy makes up the legs, allowing them to be robust, plus the legs are completely adjustable. Quick release leg locks added will allow for easy set-up and take down of your equipment.

The die-cast canopy is made from premium magnesium for extra durability. On top of this, the central column has a hexagonal shape, giving it even greater stability for long exposure shots.

This tripod comes with spiked, non-slip rubber feet. Meaning no more worries of falls into the mud. Plus, it comes with a hook to hang your various accessories right on your tripod.

The ball-head fluidly rotates a full 360 degrees too. With its smooth-locking knobs, excellent loading capacity, and fine-tuning ability, you’ll have everything you need. Vanguard makes some of the best DLSR camera tripods on the market, so it’s worth checking out.

Check Product Price // Read More Reviews

CHECK PRICE  READ REVIEWS

2) Rangers Ultra Compact & Lightweight Tripod

Lightweight and compact enough to take on your travels, these Rangers DSLR camera tripods are terrific. It has four section column legs together with flip-locks that can be released instantly so you can set up in moments. The working height can be adjusted from just 14” to 55” instantly.

Meaning you can get just the right shot, no matter what height you are.

If you’re looking for true versatility, this tripod has it in spades. You can even convert it into a monopod thanks to its removable leg.

You won’t be compromising on stability either, the Flip-lock boasts a large contact area with the tripod leg. This means you can shoot to your heart’s content without worrying about wobbles and shakes. There are also two control knobs on the ball-head, so you can rotate it through a full 360 degrees for the ideal angle.

When you invest in this tripod, you can be confident you’re getting the best quality. Made from an aluminum, high-density alloy, it can hold a maximum load of 26.5lbs. It even has two inbuilt bubble levels so you can check the level of your camera lens in seconds.

Check Product Price // Read More Reviews

CHECK PRICE  READ REVIEWS

3) Benro SystemGo Plus Aluminum Tripod

Are you looking for the versatility of a center column with the compact and lightweight design of a travel camera tripod? Then the FGP18A SystemGo is the one for you. Boasting a 180-degree versatile center column, it allows you to choose from an enormous range of camera positions.

This includes inverted, horizontal, and vertical positions. You’ll never struggle to get the right angle again.

There’s also a speedy leg locking system, which is dust-resistant and stable. Even better, the detachable leg allows it to turn into a monopod for even greater flexibility.

If you’re shooting on the move, no worries – these DSLR camera tripods have a folding compact design so you can put it in your backpack and travel anywhere. Despite its small size, it’s still strong and durable thanks to its aluminum tubing and components made from robust magnesium alloy.

Its design combines reverse folding legs which wrap about the central column. The column itself can be taken out of its position and swung through a full 180 degrees, lockable into any position.

With three different positions to choose from for the leg angles, this tripod is the ideal choice for low-level macros. On top of this, its screw-in spiked feet ensure your camera won’t accidentally fall when in use outdoors. As a final finishing touch, it even comes with a padded high-quality carrying case so you can take it anywhere:

Check Product Price // Read More Reviews

CHECK PRICE  READ REVIEWS

4) AmazonBasics 60” Lightweight Tripod

Are you on a low budget, looking through DSLR camera tripods you need, but you want an affordable option you can depend on? The AmazonBasics tripod is ideal for you. With its lightweight design, it’s perfect for taking out and about. Its rubber feet ensure that it won’t slip on rough surfaces.

Thanks to the height adjustable legs, you can accommodate your height, whether you’re a giant or little person.

It can be used with an enormous range of cameras like GoPros and even cameras weighing up to a maximum of 6.6lbs. Regardless, you’ll be able to use this tripod with your favorite trusty DSLR.

When the center post is extended to the max, it extends up to 60”. This ideal for taller users. It even comes with its own convenient carrying case you can take your camera anywhere, no matter where you’re heading. For a tripod in this price bracket, you’re bound to be impressed by the inbuilt bubble levels that let you check stability in seconds.

There’s even a three-way head while lets you swivel and tilt in both landscape and portrait options. You won’t spend ages transitioning between shots thanks to the speedy release mounting plate. Since it only weighs 3lbs, you won’t be weighed down, even if you’re hiking, camping, or climbing.

Check Product Price // Read More Reviews

CHECK PRICE  READ REVIEWS

5) Manfrotto Three Section Tripod

Manfrotto is one of the top names in camera tripods, so you can be confident you’re investing in the best with this model. It’s pretty easy to guarantee that Manfrotto offers one of the top DSLR camera tripods on the market today. It has outstanding stability and a quick power lock so the legs fix firmly into position.

This allows you to use your heaviest equipment without needing to worry about wobbling or shaking.

Despite its high locking power, you can still expect impressive ergonomics. The hand-opening mechanism slashes set-up times and makes it easy to operate. Thanks to the Easy-Link attachment, you can even convert this tripod into a portable photo studio – making it perfect for pros.

Check Product Price // Read More Reviews

CHECK PRICE  READ REVIEWS

6) Gitzo Traveler Kit

Taking photos on the move? If you’re looking for the perfect tripod to take on vacation, the Gitzo Traveler Kit fits the bill. With its G-lock leg locking system, the Traveler Tripod is amazingly compact without compromising on height. It boasts a curving external form for better grip.

Thanks to its internal O-ring, it operates smoothly and softly without risking any grit or dust getting into the lock.

Even on the move, you don’t want to worry about a jerky ball-head. These DSLR camera tripods are precise and smooth, fitting perfectly in position. You can also remove the head easily and replace it with another one of your choices to suit your needs.

Durability is always important. The Carbon eXact tubes used on the Gitzo Traveler Tripod are stiff, robust, and strong. They offer outstanding performance and no additional weight. It’s even simple to store and carry thanks to the inclusive shoulder strap.

The space-saving feet can be interchanged while there is an inclusive short column for perfect ground-level shooting.

Check Product Price // Read More Reviews

CHECK PRICE  READ REVIEWS

7) Vanguard Aluminum Travel Tripod

Vanguard is one of the best brands in DSLR camera tripods, so when you invest in this model you can be sure you’re getting great value for money. With its exclusive and rapid column rotation, this model lets you set-up and down instantly.

All while its high-loading performance (with a maximum capacity of 17.6lbs) makes it suitable for use by most photographers.

The design of this tripod is for use on the go. Its compact folding means that you can easily take it wherever you need to go. It also comes complete with a multi-action ball head along with an oversized ergonomic locking knob for easier operation.

The arca-swiss quick release plate makes fitting your camera a breeze while the inbuilt bubble level lets you see at a glance whether your camera lens is at the right angle.

The legs are made from a strong and robust aluminum alloy. There are three different angle options available for the legs. You can also convert the feet from rubber grips to spikes to suit the terrain you’re working on. For fans of low angle photography, an adaptor is included to make shooting simple.

One final benefit is the carrying bag which comes free of charge.

Check Product Price // Read More Reviews

CHECK PRICE  READ REVIEWS

8) Dolica Proline GX Series Aluminum Tripod

Whether you’re shooting indoors or out, the Dolica Proline GX Series is the ideal DSLR camera tripods for most. Weighing just 3.5lbs, you won’t have any difficulty in taking it wherever you need to go from camping to a family gathering.

Holding a maximum load of 15lbs, you can use most of the best camcorders and cameras. Its legs are round, with 4-sided tubes for extra firmness.

The fix in place with snap locks so it can hold even more weight without losing stability. There are numeric degree markings on the ball-head. Meaning, you can use it easily for those horizontal panoramic shots, and even better, it comes complete with its own toolkit and carrying bag.

Clearly, it doesn’t get more convenient than that!

Made from plastic polymer composite and anodized aluminum alloy, these DSLR camera tripods are a bit small. However, it’s pretty mighty with reinforced stability for perfect shots. If you’re shooting in winter, you’ll feel the benefit of the BNR comfort foam grips.

Meanwhile, the quick release plate means that setting up is easier than you ever imagined.

Each leg can be adjusted independently of the others to a choice of 4 levels. In addition, there are both spiked and rubber feet supplied. This means you’ll never need to worry about slipping on a rough or wet terrain.

Check Product Price // Read More Reviews

CHECK PRICE  READ REVIEWS

9) Bonfoto Lightweight Aluminum Portable Tripod

If you’re searching for a professional quality camera tripod, this Bonfoto model is ideal for you. It offers a 360-degree horizontal swivel as well as a 90-degree vertical platform. These DSLR camera tripods have a three-way head that enables you to take shots at the angle of your choice. Even with faster than ever transition.

Holding a maximum load of 17lbs, this tripod has a maximum height of 55” when fully extended. This is tall enough for most photographers. It has double telescoping center columns for extra compactness during folding.

It even comes with its own center column hook so you can add weight if extra stabilization is required.

The handy carrying bag that comes supplied lets you take your photography equipment everywhere. With a light aluminum construction of just 2.6lbs, it’s the perfect tripod for shooting outdoors. It folds up to a tiny 14.5” and its rapid release mounting plate makes it easier than ever to detach and attach your camera in a matter of moments.

Check Product Price // Read More Reviews

CHECK PRICE  READ REVIEWS

10) ZoMei Lightweight Heavy Duty Tripod

Heavy-duty and yet surprisingly compact, this ZoMei tripod has inverted legs that can be folded backward by 180 degrees, all for a folded size of just 18”. This multi-functional model is a 2-in-1 gadget, converting easily into a full-sized monopod by simply screwing the tripod leg and center column together.

Thanks to the center column hook, you can hang extra weights for stabilization. Meanwhile, the separate head and pan lock make sure that you can make the perfect adjustments. Setting up these DSLR camera tripods are a breeze as all you need to do is screw your camera to the quick release plate.

All with only a single press of the button, your camera can be removed from the tripod.

There are three different positions for the legs for better flexibility, allowing you to shoot equally well on rough ground or in cramped spaces. The rotating leg locks let you easily control the height of the tripod from between 18 and 65″. This is perfect for even the tallest users.

It won’t weigh you down to carry this tripod anywhere you need to go. ZoeMei offers DSLR camera tripods here that offer lightweight construction. This comes from aluminum and magnesium alloy tubing. this also protects it from corrosion for extra durability for use outdoors.

It even comes with a carrying bag and an inbuilt bubble level for extra value for money.

Check Product Price // Read More Reviews

CHECK PRICE  READ REVIEWS

11) Cayer Tripod System

These professional DSLR camera tripods can be used for both interchangeable lens and  HDSLR cameras. The perfect choice for home video enthusiasts, this tripod has a two-way fluid head for optimal panning and tilting to suit the needs of every shot.

There are two quick release plates as well as locking rubber buckles for extra security of your expensive camera equipment. Meanwhile, the mid-level spreader gives even greater stability so you’ll never need to worry about your camera falling in mid-shot.

It offers a secure 8-year warranty. This means you’ll be well protected with this model, which can support a payload as high as 88lbs. Making it ideal for all your filming needs.

Check Product Price // Read More Reviews

CHECK PRICE  READ REVIEWS

12) Manfrotto Compact Advanced Tripod

The Manfrotto brand is well known as one of the top performers in the tripod market. This compact model is ideal for taking your camera equipment everywhere you need to go. Being among the top, it’s not a shock they bring us more DSLR camera tripods of great quality and value.

With its quick release system, it couldn’t be easier or faster to set up and put down your equipment. Meanwhile, the foldable three-way panning and tilting head give you great versatility over the shots that you take.

This tripod can support a maximum weight of 6.6lbs. This makes it better for smaller and lighter cameras – perfect for use while traveling. It even comes with a padded bag to allow for more comfortable and secure transportation.

Optimized for DSLR and CSC cameras, this flexible tripod is lightweight. However, with a leg structure which you can depend on to give you detailed and sharp images each and every time.

Check Product Price // Read More Reviews

CHECK PRICE  READ REVIEWS

13) Manfrotto BeFree Compact Aluminum Travel Tripod

If you’re traveling with your camera equipment, these Manfrotto travel DSLR camera tripods are the one for you. Boasting a compact and light design, this model has a special design to ensure your camera is fixed firmly into position throughout use.

It also has a quick release plate for easier set-ups.

Capable of supporting a maximum weight of 8.8lbs, this is the ideal camera tripod for use with your lightweight DLSR camera. This is especially true when hiking or camping. It’s so small and lightweight that it can easily fit into your backpack or your carry-on luggage at the airport.

You’ll never be at risk of accidentally leaving your tripod on an aircraft!

Check Product Price // Read More Reviews

CHECK PRICE  READ REVIEWS

14) Mactrem Travel Camera Tripod

If you’re looking for quality and compactness built into one handy, lightweight package, the Mactrem Travel Tripod is the ideal solution. Measuring only 20” when collapsed, it can extend up to a maximum of 55”. It’s tall enough for most users. It only weighs 2.6lbs but is capable of holding as much as 11lbs of weight.

That is incredibly impressive for a compact model.

Simple to store, these DSLR camera tripods are compact and come with a carry case so you can take it anywhere you need to go. It also has a three-way pan head and a 360-degree swiveling function. The quick release plate lets you detach and attach your camera in a matter of moments.

This helps for speedier transitions from shot to shot.

Featuring four-section lever-locked legs, this tripod can easily be used on uneven ground. The rubber feet ensure extra stability on any kind of surface. Its aluminum build is strong and robust enough to survive in the long-term, Meaning you can be confident of great value for money.

Check Product Price // Read More Reviews

CHECK PRICE  READ REVIEWS

Get The Picture?

Whether you’re a professional or just an amateur enthusiast, a high-quality camera tripod is exactly what you need to make the most of your photography experience. Keeping your camera at the perfect angle, you’ll be able to hone your shots and capture images that are better than you ever imagined.

Use our buying guide to help you navigate DSLR camera tripods and decide on the perfect features for you. Do you need the multi-functionality of a 2-in-1 tripod/monopod? Or do you want the convenience of a lightweight folding model? Perhaps you’re on a budget and need to get maximum value for money.

Maybe you’re searching for the best that money can buy.

You might be searching for a mini-camera tripod to take on vacation or something more heavy-duty for use while filming. Whichever is the case for you, you’re sure to find something in our list of the top-performing 14 tripods on the market that ticks all the boxes.

We’ve covered tripods that come with their own handy carrying cases to industrial-strength tripods that can support all your heaviest camera equipment. Our selection of quality tripods is sure to impress. We’re sure that our camera tripod reviews will give you all the information you need to make a snappy decision.

Invest in one of these fantastic models and you’ll be channeling your inner David Bailey in no time!