
Welcome to Product Support, a column devoted to helping you get the most out of the gadgets and software you already use.
Spotify is the biggest music streaming service in the world. If you’re like me, you’re one of those Premium subscribers and have been for years. Yet, Spotify is constantly updating, adding new features and changing its interface, so there’s a lot you probably don’t know — being a paying subscriber is more just than ad-free listening and offline downloads, after-all. We’ve rounded up the best tricks of the trade to help you get the most out of your Spotify subscription.
Manage your downloads like a pro.
One of the big perks of being a Spotify Premium subscriber is being able to download tracks, albums and podcasts directly to your device so you can listen to them offline, which is ideal for people who are on a capped cellular plan or know they’re going to a place with no service. The problem is that keeping taps on your downloads — especially if you download things across different categories, like albums, playlists and tracks — is the opposite of intuitive.
Even though Spotify doesn’t make it easy, you can still delete all your downloaded music. Open the app, go to “Your Libary” and select the big “Music” tab at the top of your screen. Then select either Playlists or Albums, whichever you want to manage, and then you’ll have to swipe up so that a search bar appears. Select the Filters button, then select Downloads from the drop-down menu. From here, you can see all your downloaded playlists and albums, and then remove them one by one.
Make a group playlist with your friends.
Spotify has a feature called “Collaborative Playlists” that lets you and a bunch of your friends share playlists with one another, with each individual able to add or delete songs, as well as reorder songs on the Collaborative Playlist. All you have to do is open one of your playlists, click the ellipses adjacent to the playlist, and select “Make collaborative.” Then tap the ellipses again and hit share.
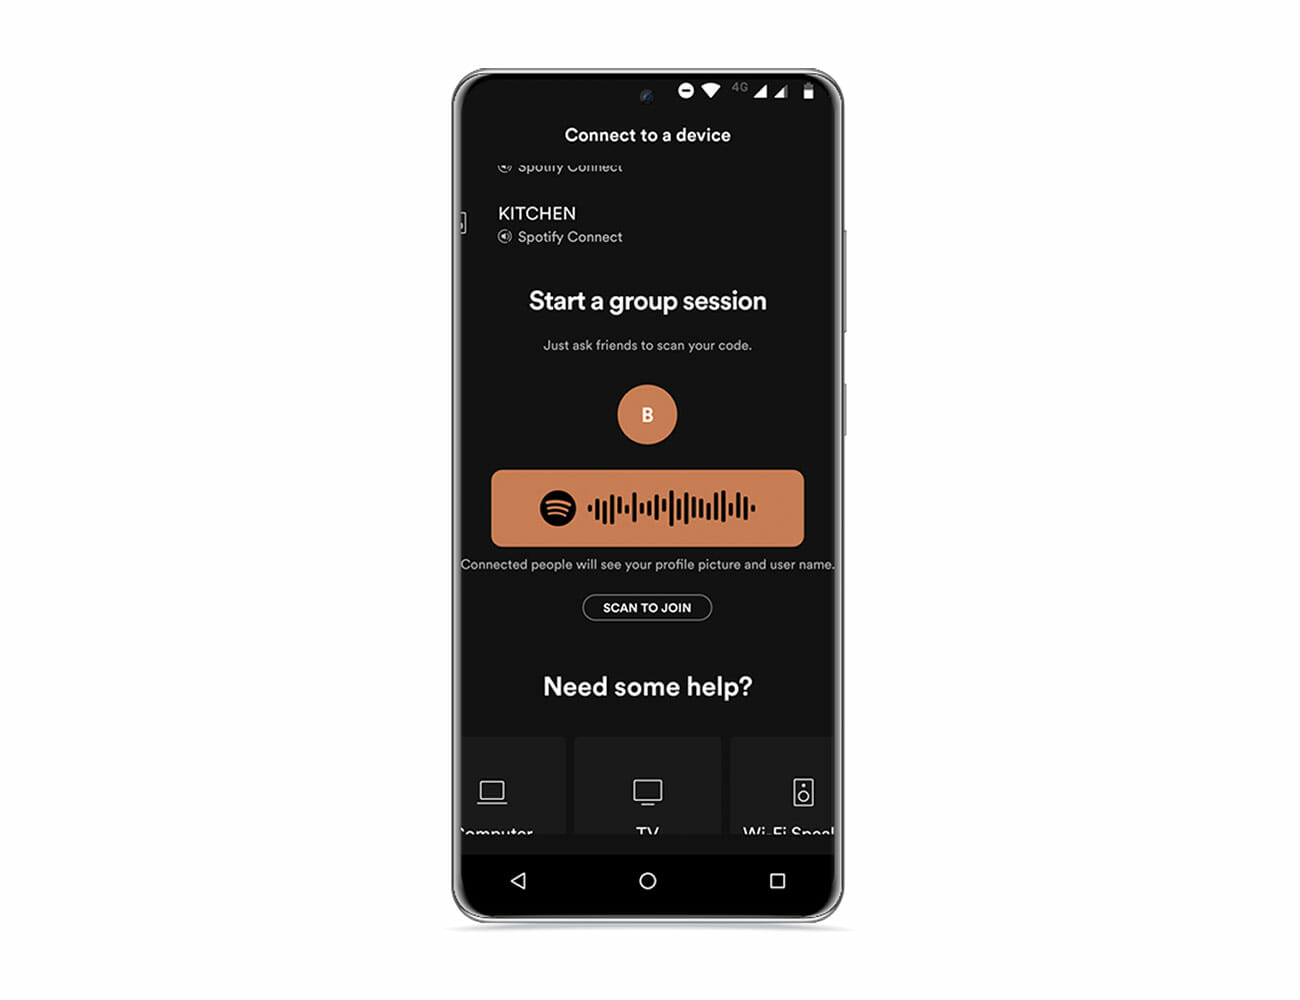
[embedded content]Try a group listening session.
One of Spotify’s newest features is called Group Session. Instead of contributing to a playlist, like with Collaborative Playlists, a Group Session is more of a temporary listening session where anybody can take control of the music from their own smartphone. This can only be done with people who are in the same location since it involves scanning a QR code to sync up, and the music will only play from one source. If you want to create your own Group Session, simply play a song on Spotify, select the “Devices Available” logo and select “Start a group session”; you can also select “Scan to Join” if you want to join somebody else’s Group Session.

If you’re looking for a way to listen to music with a bunch of people at the same time, but you’re all in different locations (because maybe you’re quarantining), check out JQBX. It’s a web player and mobile app that lets you create a listening session where you can take turns selecting tracks while listening in unison. The catch is that everybody in the listening session has to be a Spotify Premium subscriber.
Reorder tracks (or delete them) from your favorite album.
If you’re a Spotify Premium subscriber, you can actually reorder the tracks on any music album, or simply delete them if you don’t ever want to listen to them again. For example, if you want “Snowchild” (track 5) and “Heartless” (track 7) to be track one and two on The Weeknd’s album After Hours</em, you can do that. Simply play an album, select the queue button in the bottom-right corner and from here you can actually delete tracks or reorder them.
Make sure you’re listening to the best quality audio.
Spotify streams 96 kbp/s audio tracks by default. Premium subscribers can upgrade to 320 kbp/s, which is a very high-quality stream (even if it’s still not CD quality). To adjust the audio quality, simply go to Settings > Music Quality > Very high.
[embedded content]Set it up to sing along
One of the most requested features for Spotify has been real-time lyrics, which shows you the lyrics of the song that you’re listening to so that you can sing along in real-time. Spotify started rolling out the feature in early 2020 — but it’s not available for everybody just yet. In the meantime, the best way to achieve real-time lyrics is to download Musixmatch, register and connect your Spotify account. The interesting thing is that Spotify is partnering with Musixmatch, so in the near future you won’t need to open a separate app to have the lyrics overlayed in real-time. (Also, Musixmatch can’t show the lyrics to every song.)
Remove songs from your history
Long-time Spotify listeners will know that the streaming service keeps track of what songs, albums and artists you listen to, which is why you seem “similar” artists and albums suggested to you, even though you’ve never listened to them. It’s the same kind of thing that Netflix, YouTube and Amazon Prime Video all do. But maybe you’ve outgrown some things, or just want to start fresh. Unfortunately, Spotify still doesn’t let you delete your past listening history — even though it’s highly requested feature — but there is a little workaround. If you launch the Spotify app on your desktop, you can actually remove songs from your “Recently Played” section. Just right click on the song, artist, radio or podcast and select “Remove from Recently Play.”
Connect Shazam to your Spotify account.
There’s a good chance you haven’t used Shazam in years. The app first became immensely popular over a decade ago, circa 2008, as it was able to quickly listen to any song that was playing and identify it. Fast forward to 2020 and it’s easy to integrate Shazam into any of the most popular music streaming services, including Spotify. Once downloaded and registered (it’s free), you can link Shazam to your Spotify account and from then on, every time you Shazam a song you can directly add it to a Spotify playlist.
Keep your listening sessions private.
Anybody new to Spotify will know that all your friends can see what your listening to because the app’s Friend Activity is turned on by default. Well, it’s easy to turn off; just go to Settings, then Social and make sure to switch-on “Private Session.” When no, nobody can see what music you’re listening to.
Use Spotify like Pandora.
When Pandora first came out, one of the things that made it different as a streaming service is that it created playlists for you depending on the song or artist you were listening to. Well, Spotify can do the same thing. Just search for a song that you like, click the ellipses next to the song and select “Go to radio” from the drop-down menu. This effectively makes a radio station featuring other artists based around that one song.
Take advantage of Crossfade for parties.
If you’re hosting a party and preparing a Spotify playlist, one of the easiest-yet-most-important things to do is to turn on Crossfade. It’s a feature that lets you skip that dull silence at the beginning and end of each track, that way the songs just blend right into each other and the music seems like it never stops. To turn Crossfade on, all you have to do is select Settings > Playback > and adjust the Crossfade slider to the desired length. The higher the number, the more the songs will blend into each other.